Cookies help us deliver our services. By using our services, you agree to our use of cookies.
You have no items in your shopping cart.

Export Log Plugin Documentation
How to Install and Enable the Plugin
1. Download the Export Log plugin from our store (Download Plugin).
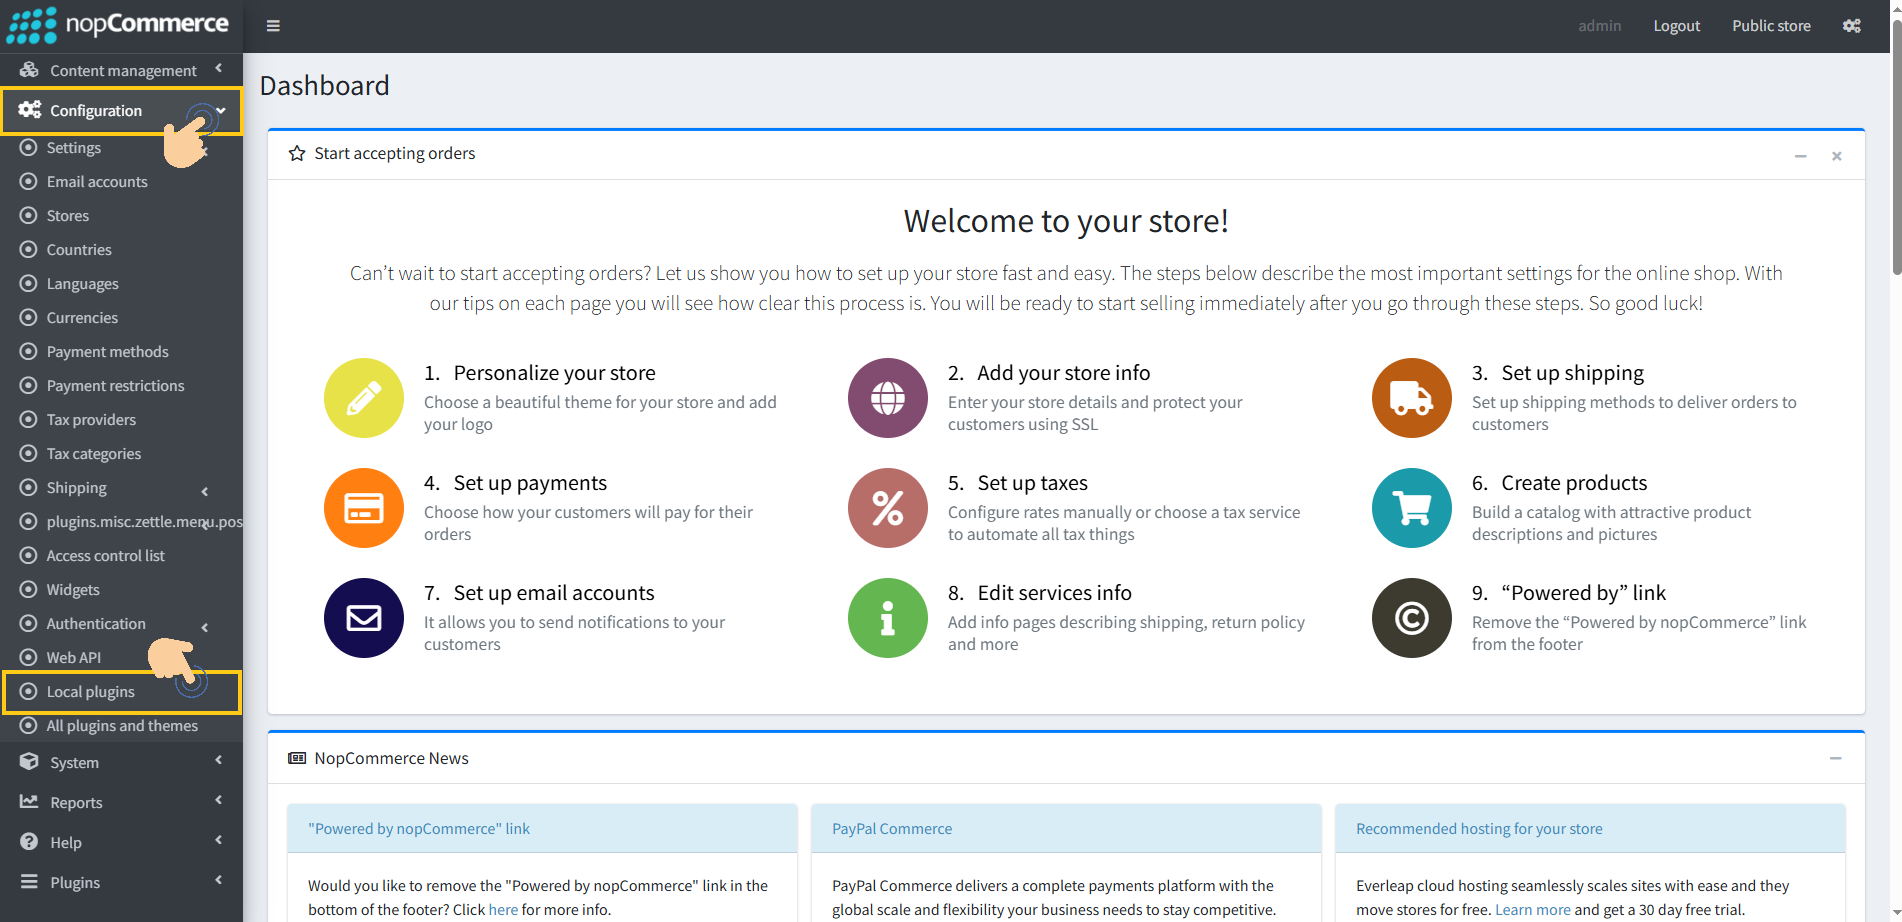
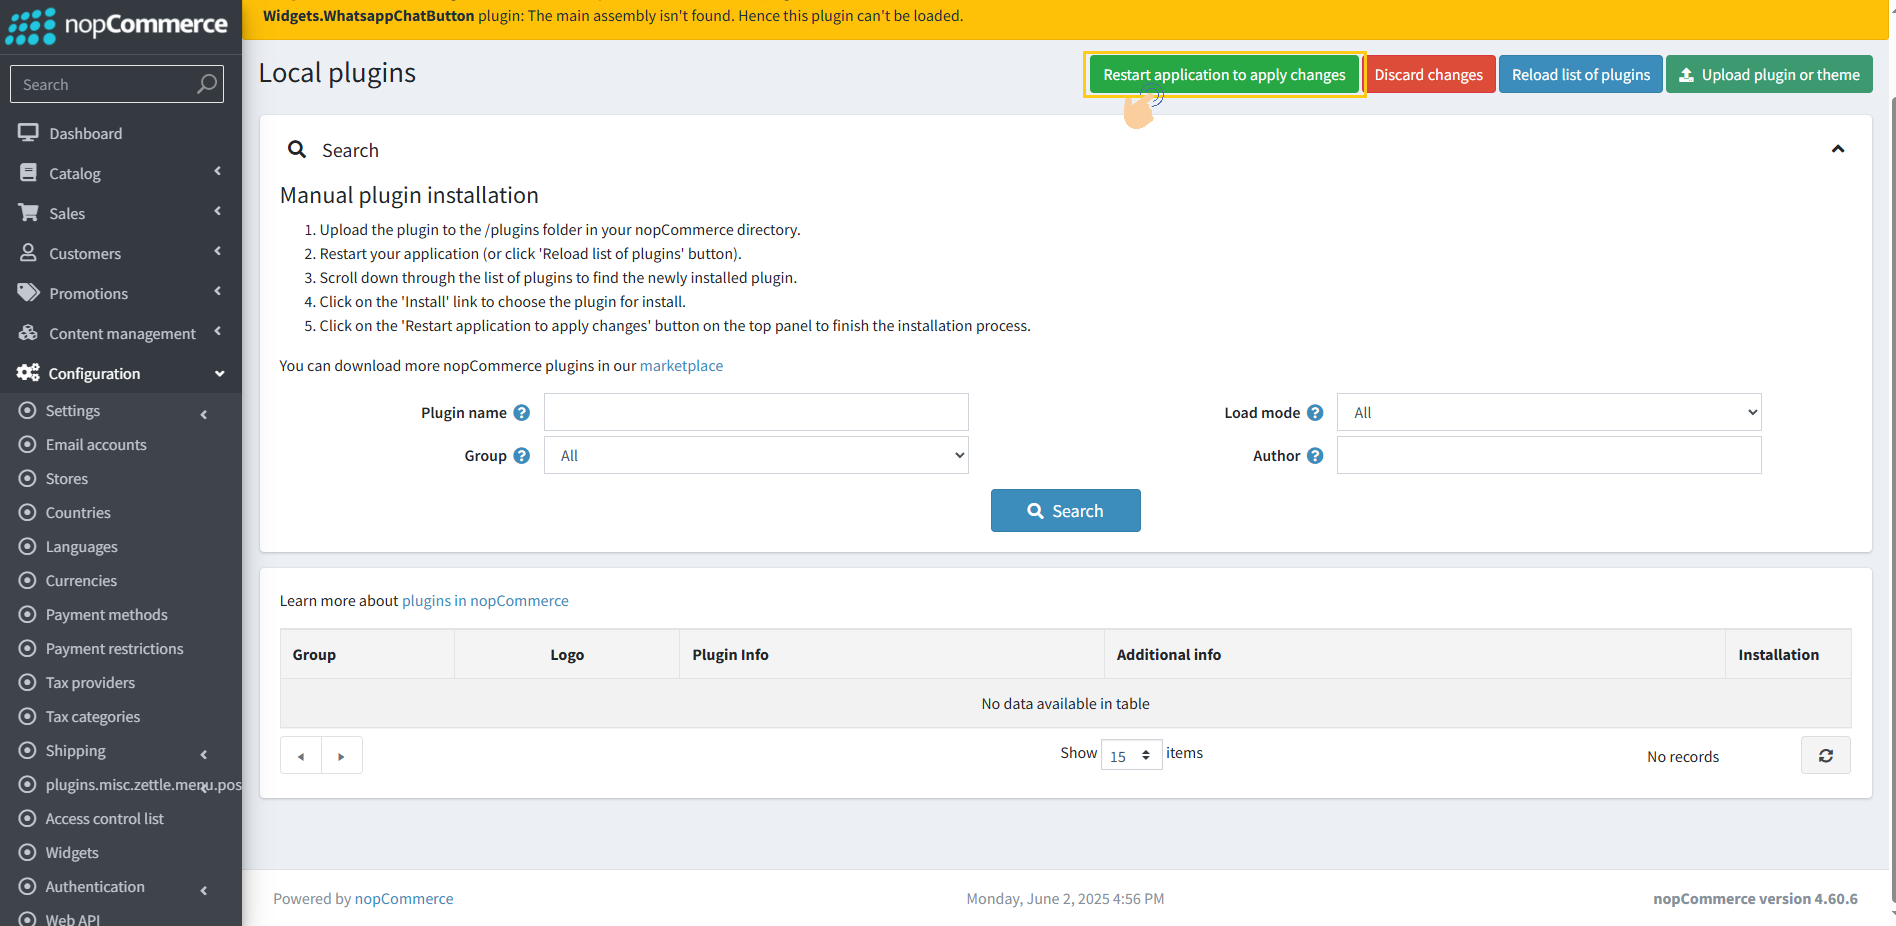
2. Go to Configuration → Local plugins from the Admin dashboard.
3. Click on the "Upload plugin or theme" button.

4. Popup will appear asking to navigate to the file that contains the plugins ZIP file.
5. Click on the "Choose File".
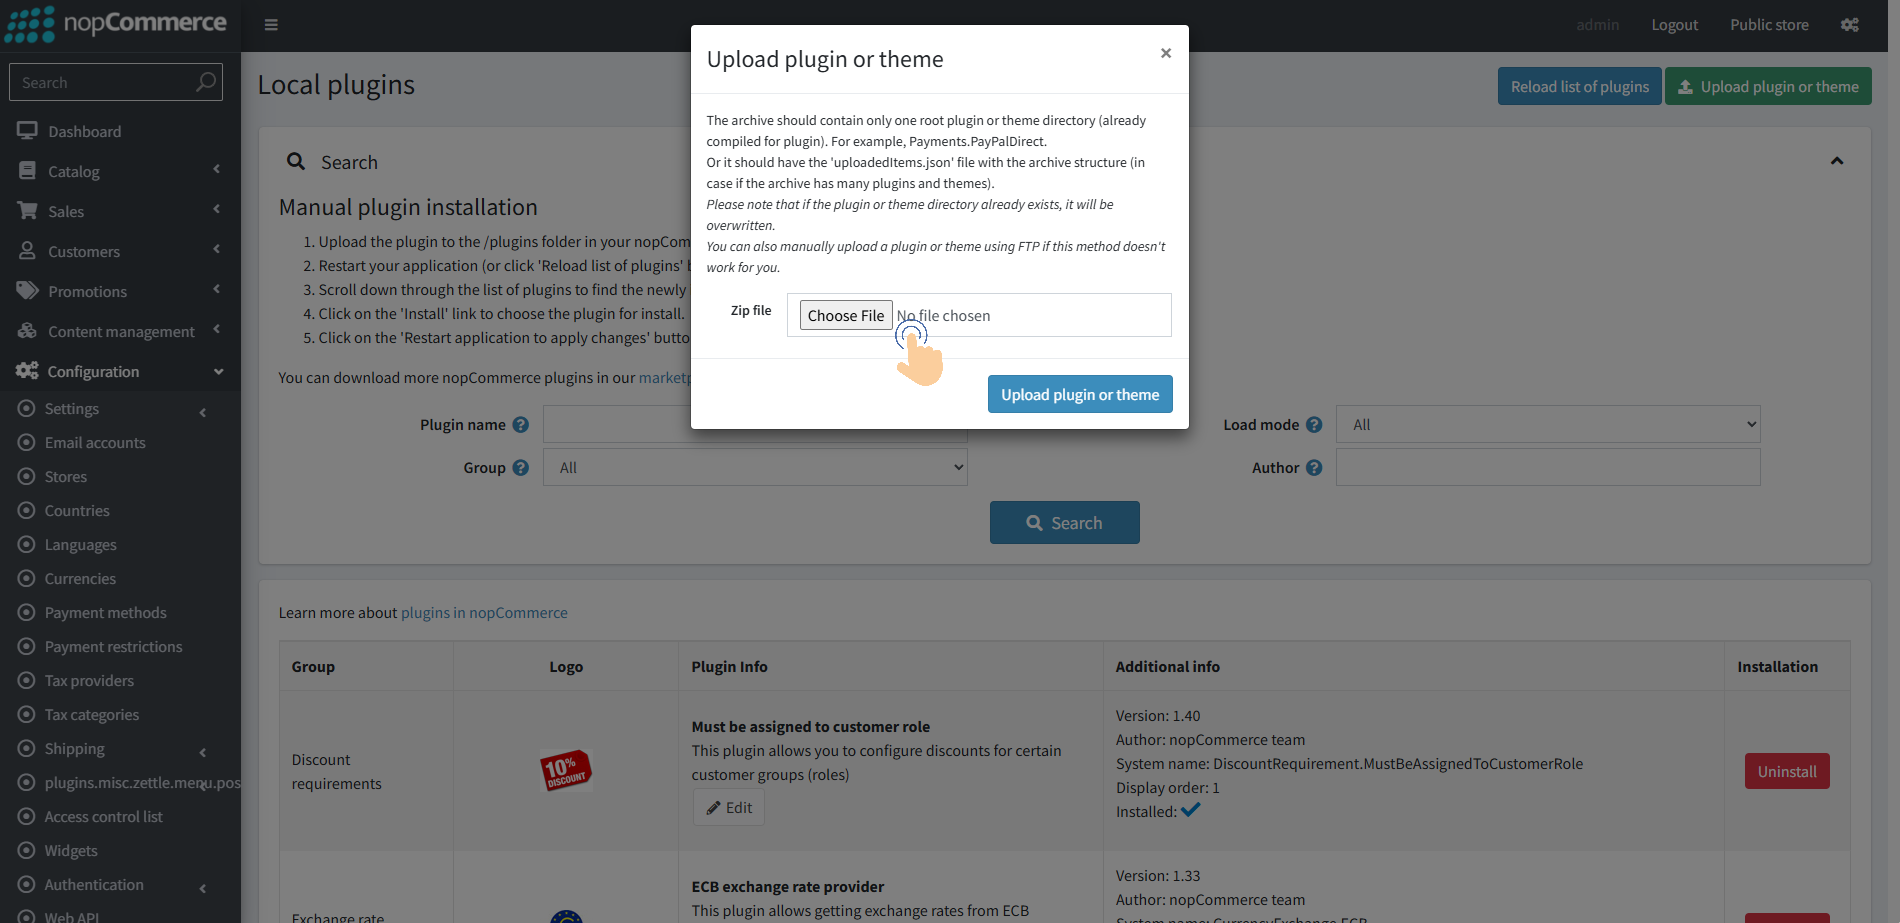
6. Select the .zip file named "Export Log" and then upload it using the "Upload plugin or theme" button.

7. After uploading the plugin, a success notification will appear at the top of the page with a message.
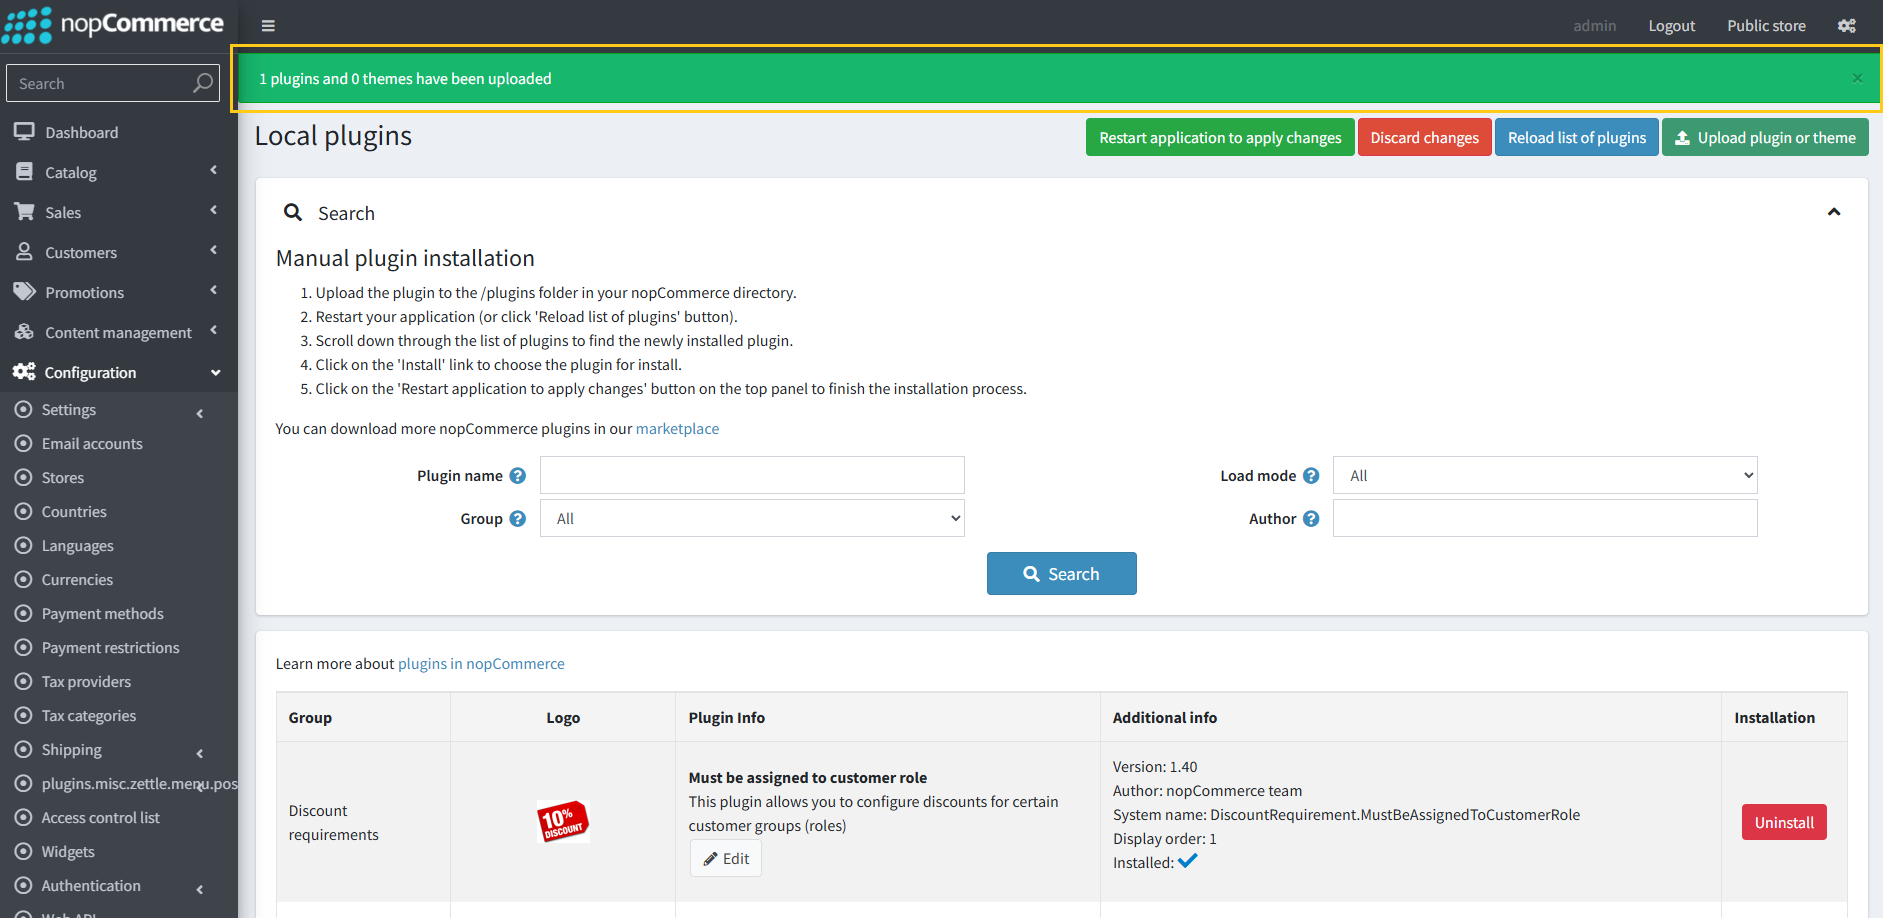
8. Once you see the notification, click on the "Restart application to apply changes" button.
9. To get this plugin, Search by the group name as Widgets in Configuration → Local Plugin.
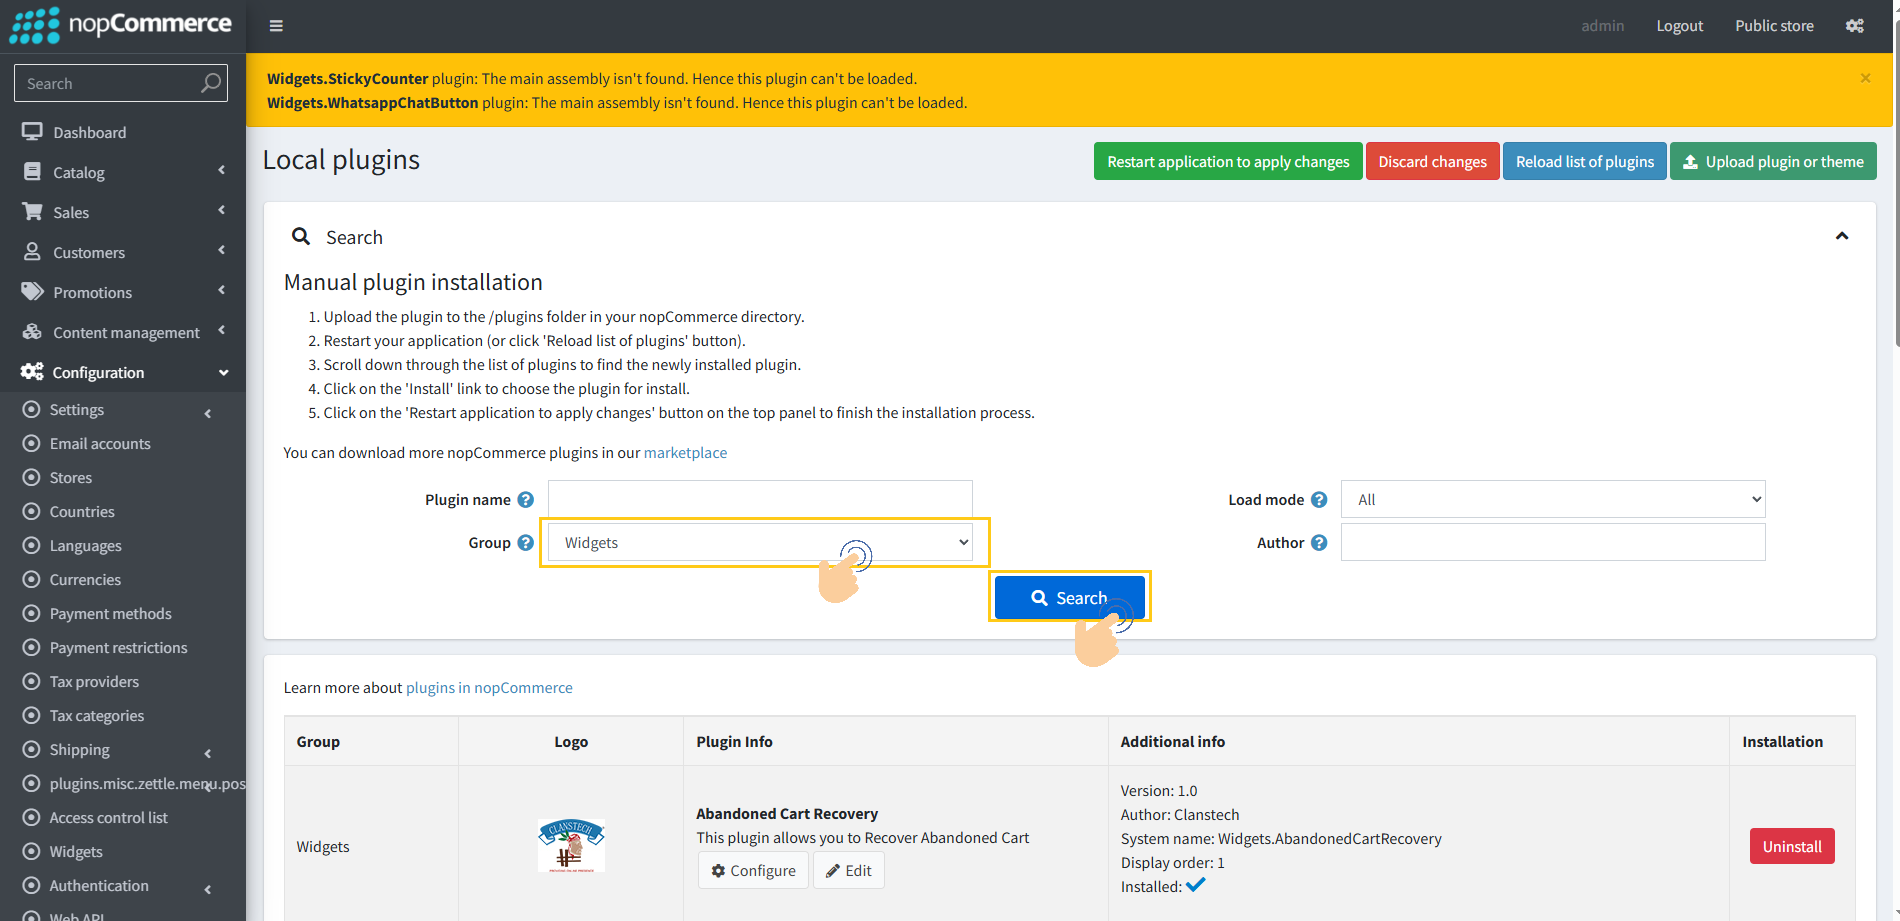
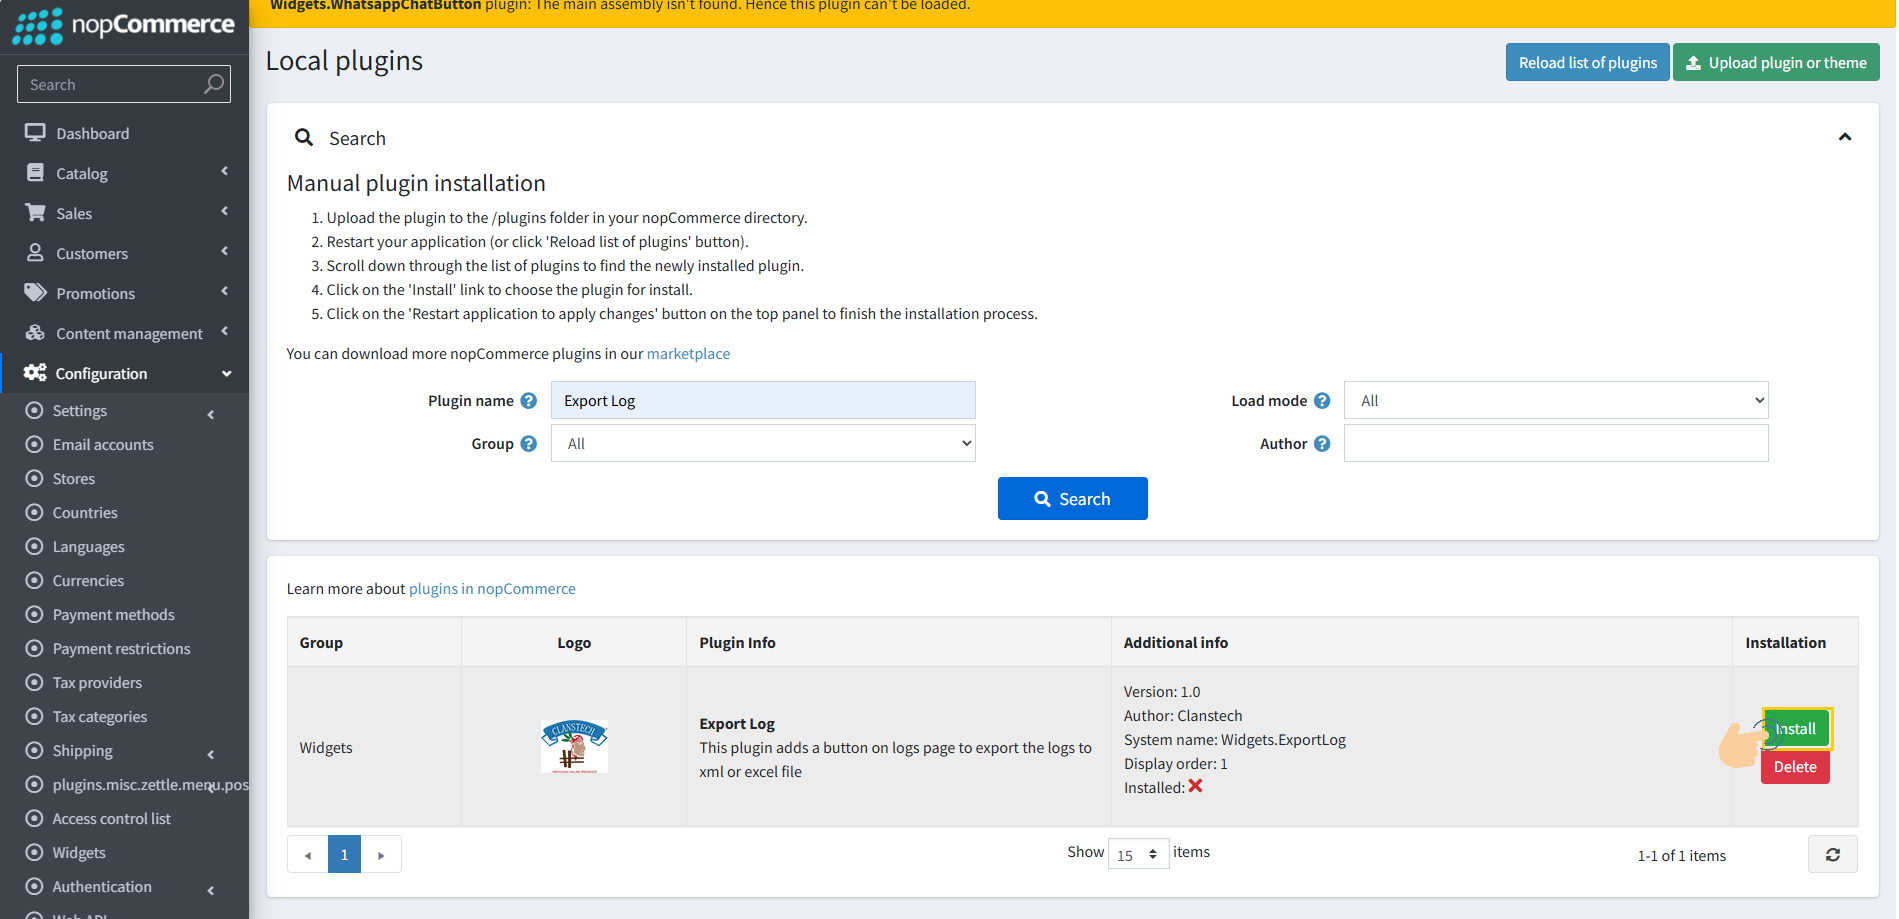
10. Look for the Export Log plugin in the list.
11. Click the "Install" button next to the "Export Log" plugin.
12. Click the "Restart application to apply changes" button in top menu.
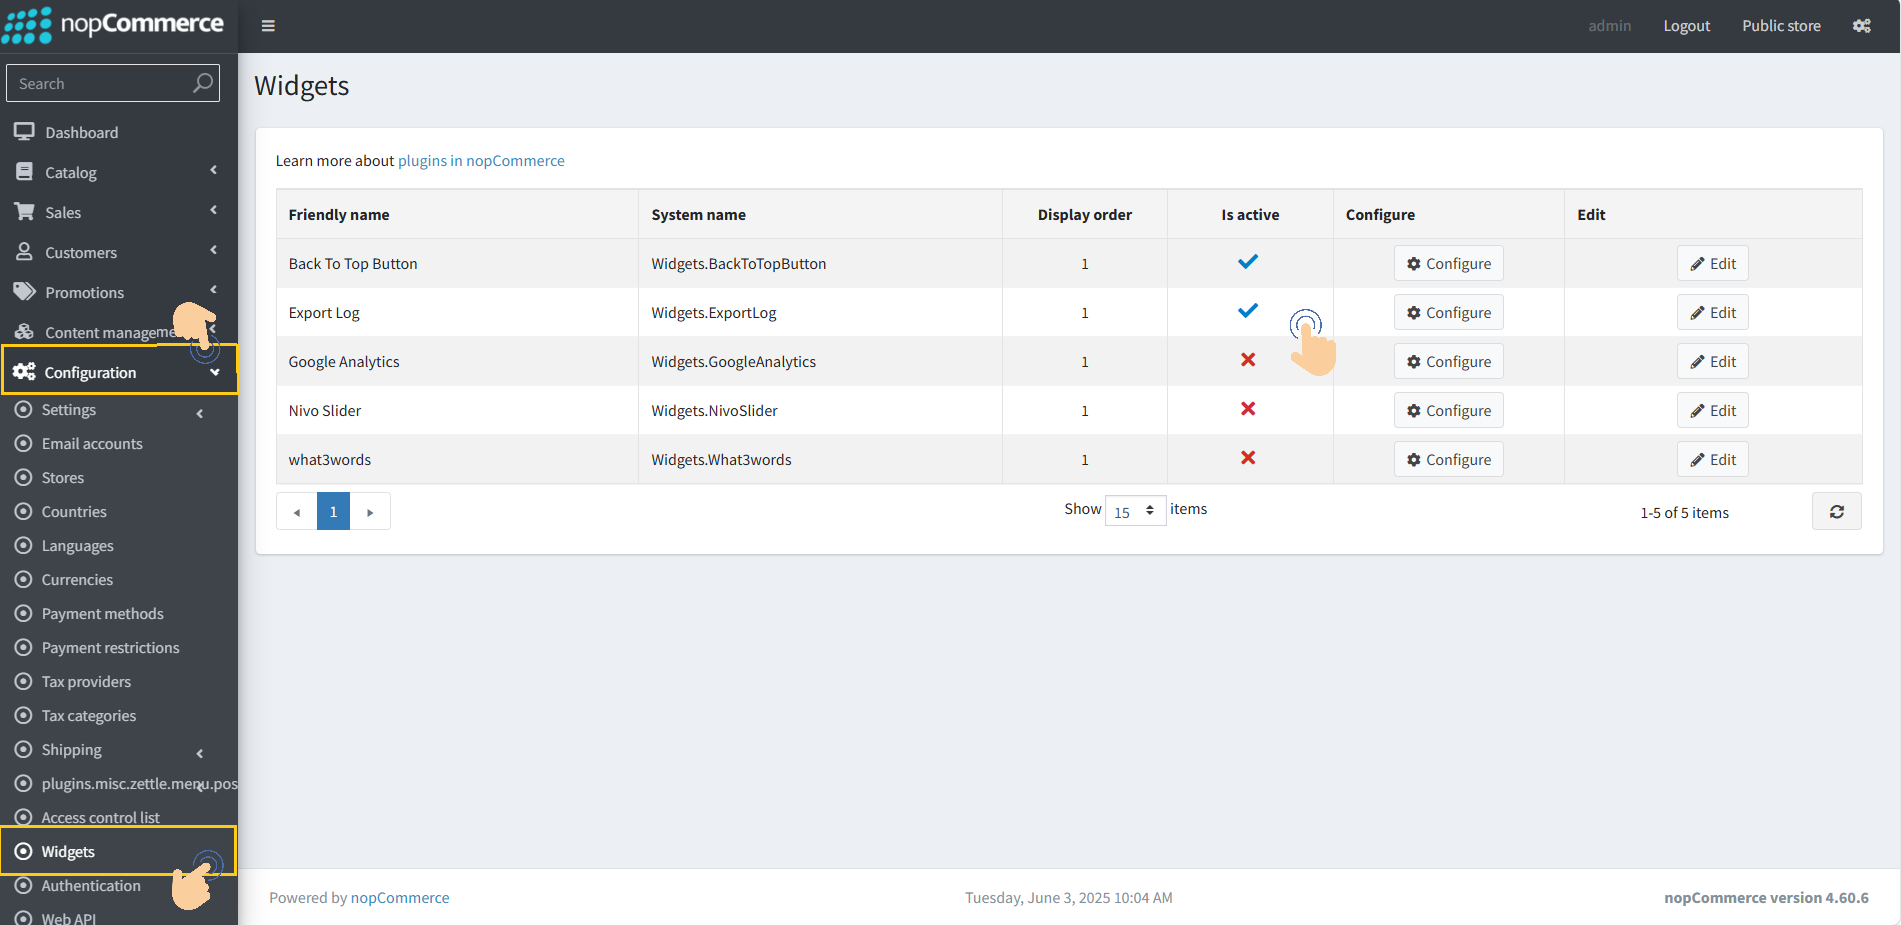
13. Button will not show up even after install if the widget is not enabled from widgets list.
How To Process:
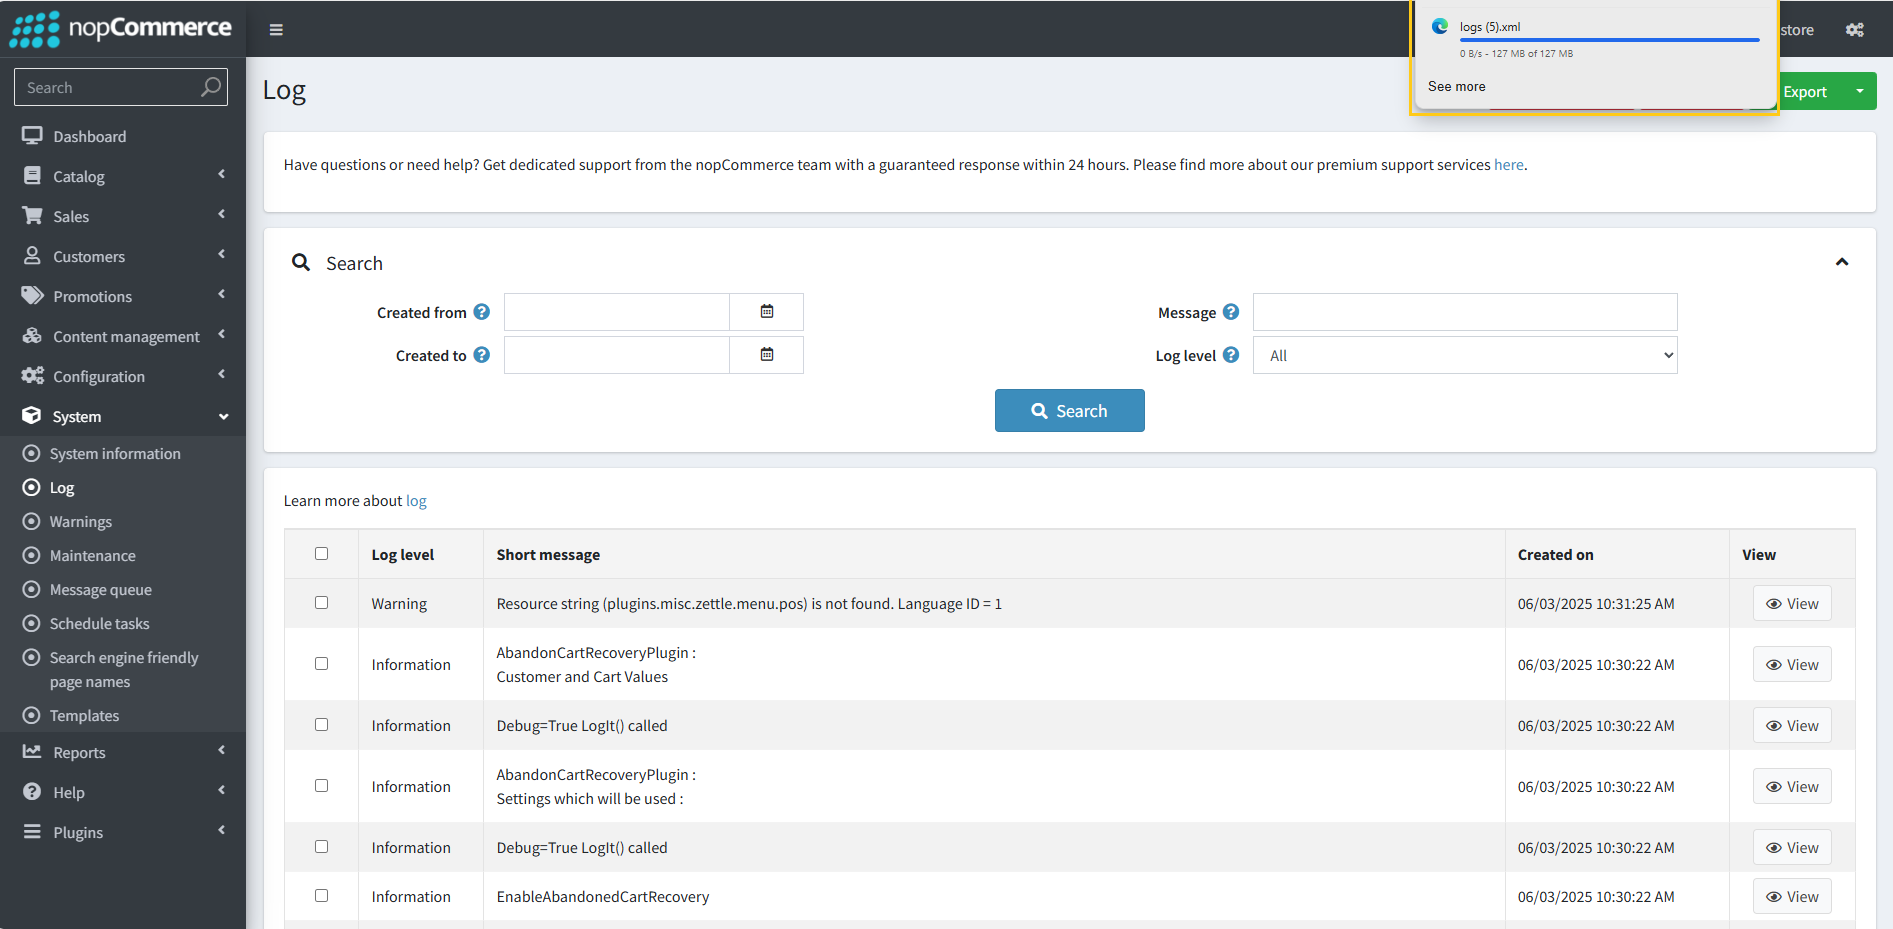
1. Go to System → Log.
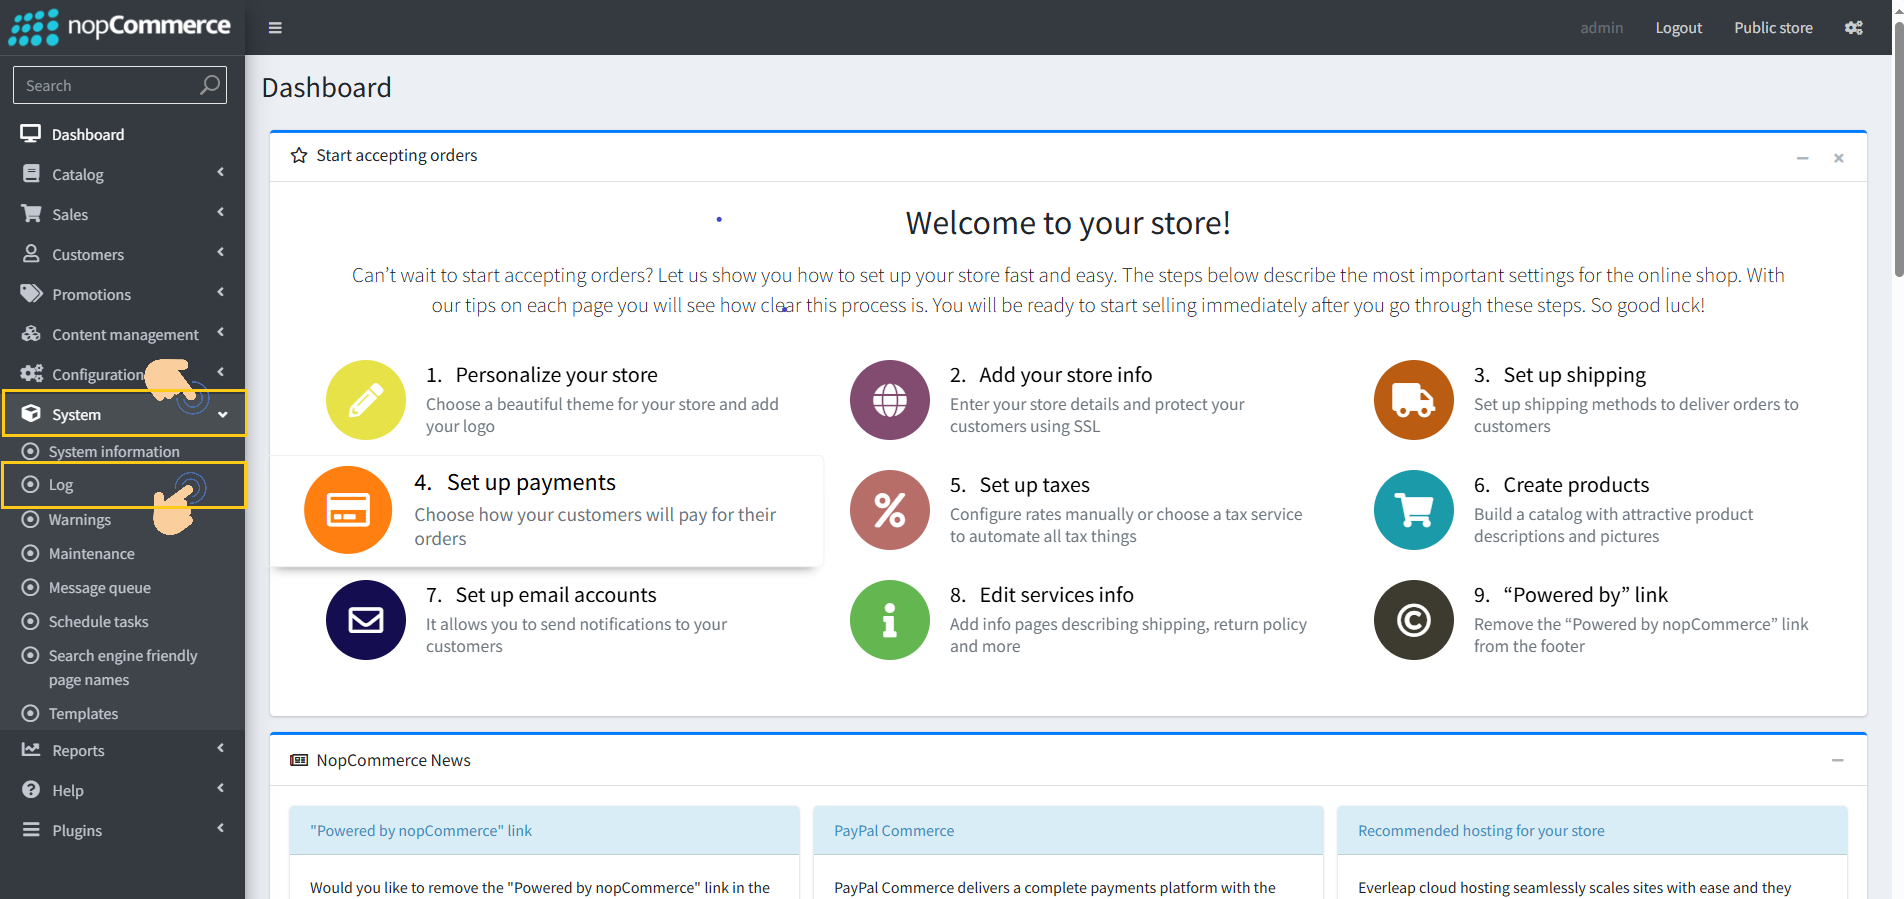
2. You will see a table, all logs with options to search, filter or sort.
3. Use the search boxes to filter logs by log level, message, date range.
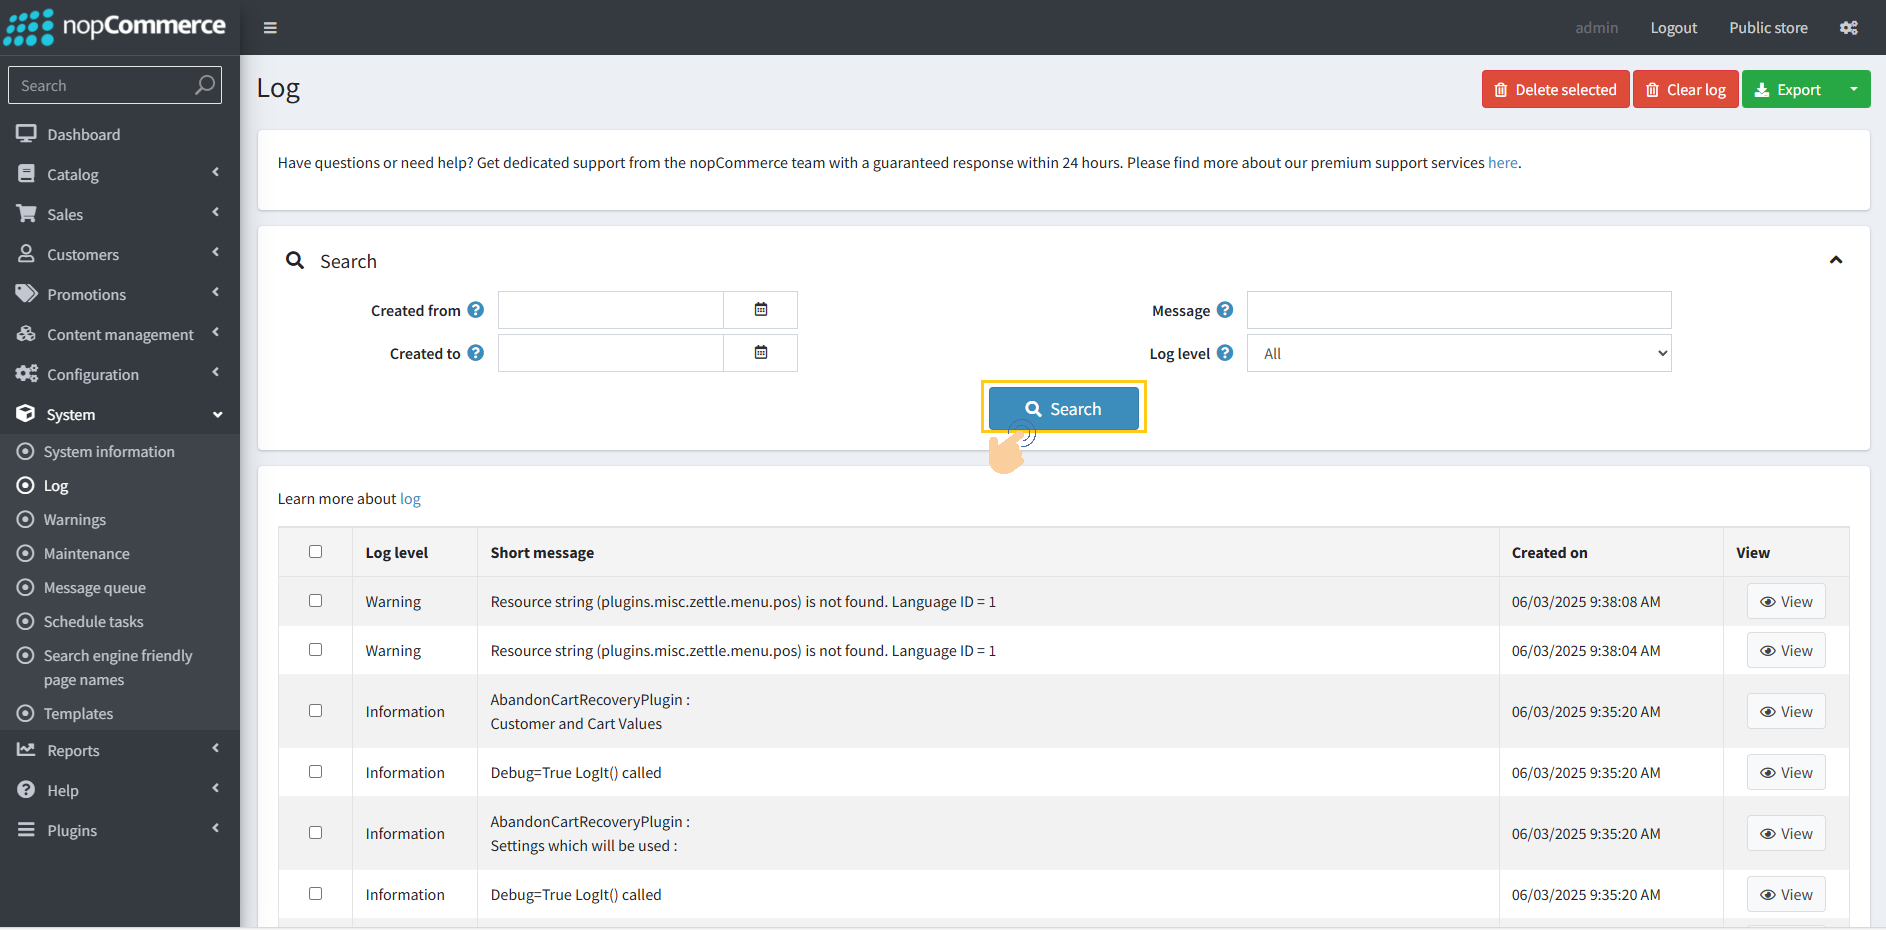
4. If you want to export specific entries, use the checkboxes beside each row to select them.
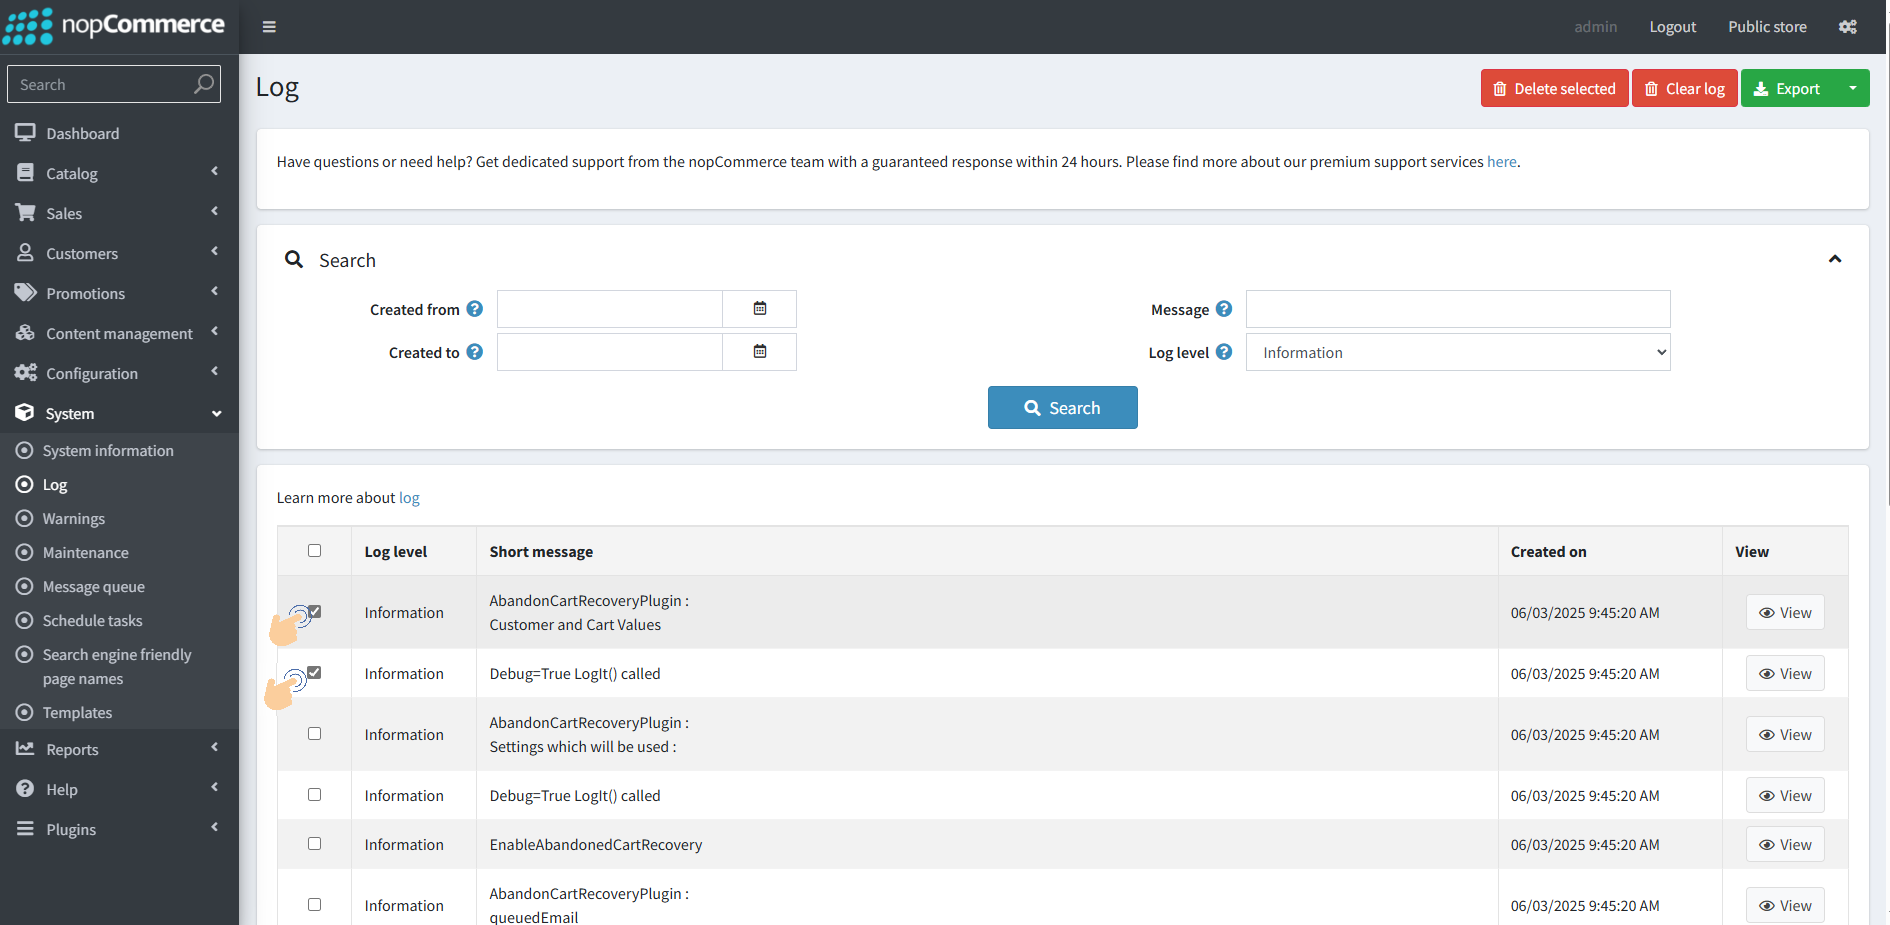
5. On the top-right of the log table, click the Export button.
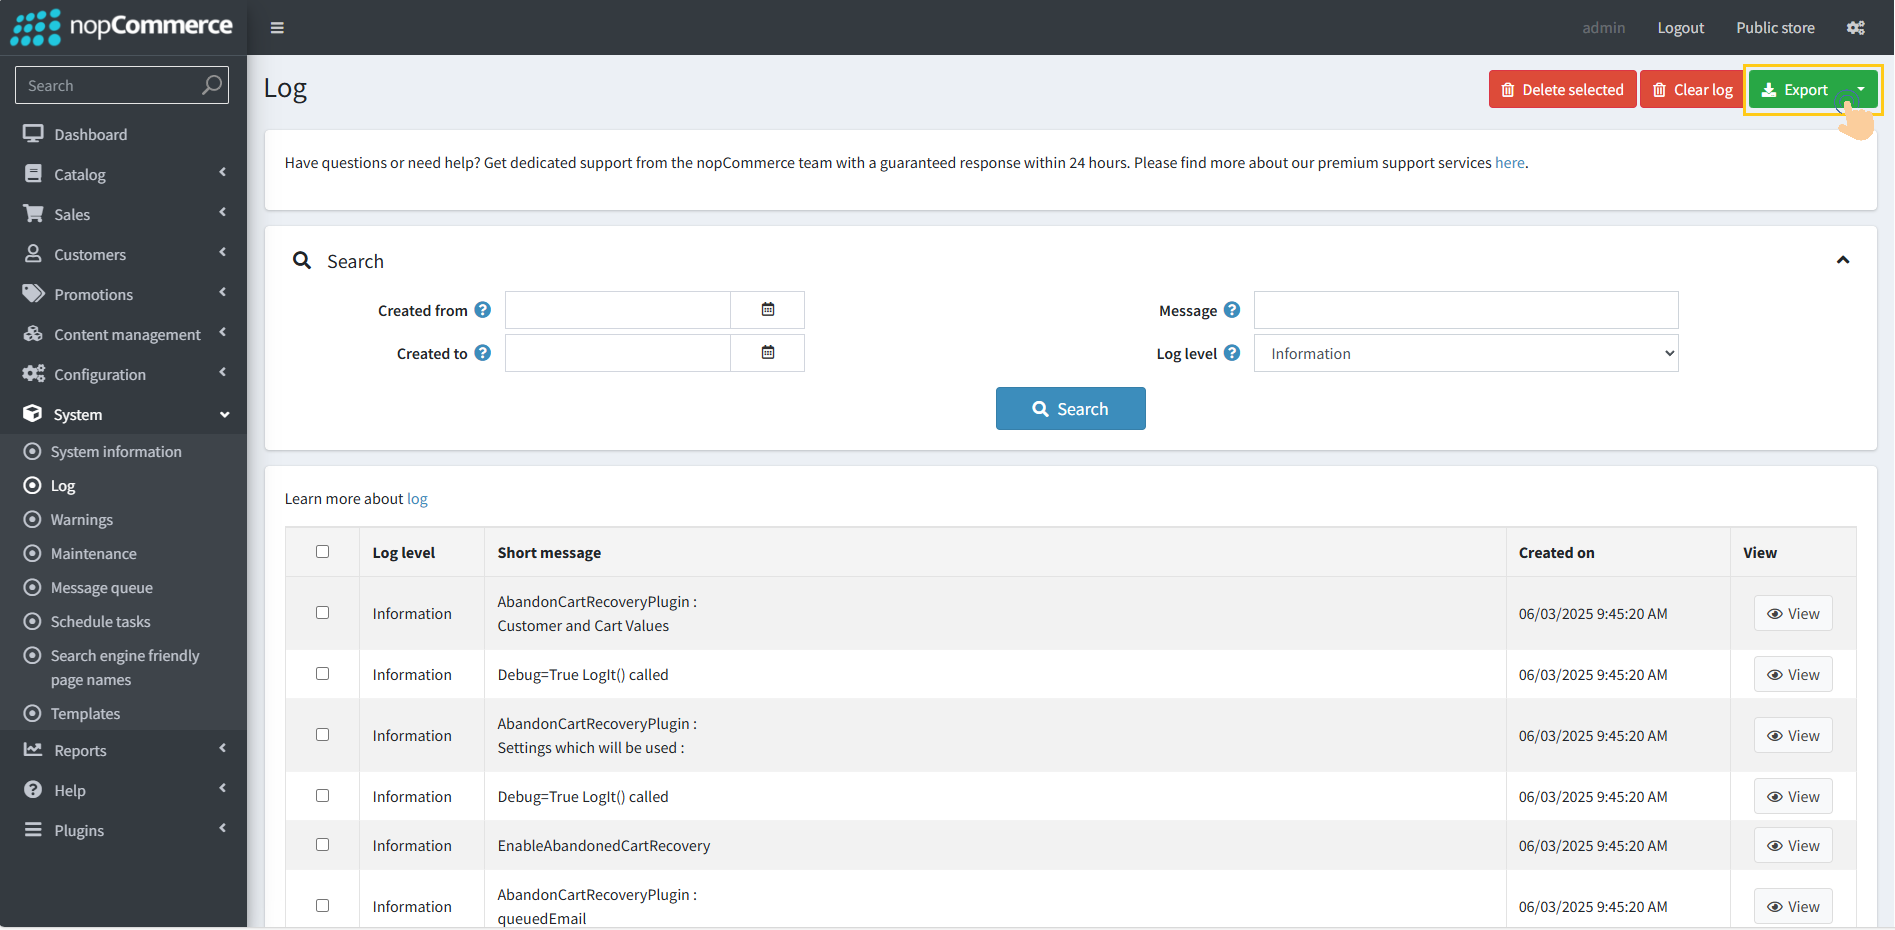
6. After clicking, a dropdown appears with four options.
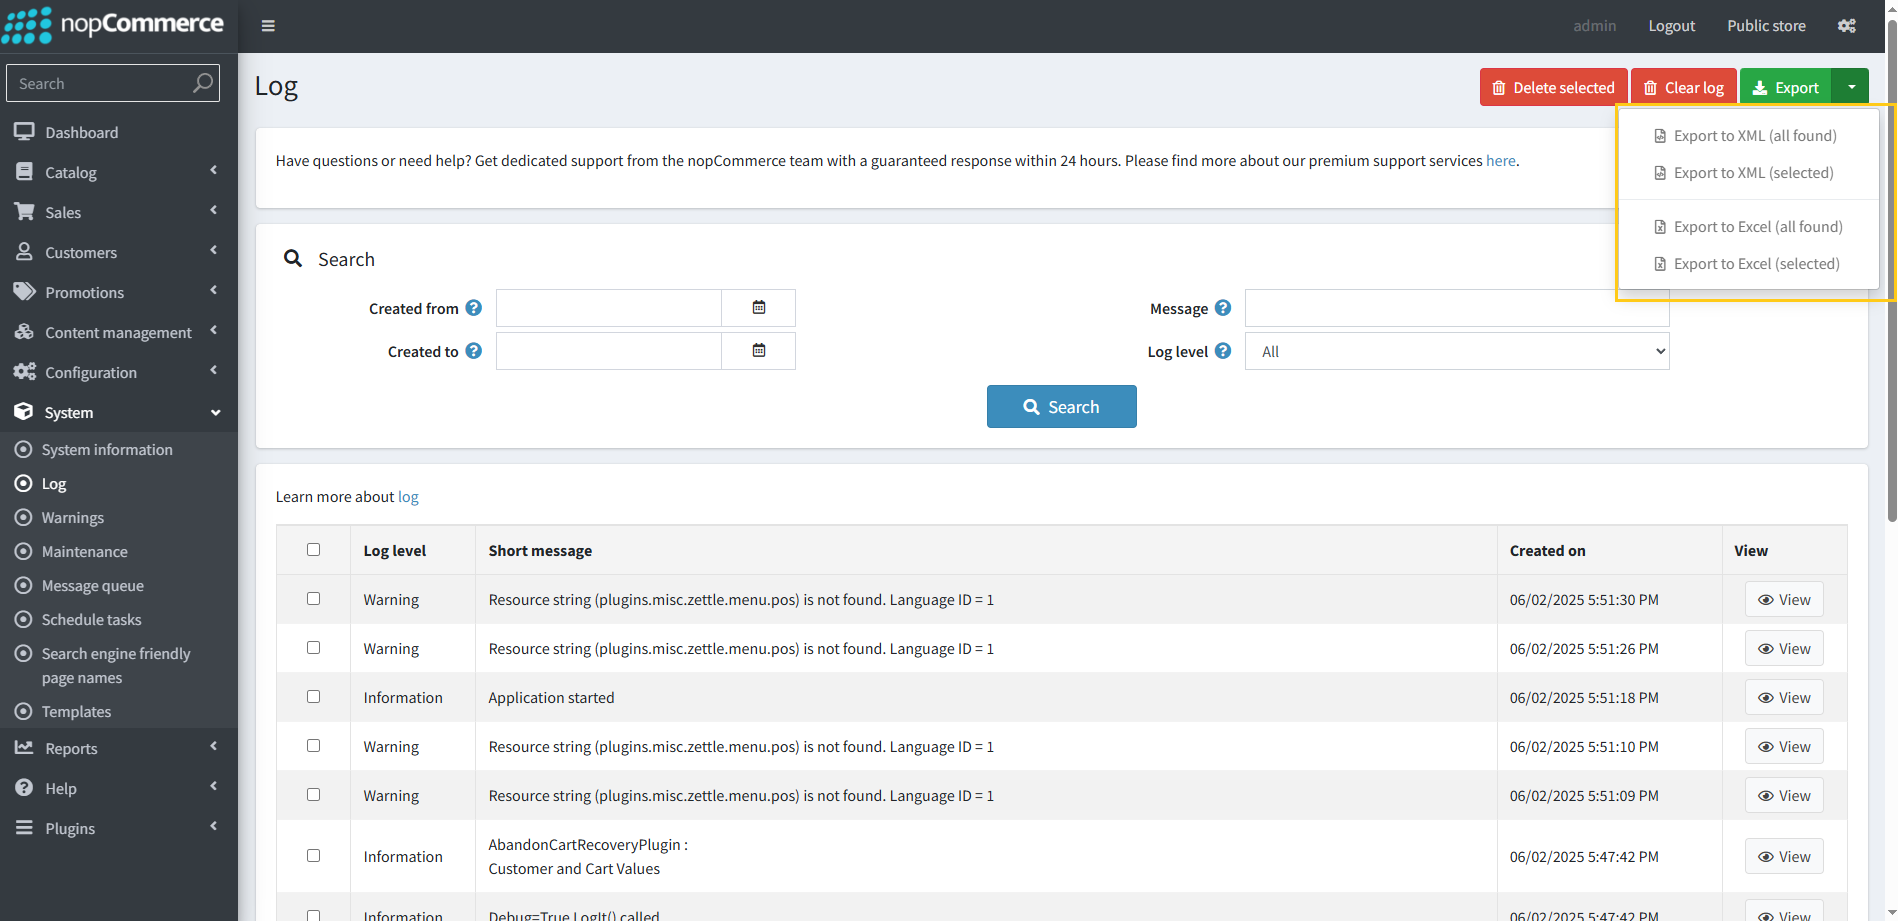
7. After choosing an export option.
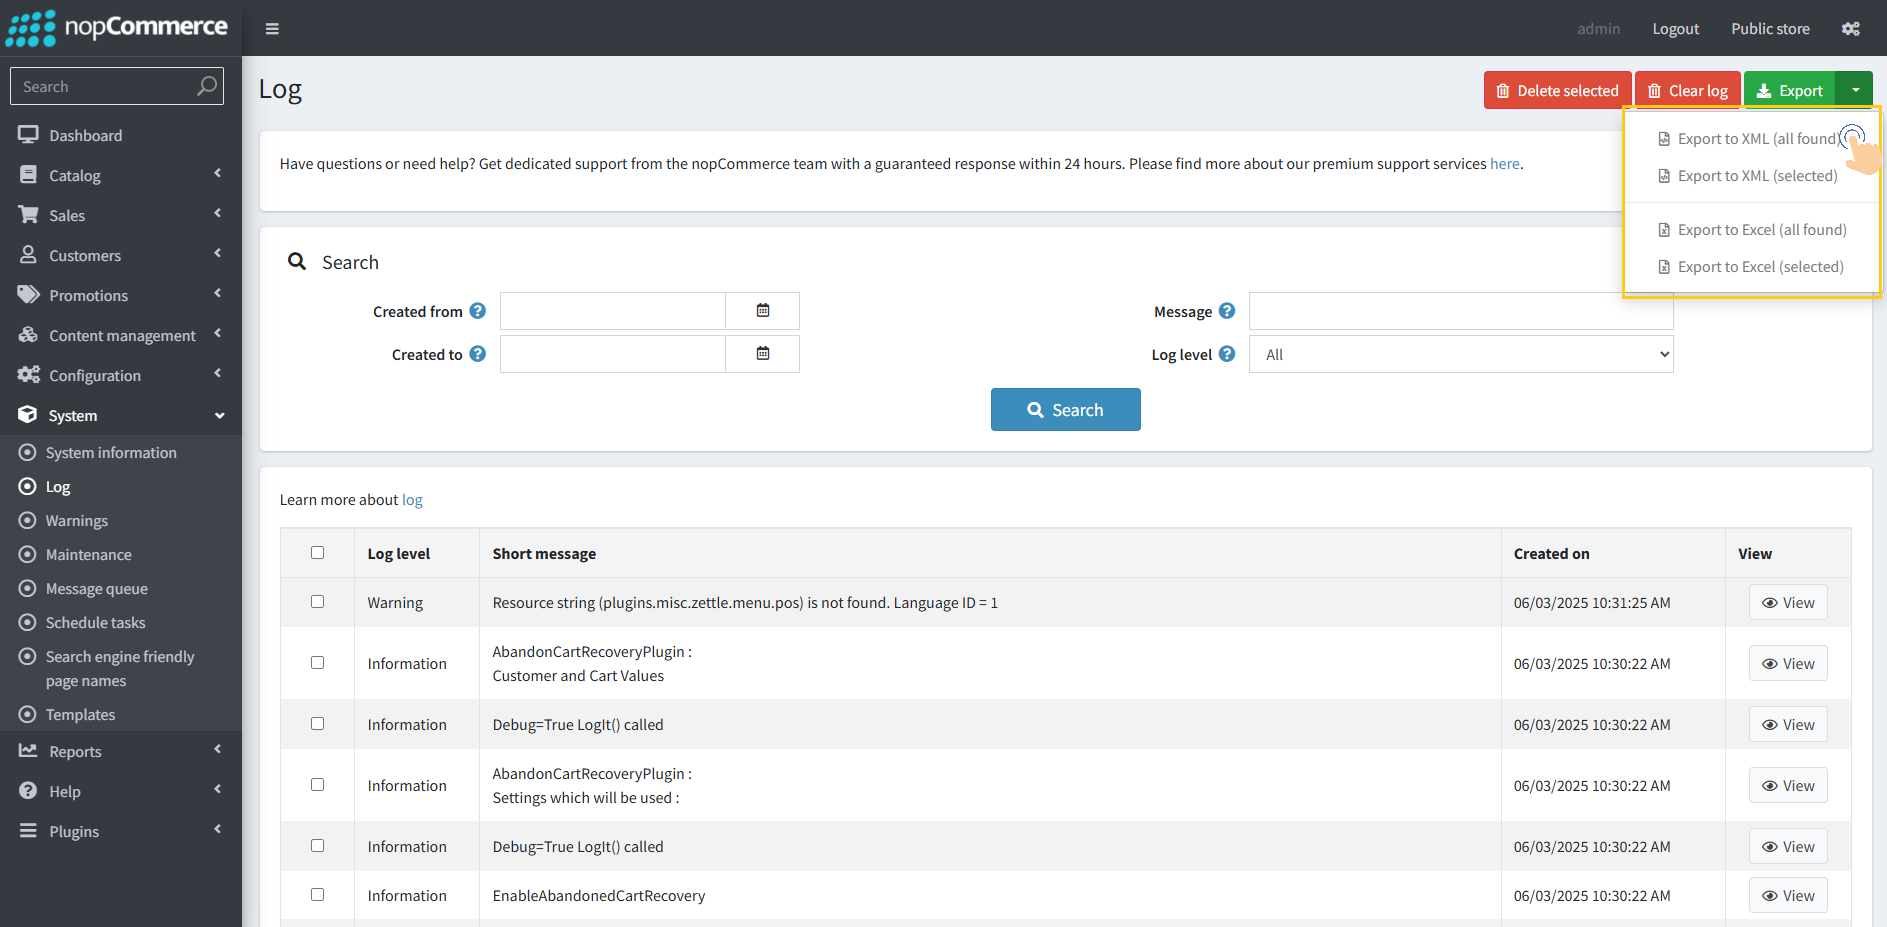
8. The file will be generated and downloaded automatically.