Cookies help us deliver our services. By using our services, you agree to our use of cookies.
You have no items in your shopping cart.

Abandoned Cart Recovery Plugin - User Guide
How to Install and Enable the Plugin Configuring Plugin for Sending Emails Resetting Customized Email Settings Message Queue (nopCommerce Inbuilt) Analytics Page Overview Customizing Email Templates Using Rich Text Editor Customizing Dynamic Content of Email Templates Viewing and Managing Plugin Logs
How to Install and Enable the Plugin
1. Download the Abandoned cart recovery plugin from our store (Download Plugin).
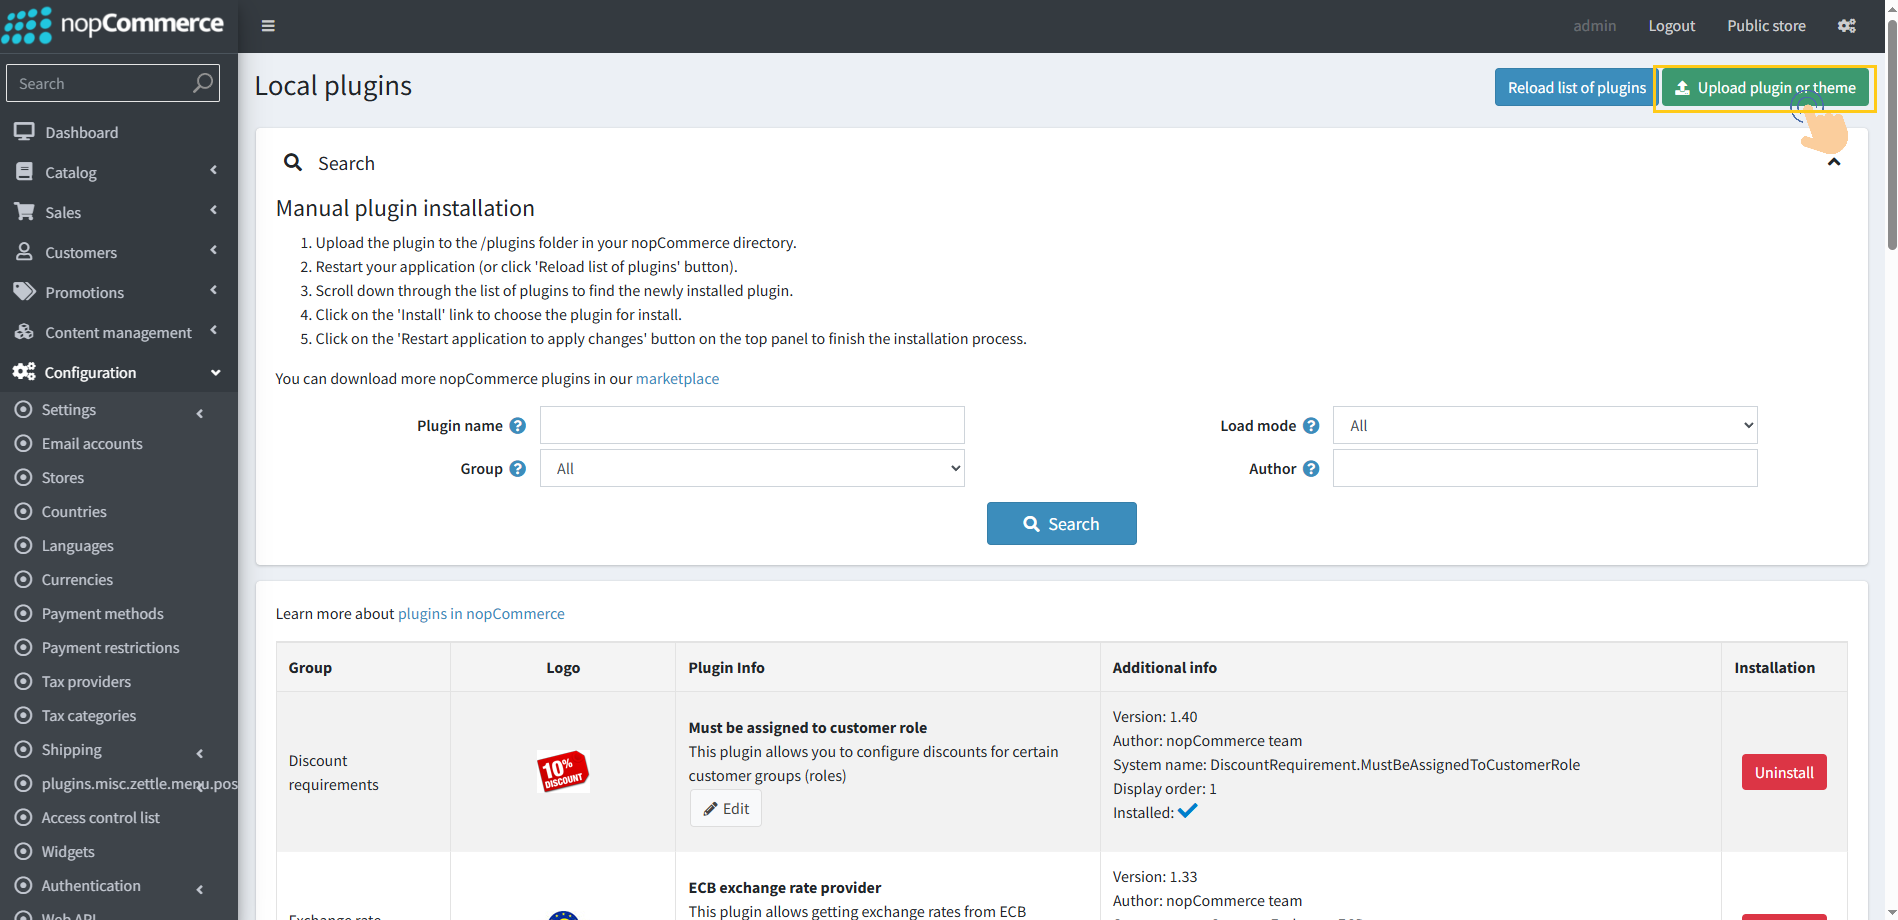
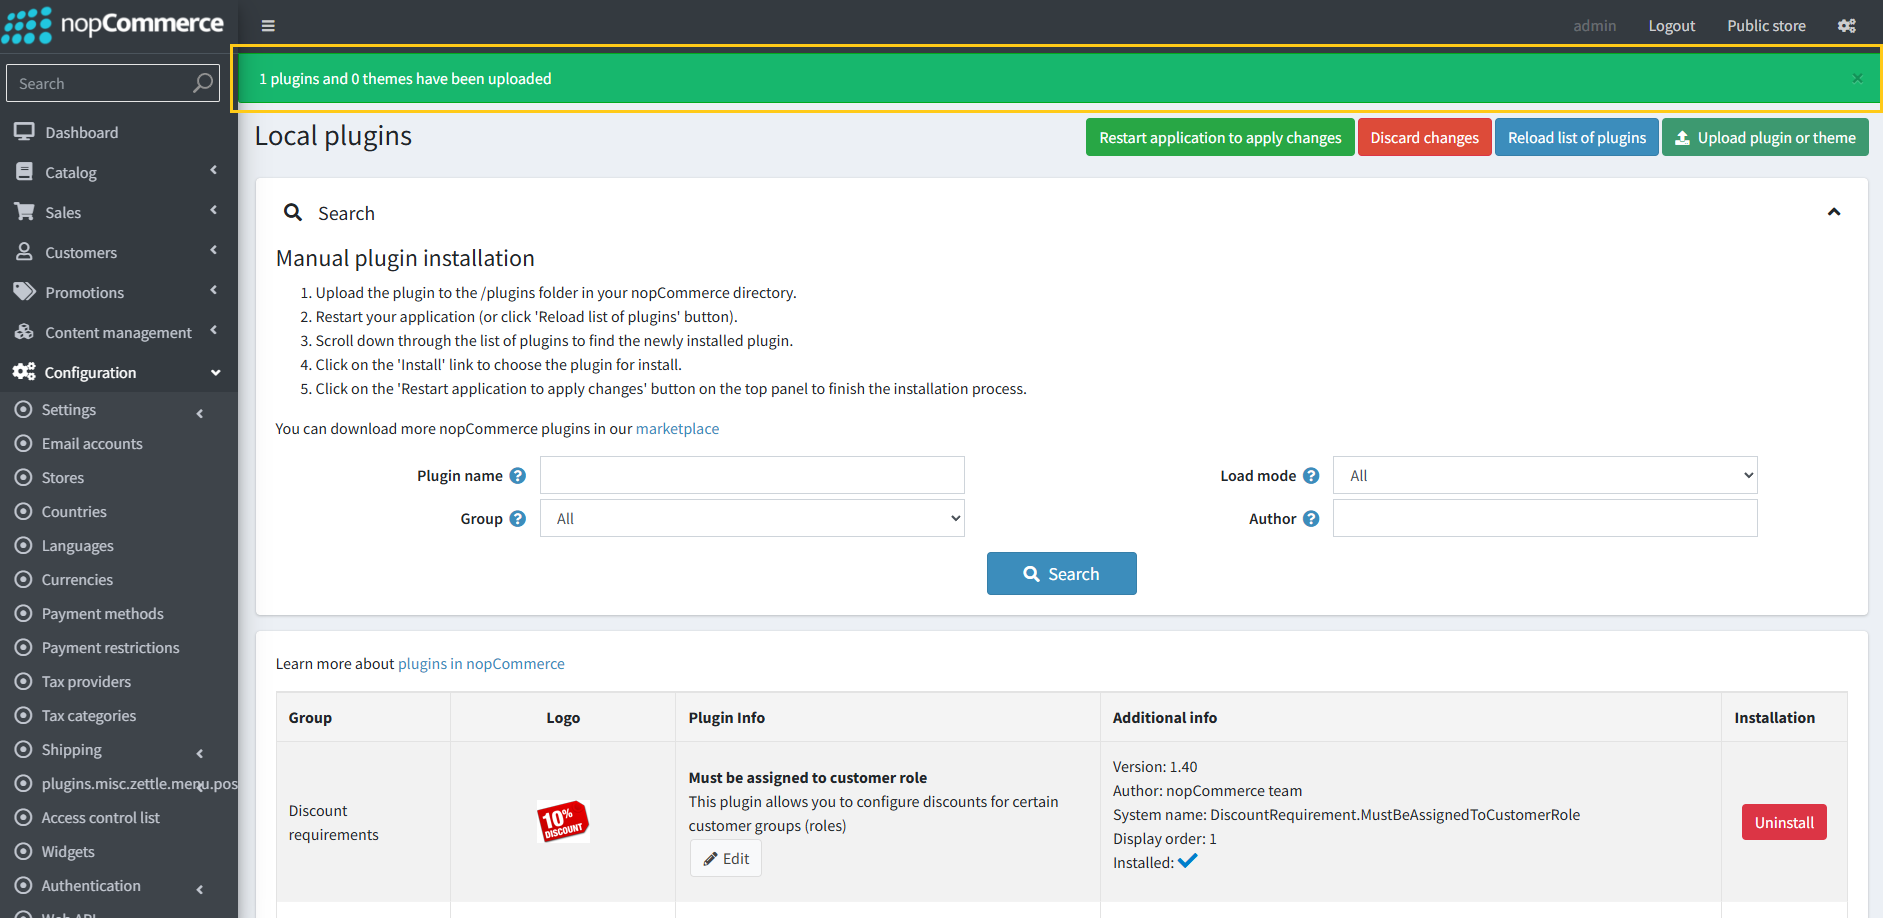
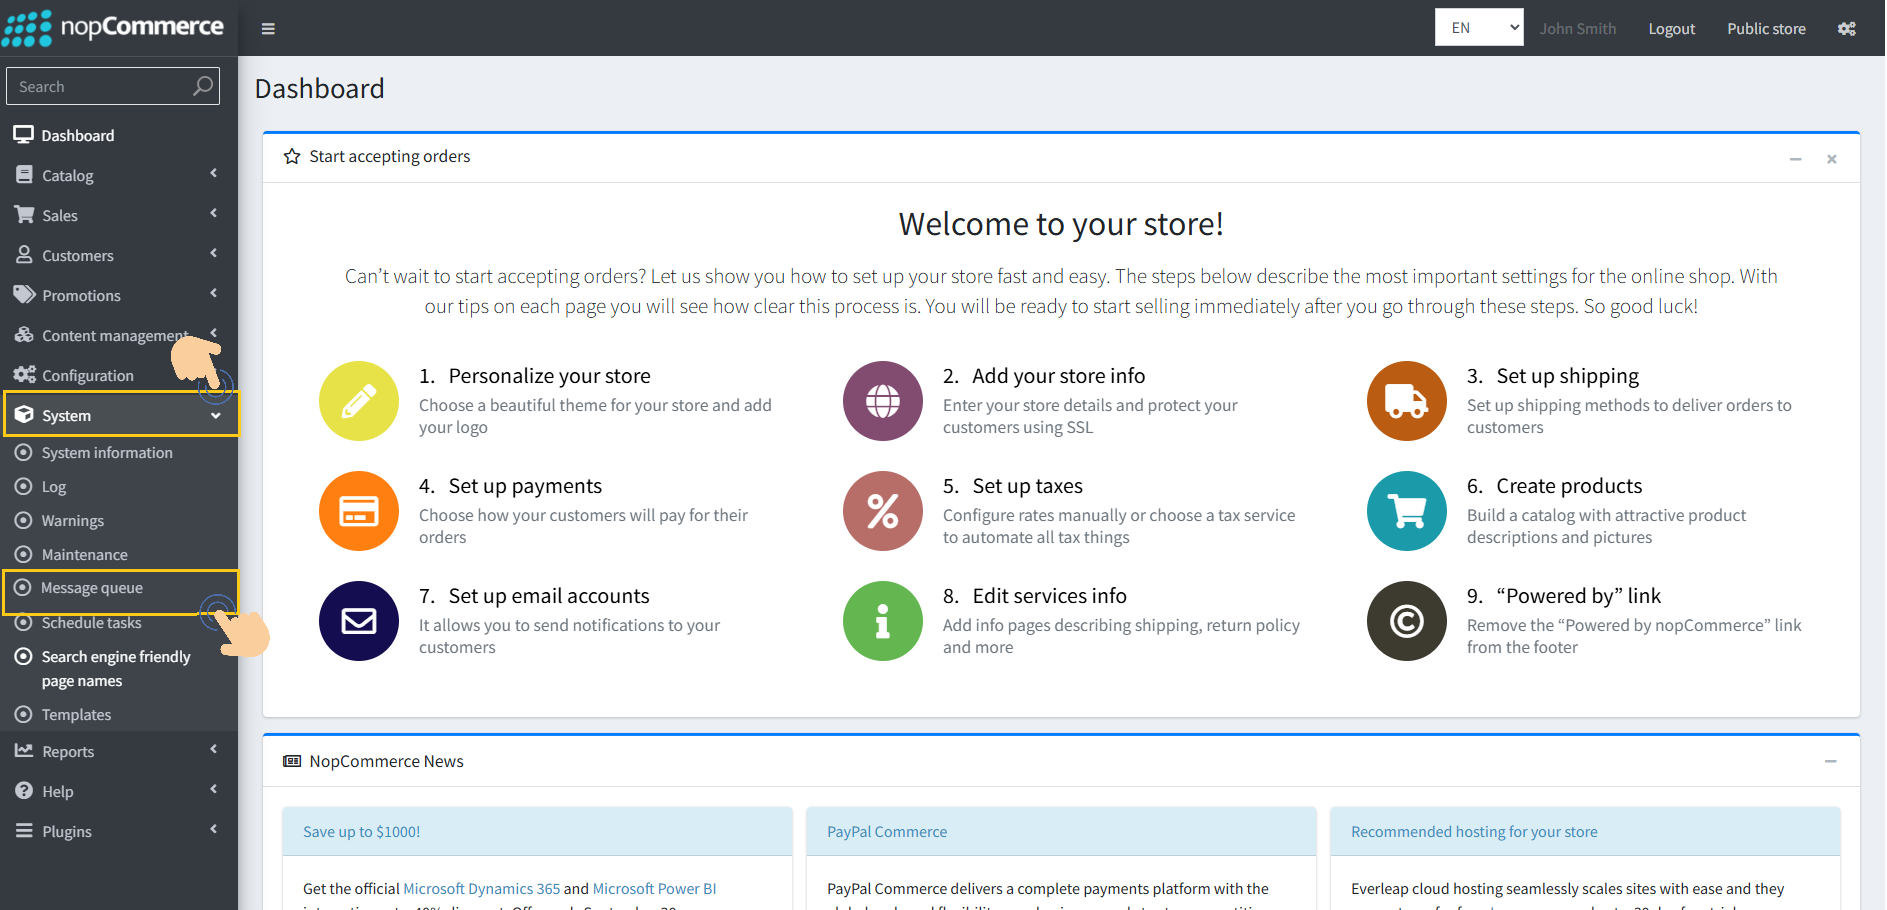
2. Go to Configuration → Local plugins from the Admin dashboard.
.jpg)
3. Click on the "Upload plugin or theme" button.
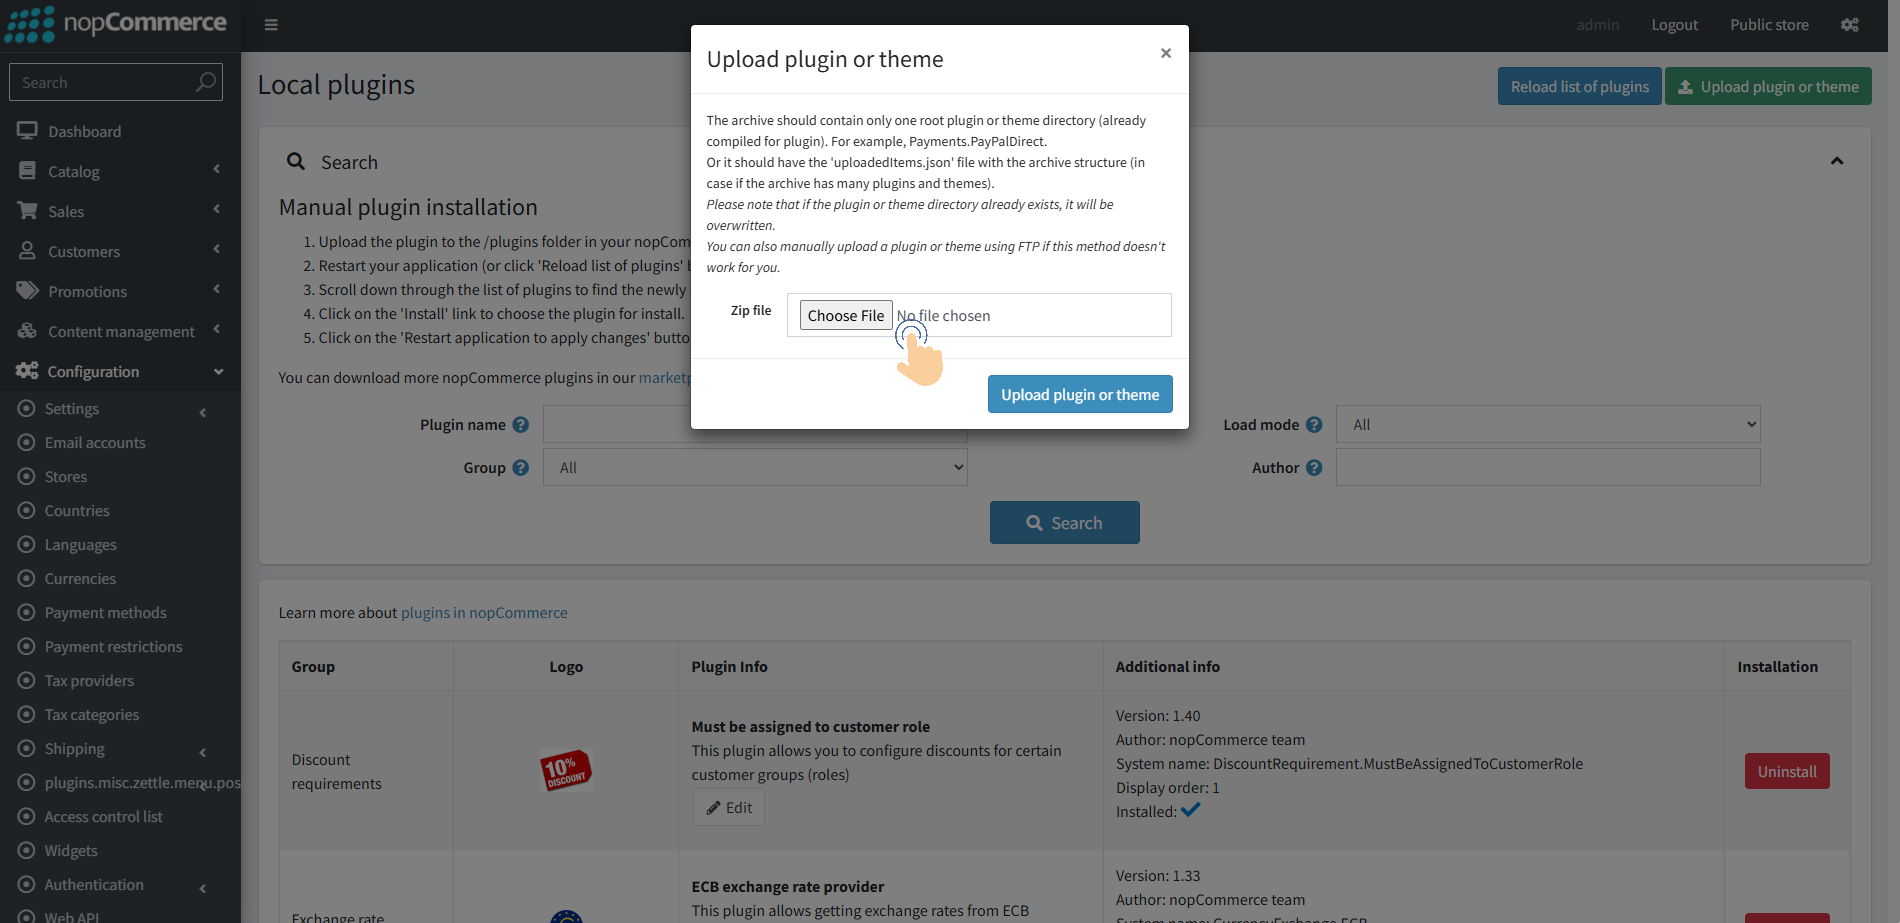
4. Popup will appear asking to navigate to the file that contains the plugins ZIP file.
5. Click on the "Choose File".
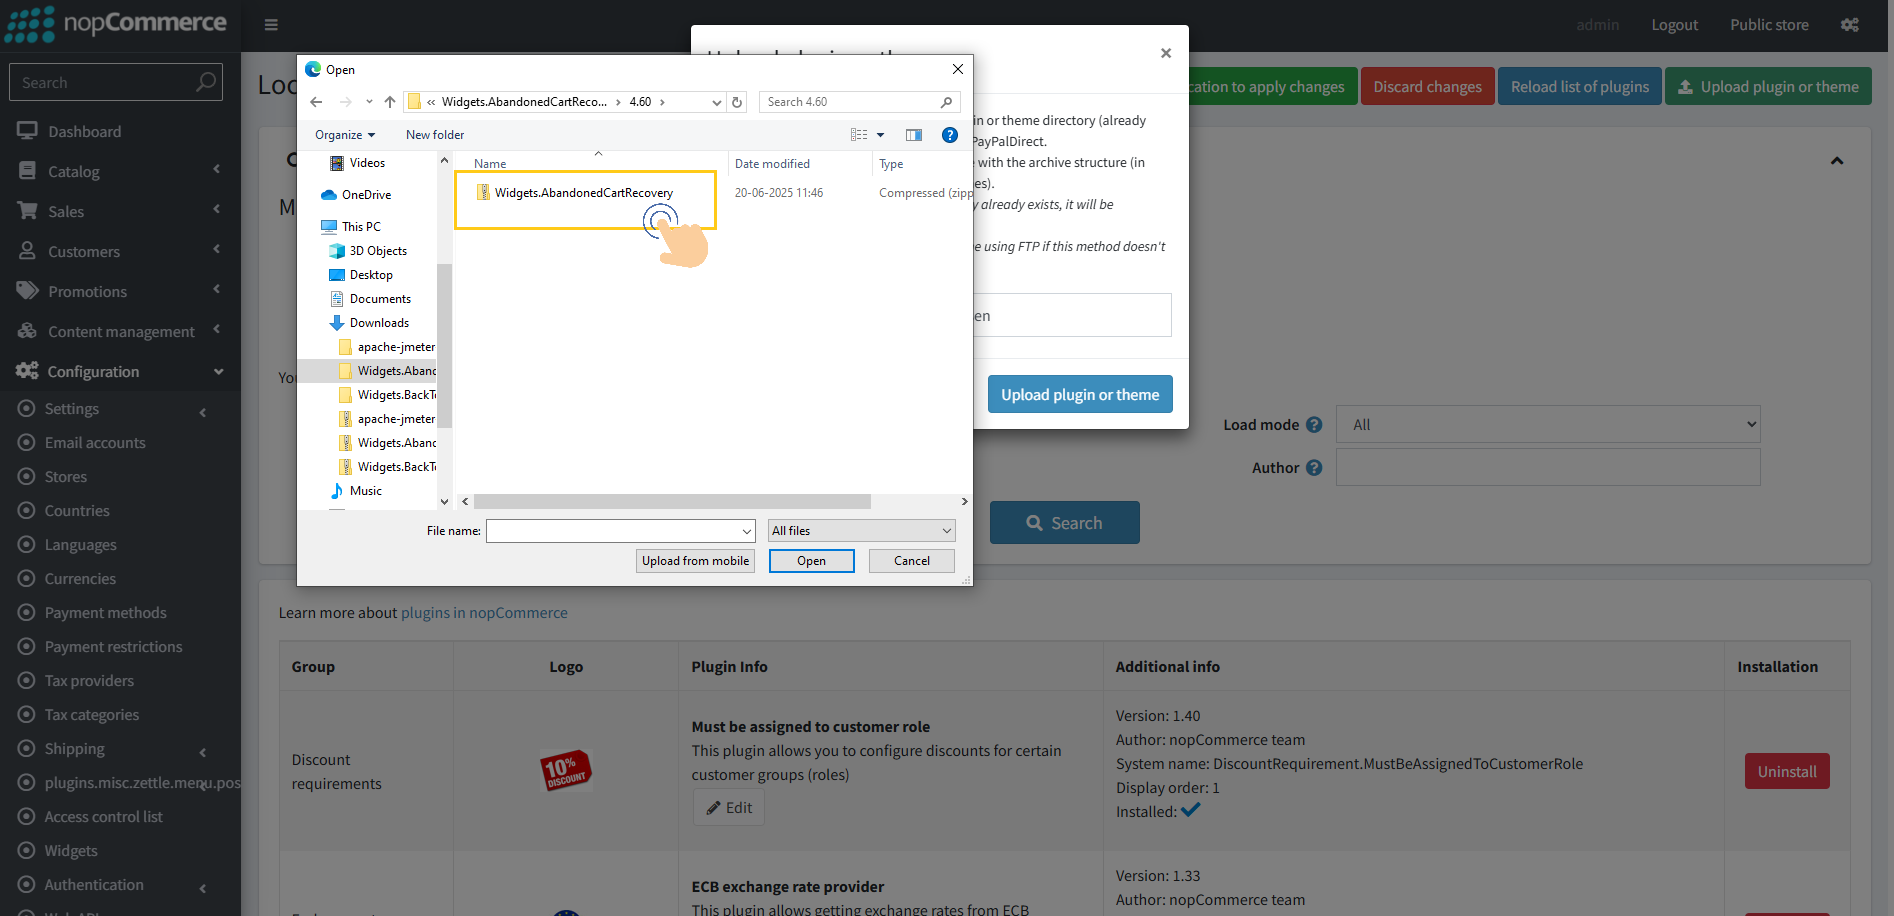
6. Select the .zip file named "AbandonedCartRecovery" and then upload it using the "Upload plugin or theme" button.
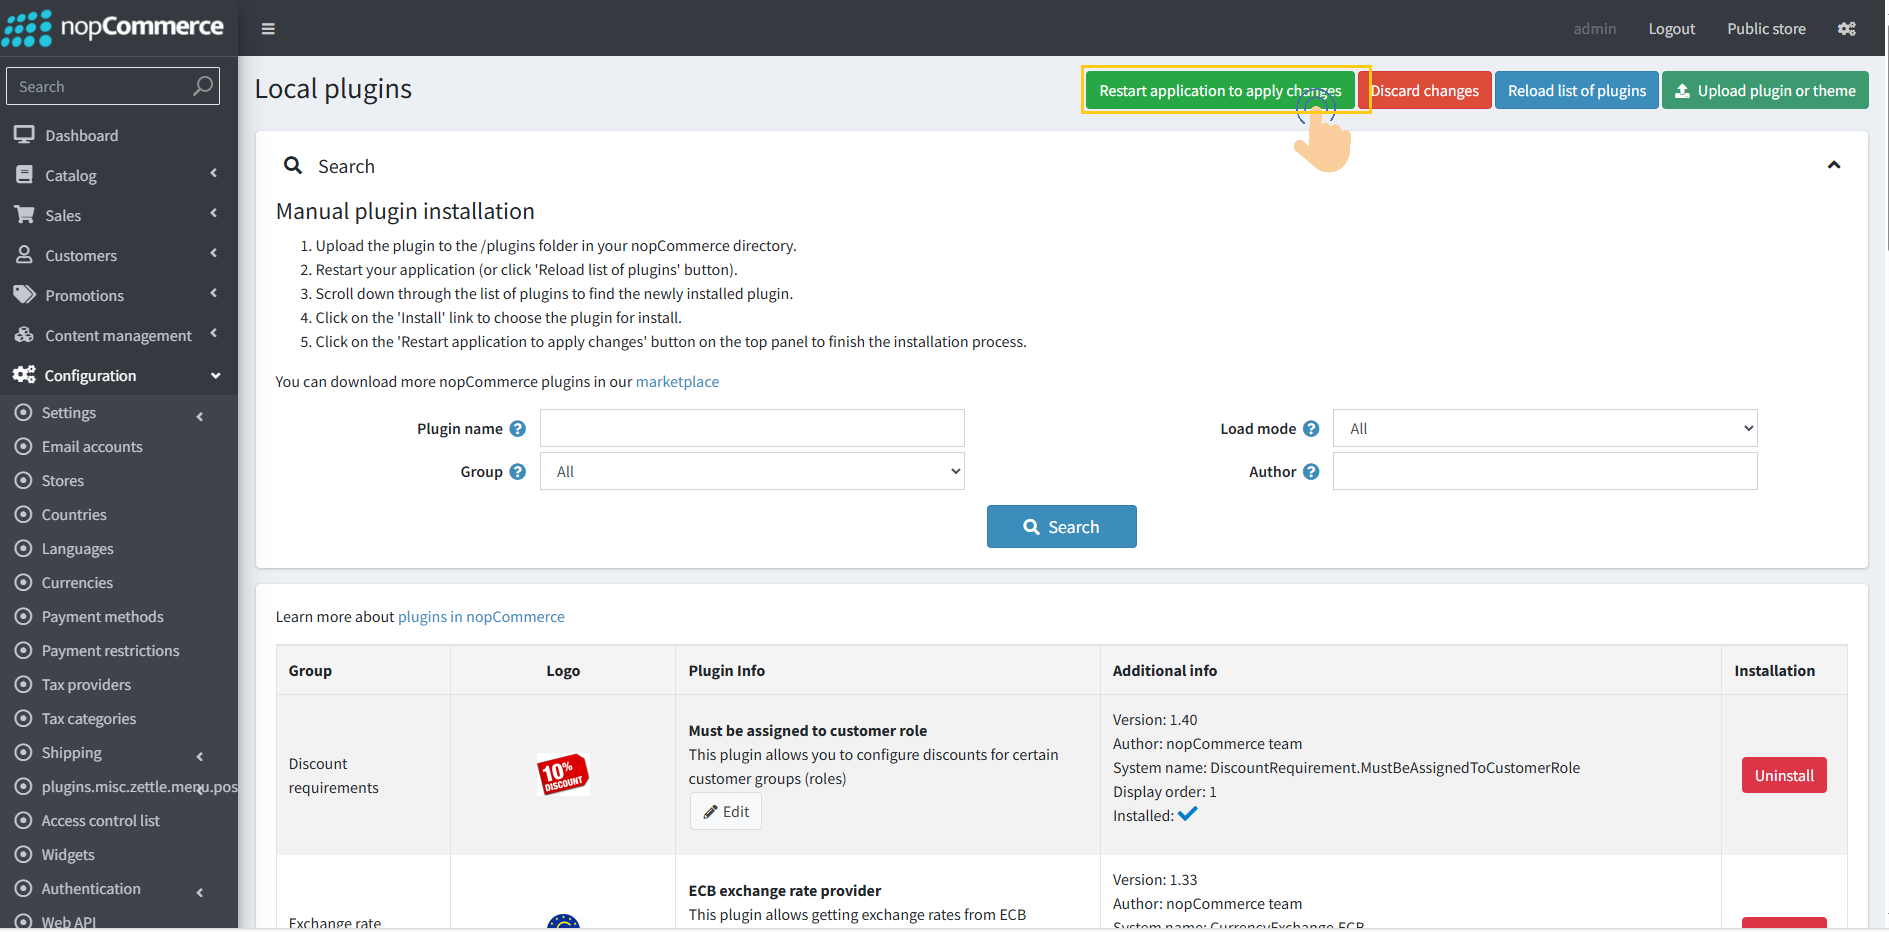
7. After uploading the plugin, a success notification will appear at the top of the page with a message.
8. Once you see the notification, click on the "Restart application to apply changes" button.
9. To get this plugin, Search by the group name as Widgets in Configuration → Local Plugin.
.png)
10. Look for the Abandoned Cart Recovery plugin in the list.
11. Click the Install button next to the Abandoned Cart Recovery plugin.
-Copy-1.png)
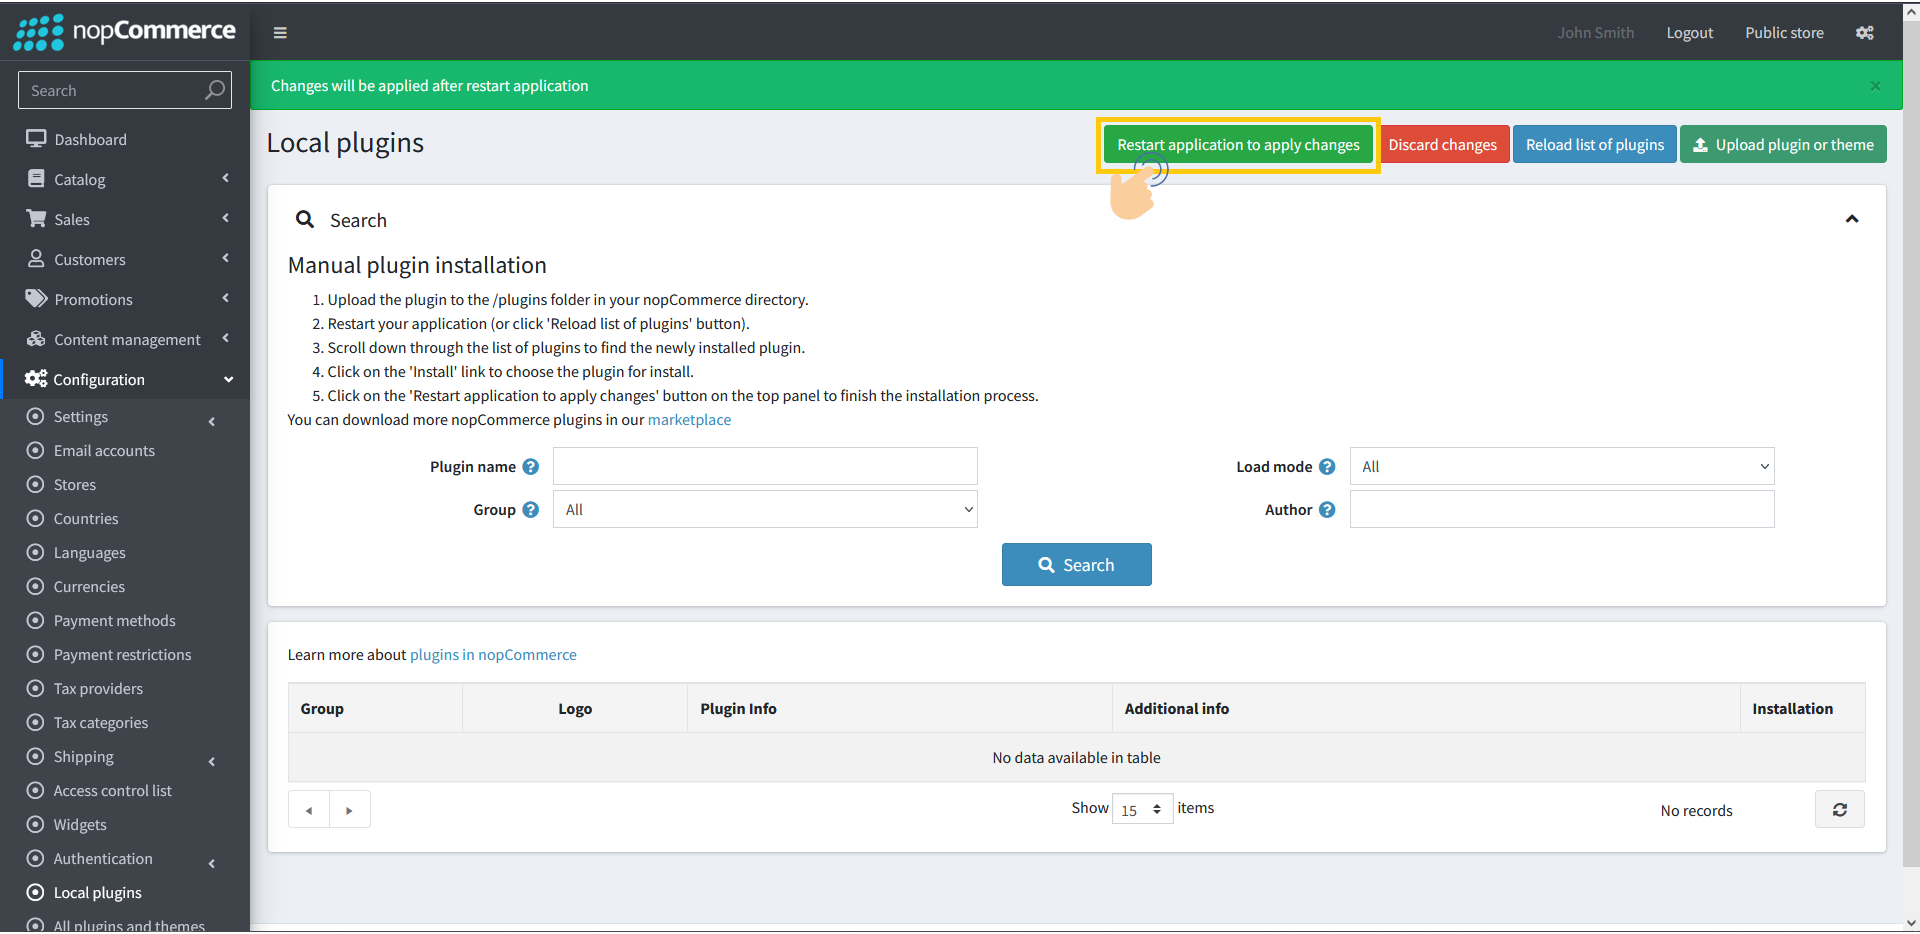
12. Click the Restart application to apply changes button in top menu.
Configuring Plugin for Sending Emails
The plugin allows you to configure email settings either for a specific store or for all stores. This flexibility ensures that you can apply unique configurations per store or maintain a common configuration across all stores.
Configuration Options
Particular Store Configuration
Select the desired store from the store dropdown.
Configure the email settings only for that selected store.
This setup will apply exclusively to the chosen store without affecting others.
All Stores Configuration
Select the All Stores option from the dropdown.
Configure the email settings once.
The configured settings will automatically apply to all stores.
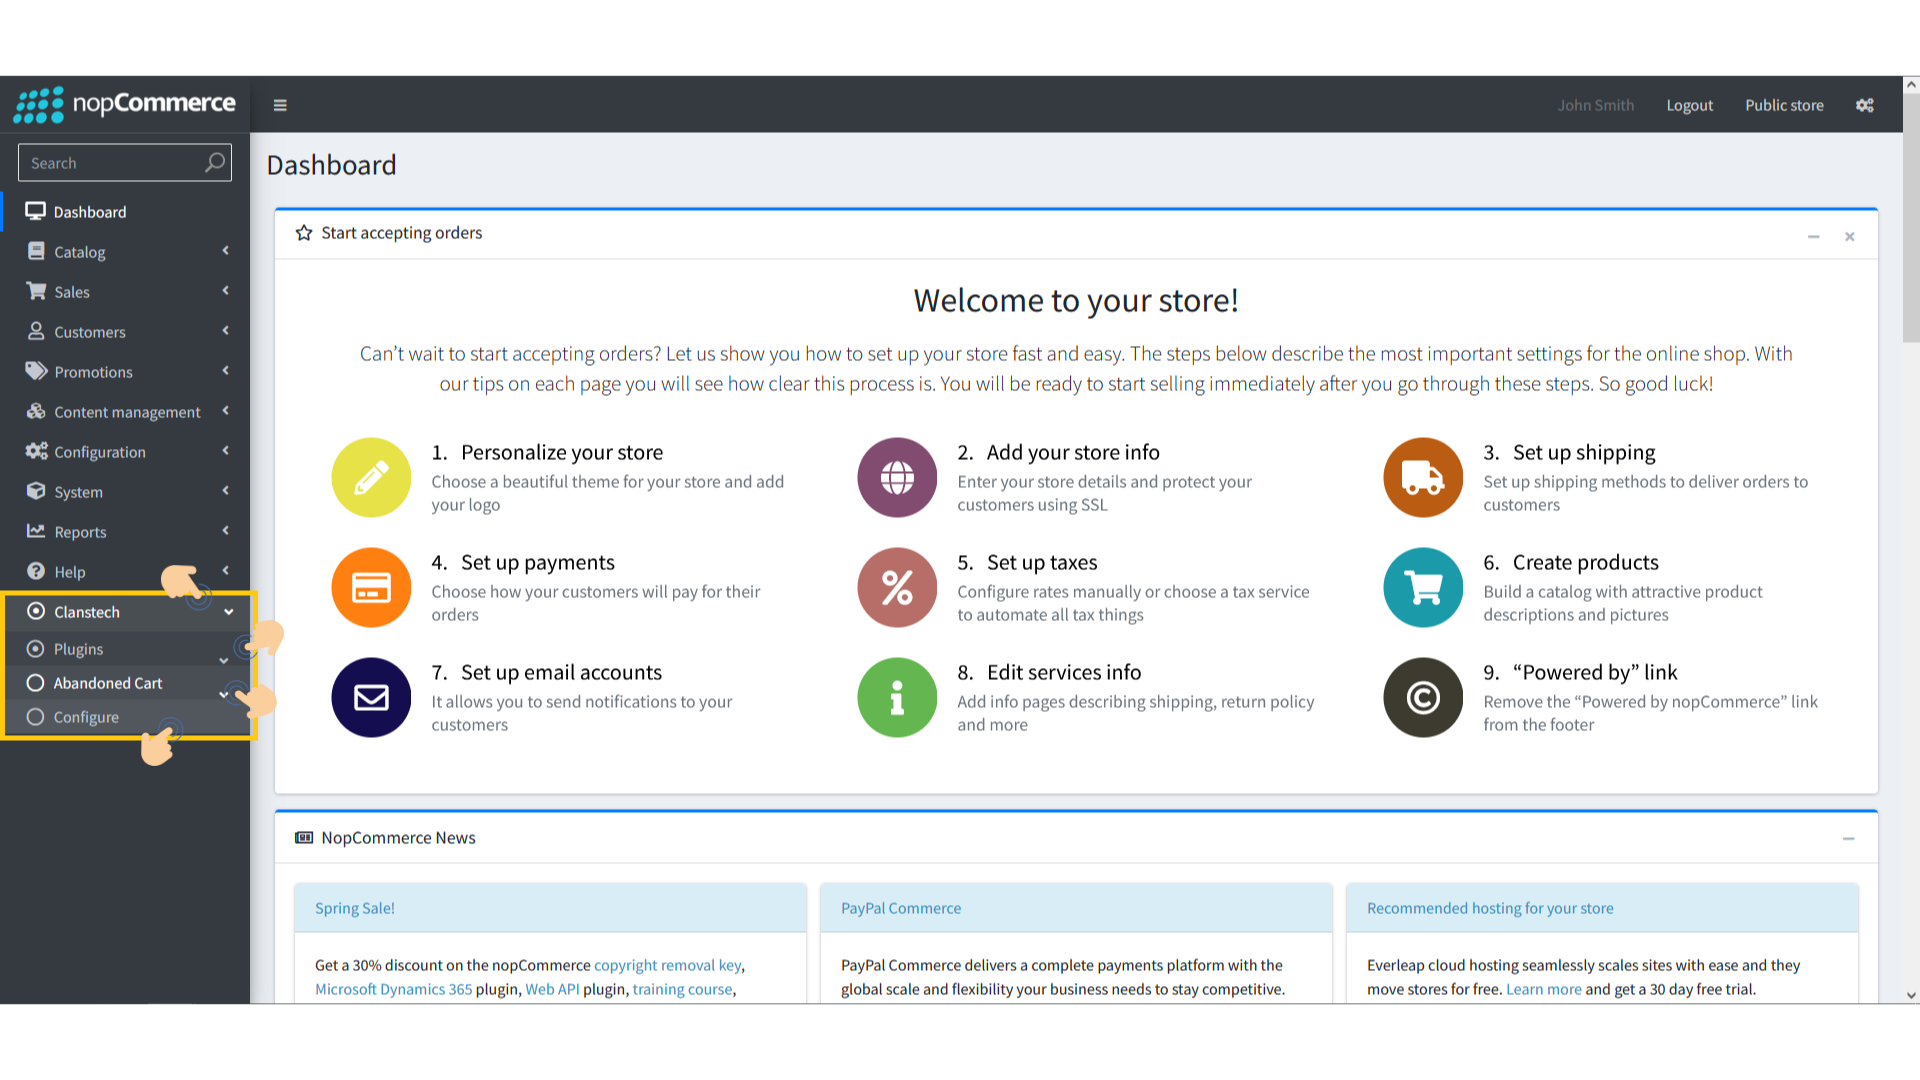
1. Go to the Clanstech → Plugin → Abandoned Cart Recovery → Configure
2. From the Multi-Store Configuration dropdown, select the store for which you want to configure the Abandoned Cart Recovery settings.
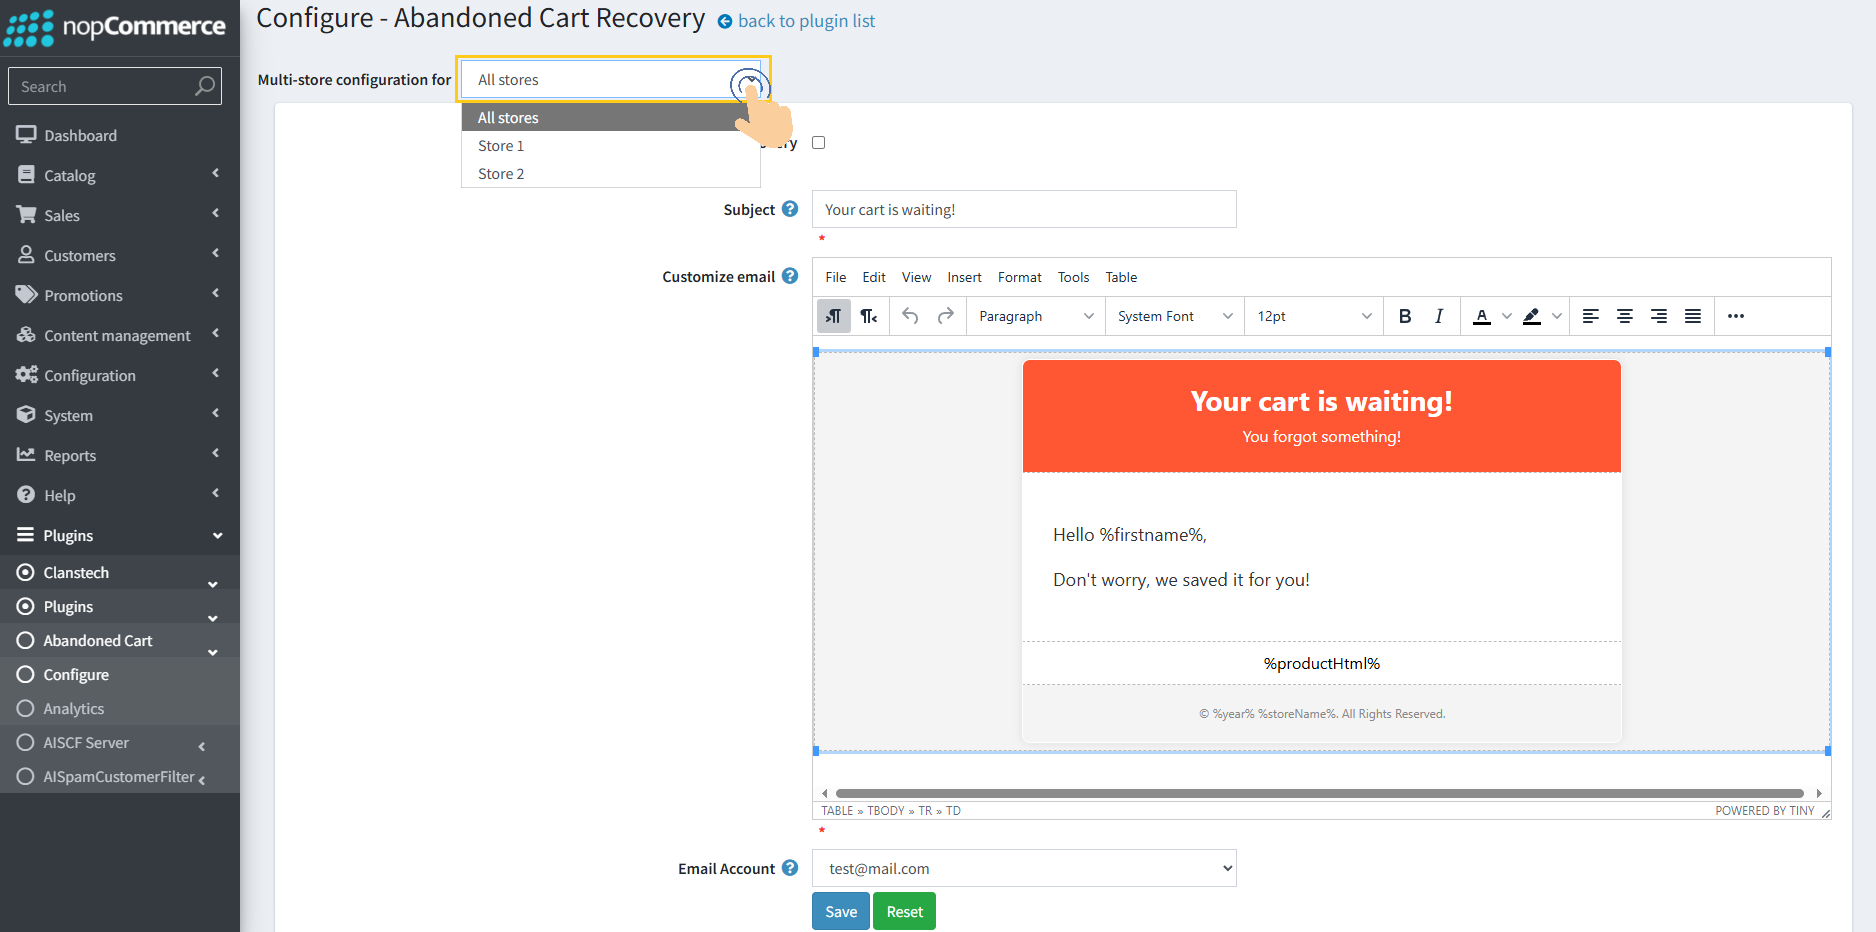
3. When you first install the plugin, the Enable checkbox is disabled by default. To start using and configuring the plugin, you must enable it.
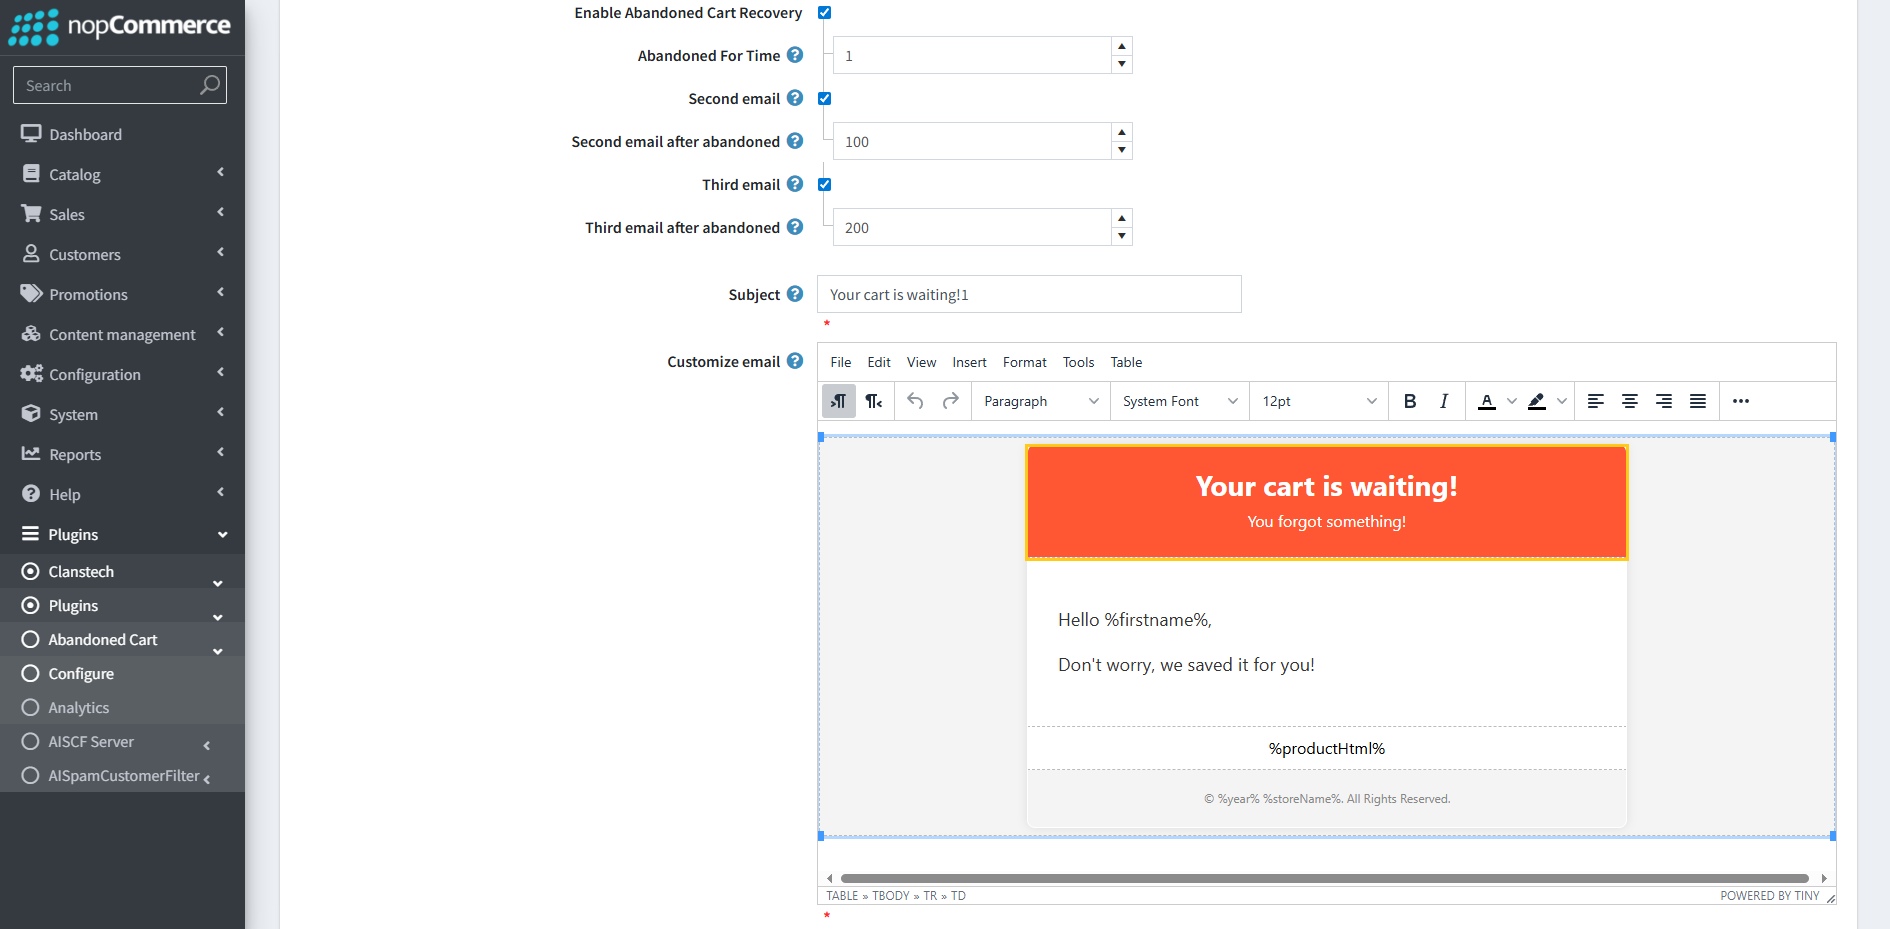
4. Check the Enable Abandoned Cart Recovery checkbox to activate the plugin for the selected store. Enter the time interval to send the first recovery email.
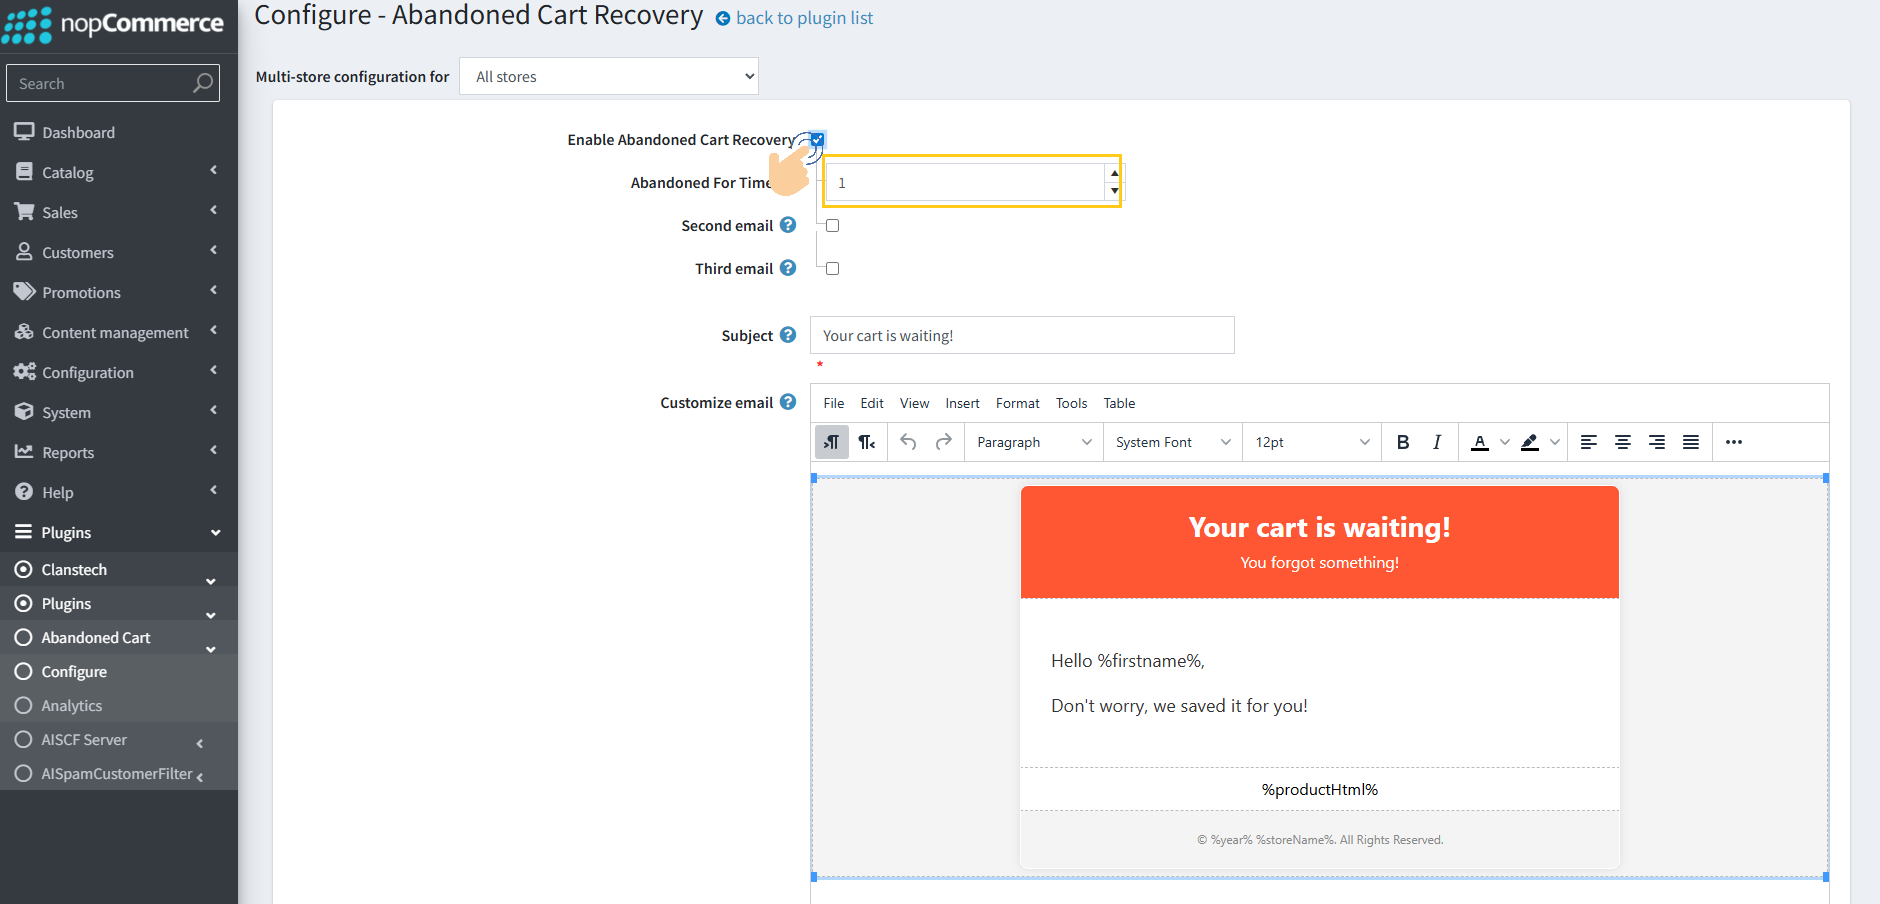
5. Select the Second Email checkbox. Enter the time interval for sending the second recovery email (this will be scheduled after the first email is sent).
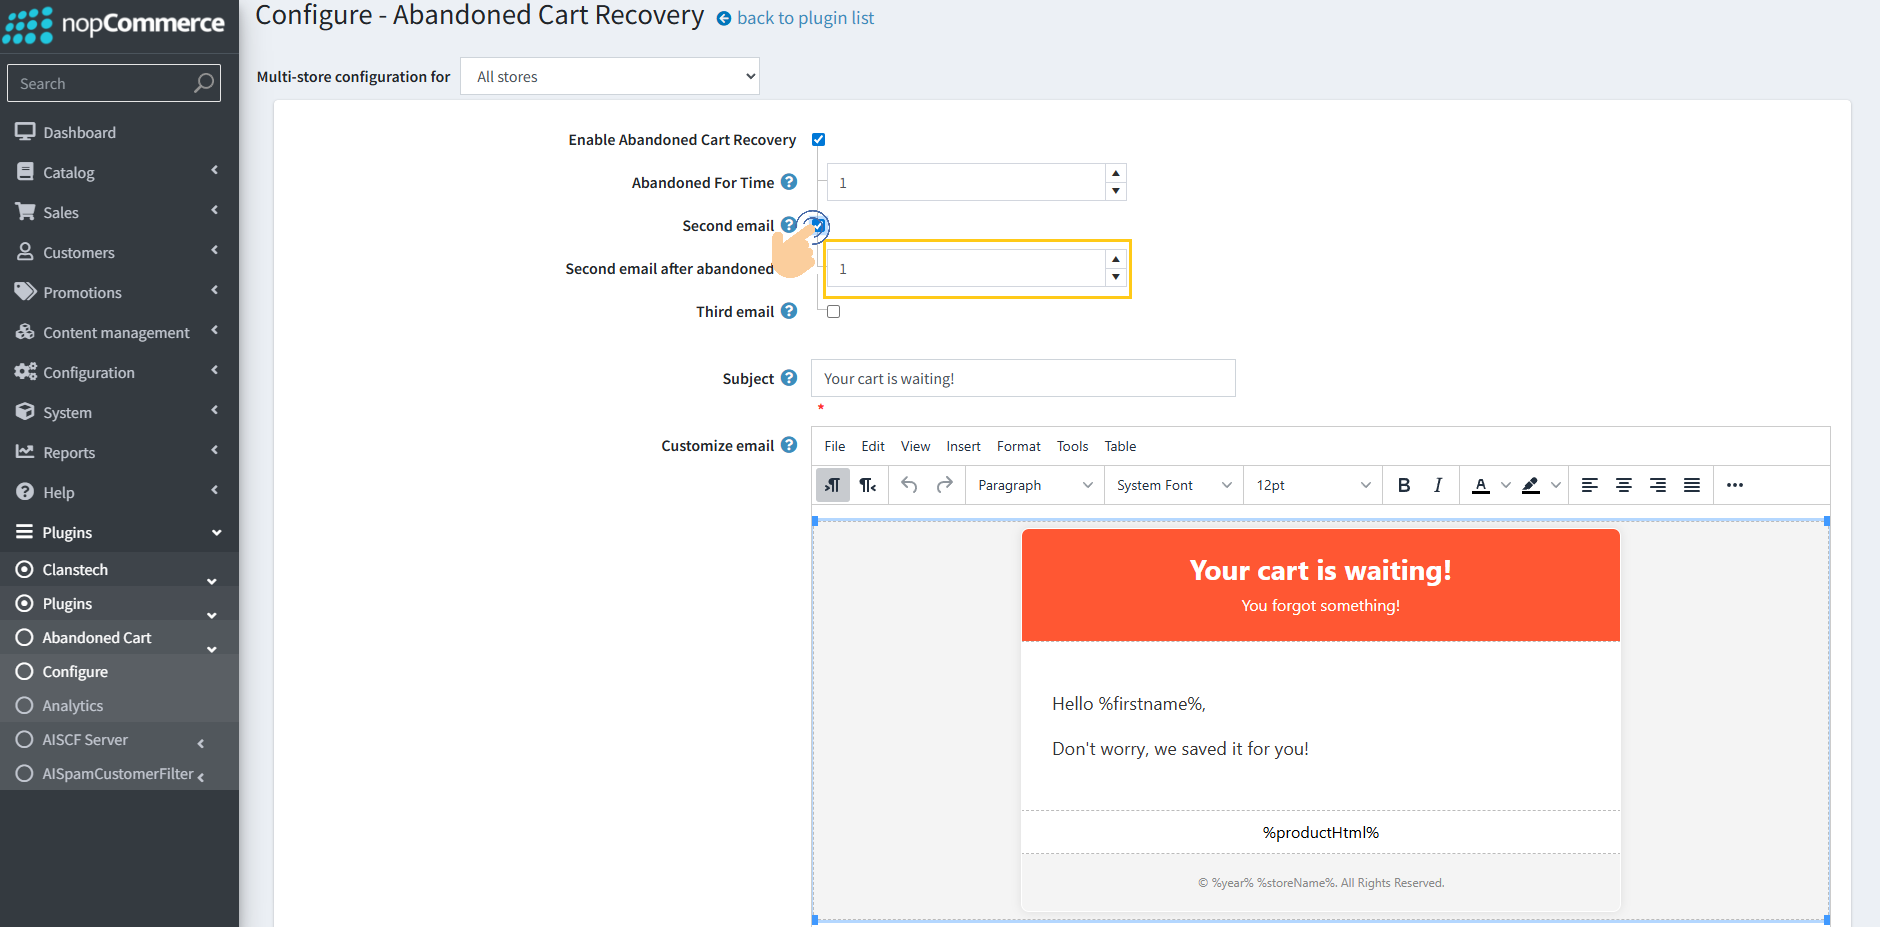
6. Select the Third Email checkbox. Enter the time interval for sending the third recovery email (this will be scheduled after the second email is sent).
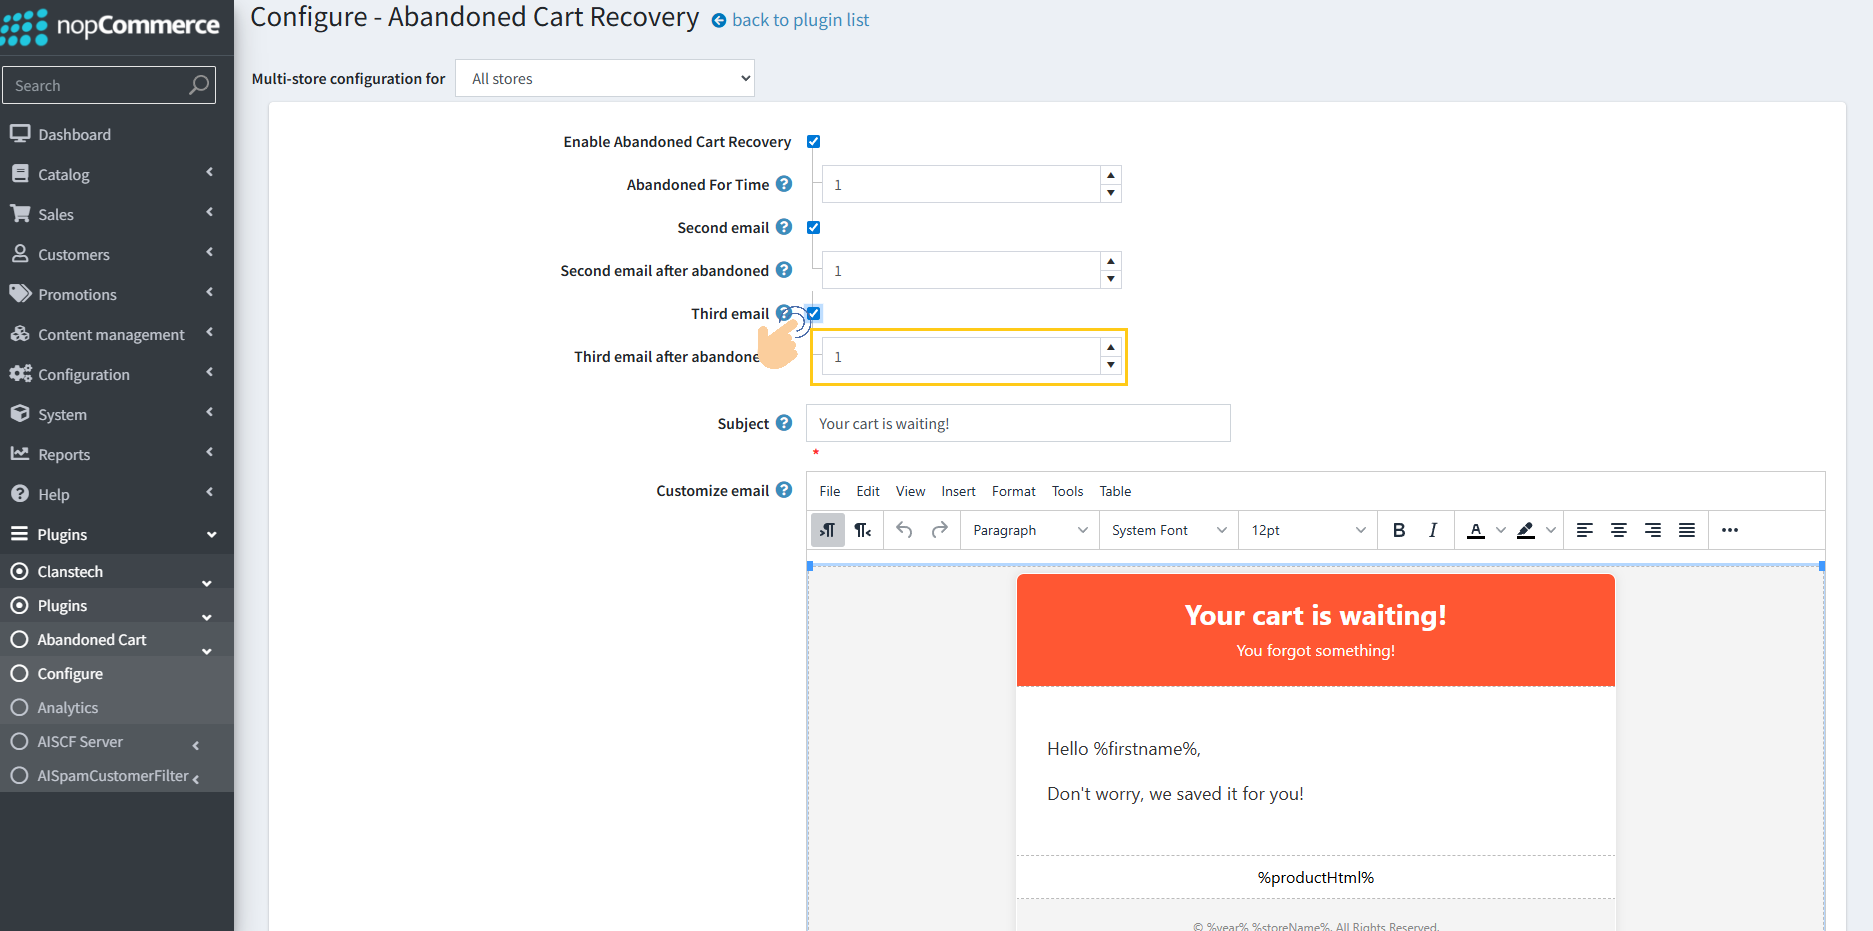
7. Provide a suitable subject line for the recovery emails.
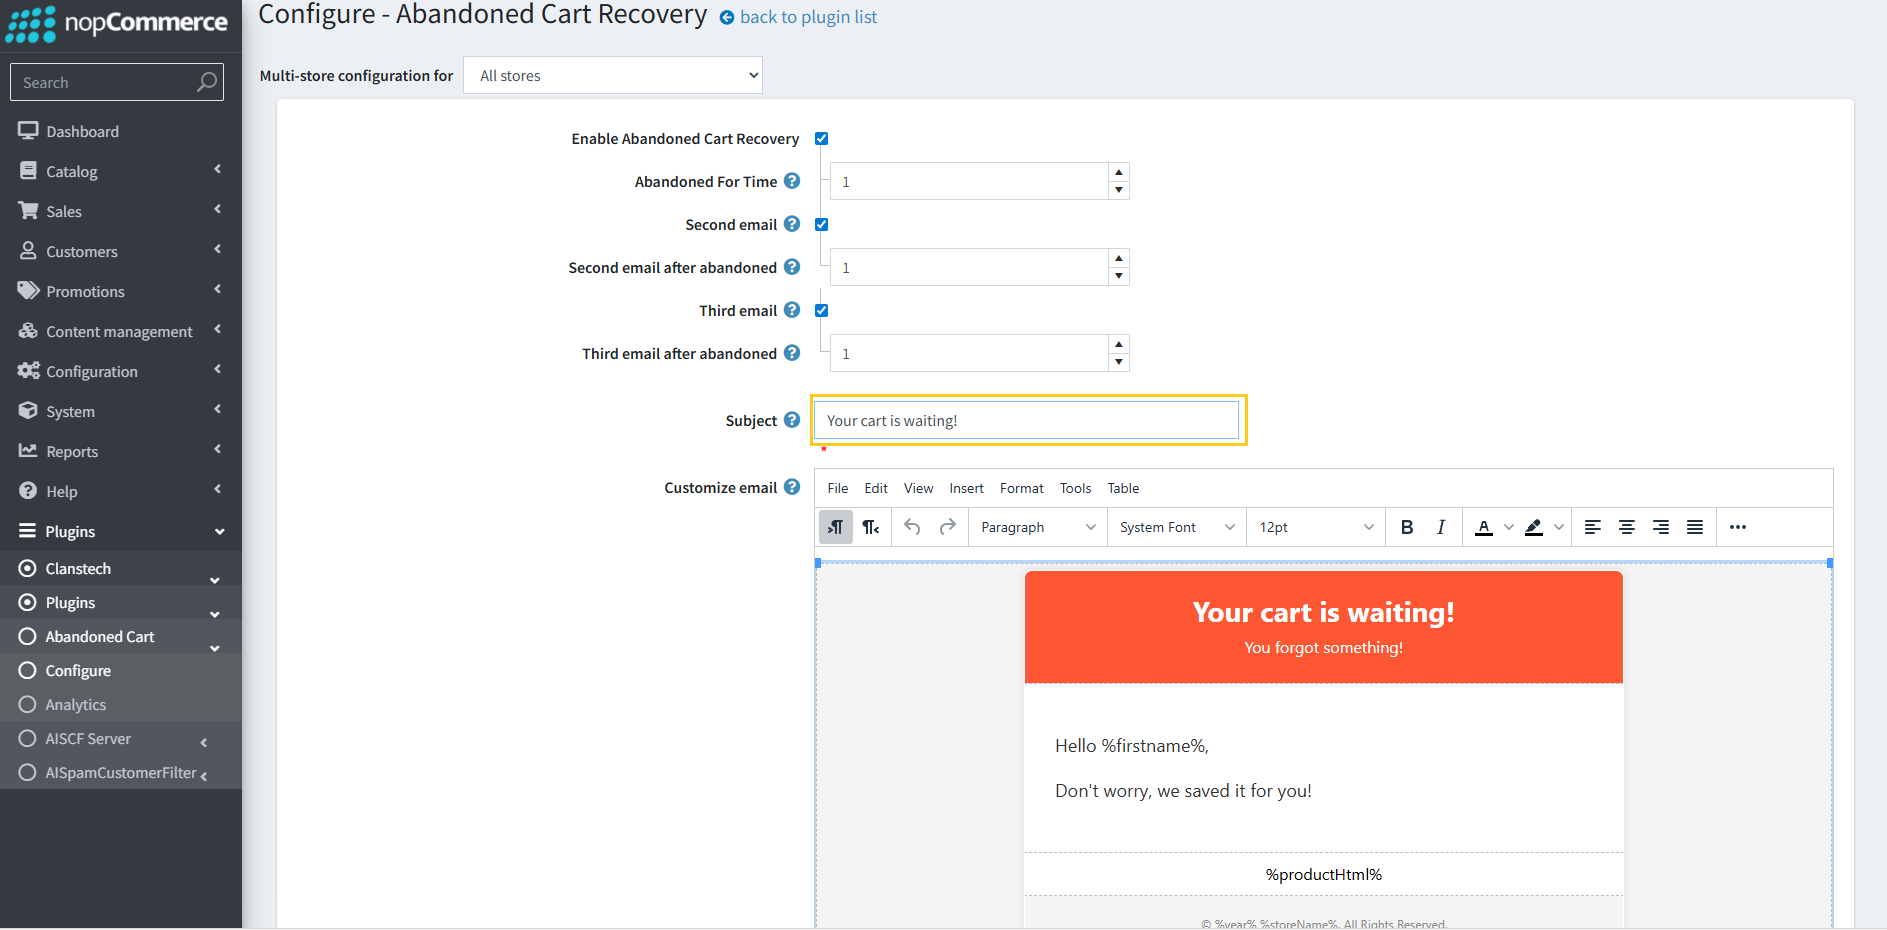
8. Write or customize the email body content to match your store’s branding and message.
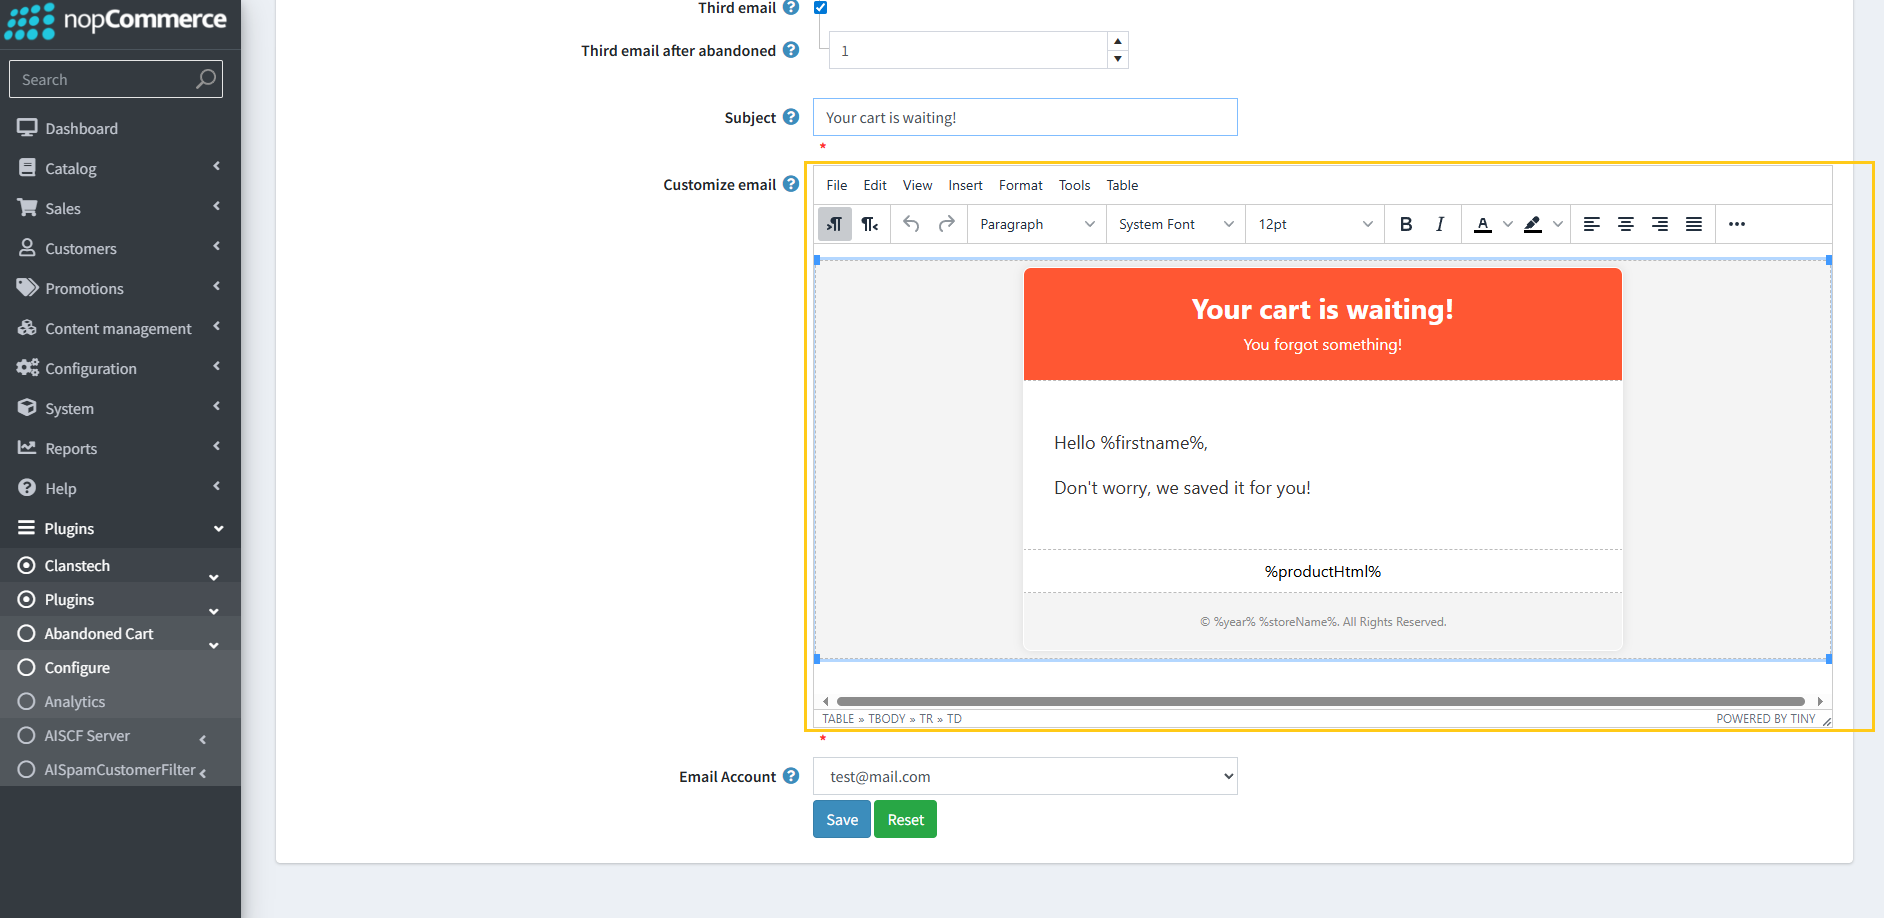
9. From the dropdown, select the email account that will be used to send the recovery emails.
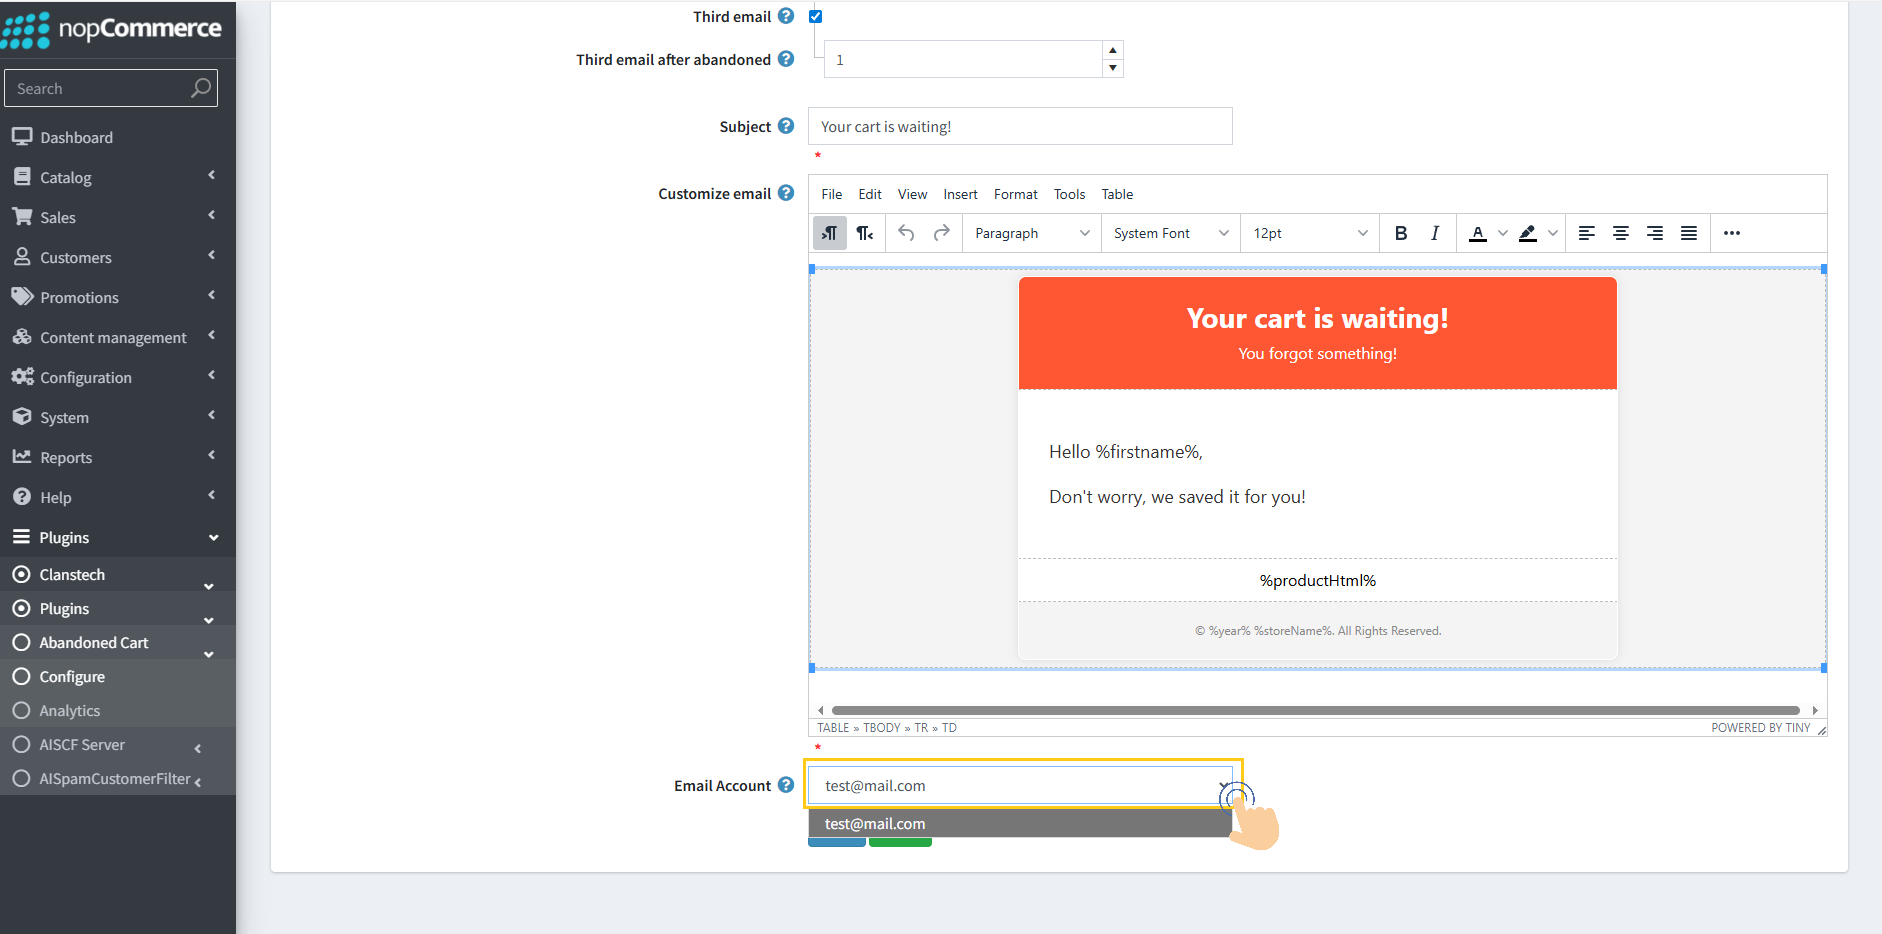
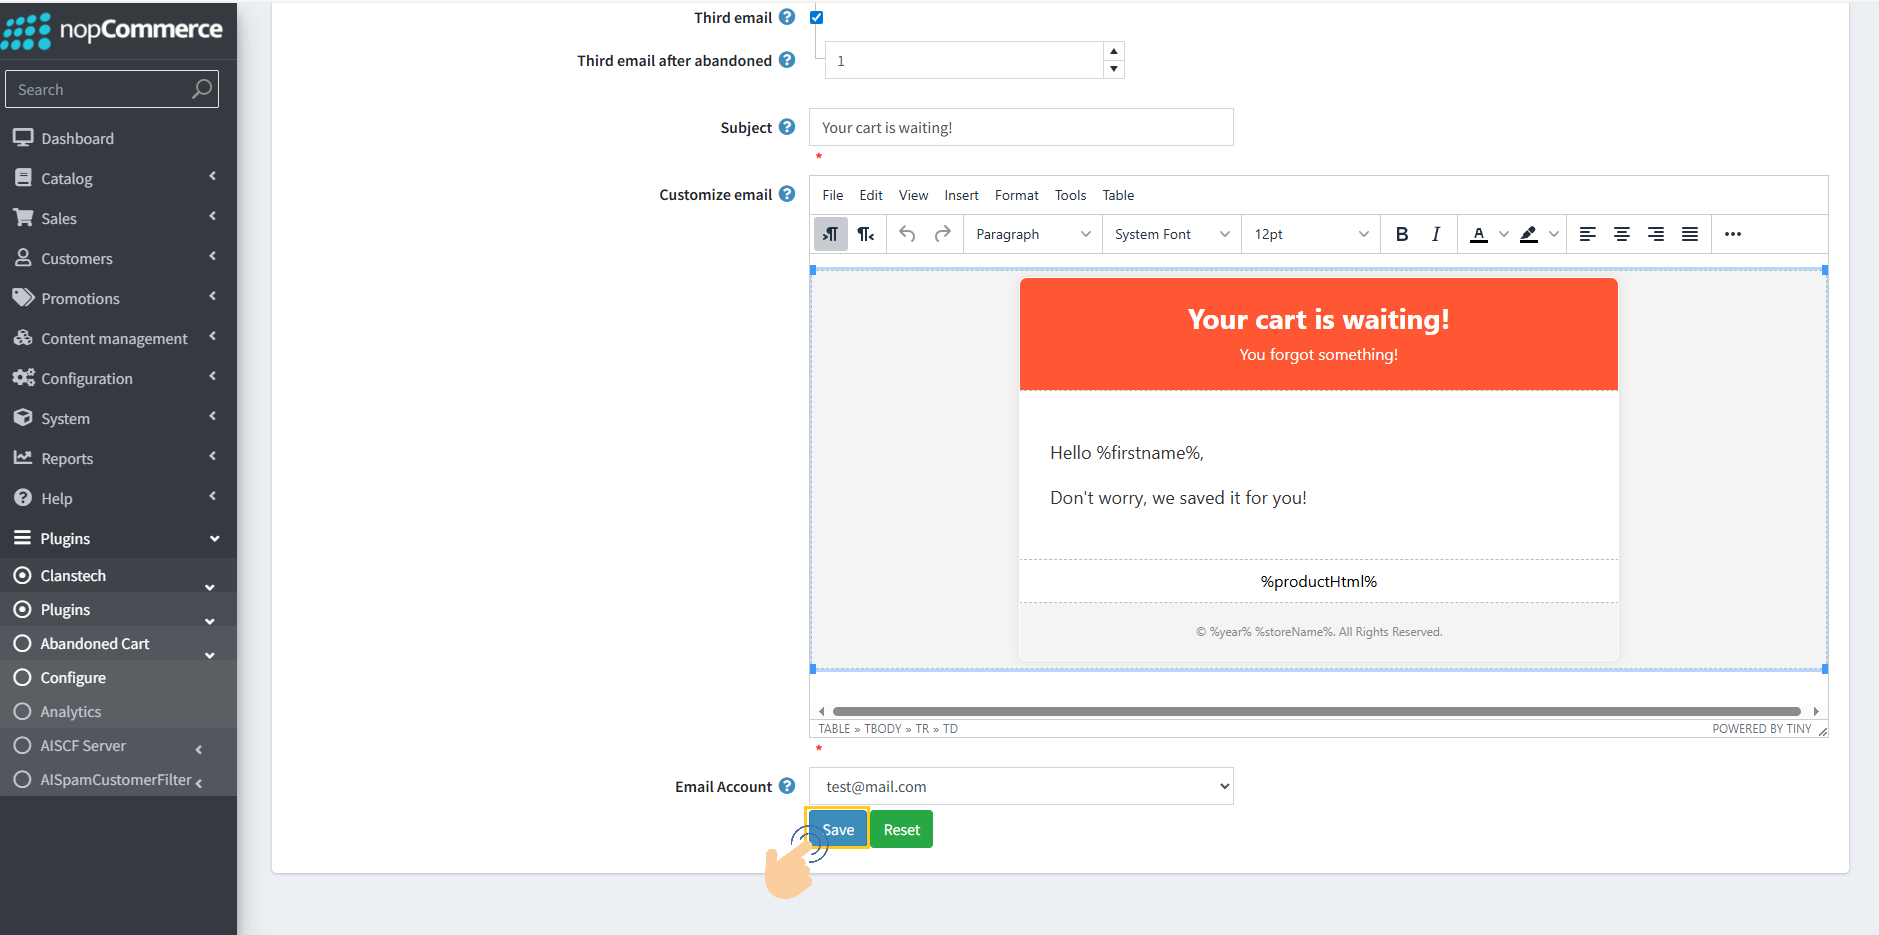
10. Click the Save button to save the configuration.
Resetting Customized Email Settings
The plugin allows you to reset any customized email settings to their default values using the Reset button. This is useful if you want to discard previous customizations and revert to the original template settings.
1. Click the Reset button to reset all settings to default.

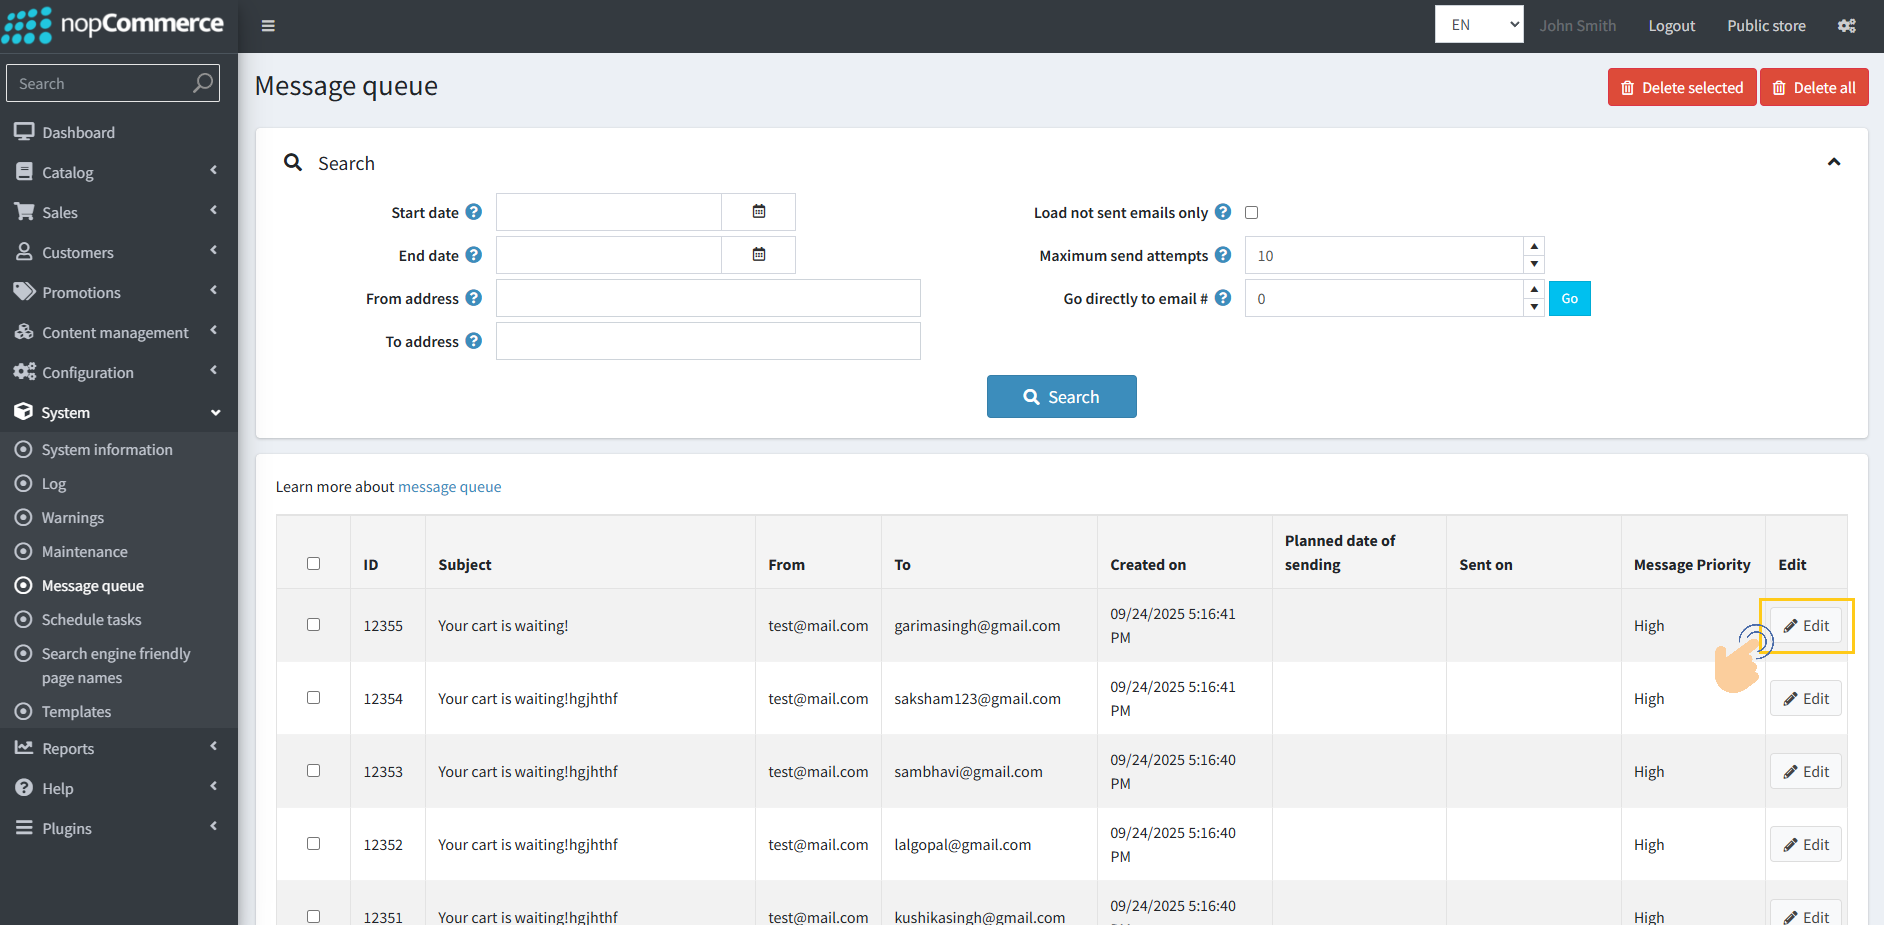
Message Queue (nopCommerce Inbuilt) Overview
All emails created for sending are stored in the Message Queue. From the Message Queue, we can view the following details:
ID
Email Subject
Recipient’s Email Address
Sender Account (the account selected during configuration)
Record Created Date (when the entry was added to the message queue)
Sent Date/Time (when the email was actually sent)
Additionally, there is an option available to edit a message queue item if required.
1. Open System → Message queue
Analytics Page Overview
On the Analytics page, you can view detailed customer records, including:
The last time the cart was updated.
The number of emails sent to the customer.
The last email sent time.
The customer’s name.
Whether the after sending email for recovery of abandon cart the conversion to sale happened.
This page helps track customer activity and purchase status effectively.
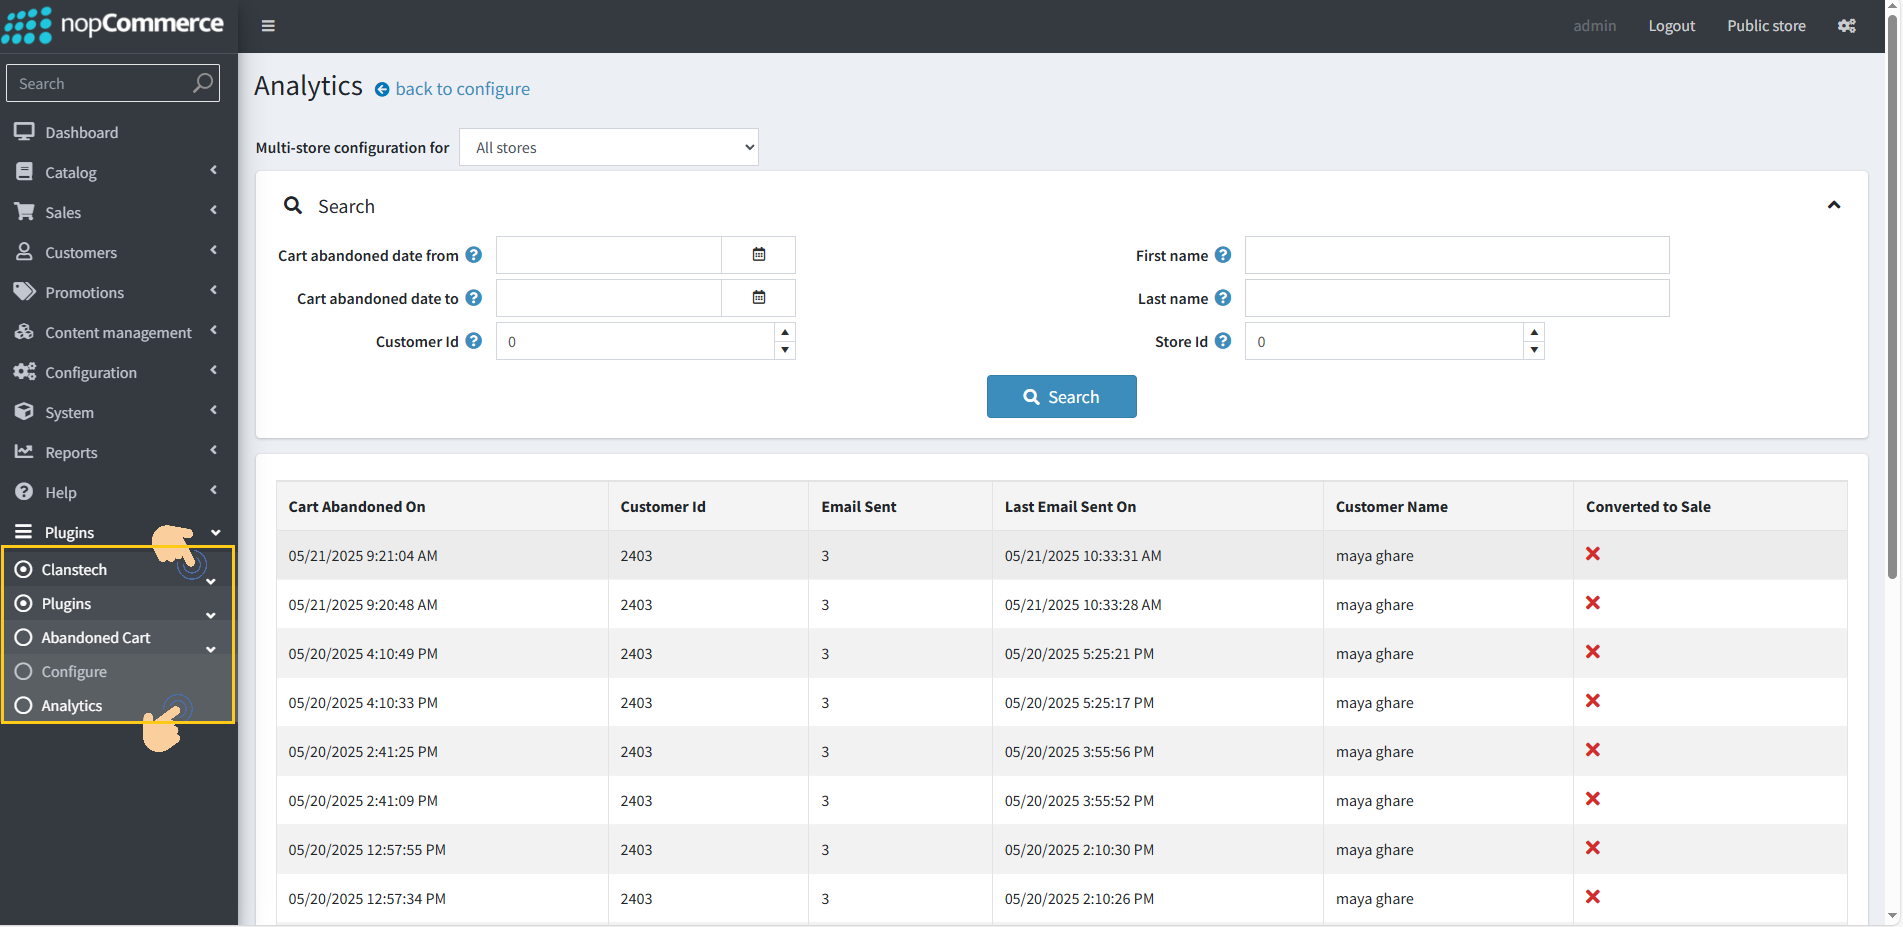
1. Go to the Clanstech → Plugin → Abandoned Cart Recovery → Analytics
Customizing Email Templates Using Rich Text Editor
The plugin allows users to edit and customize email templates using a Rich Text Editor (RTE). The editor provides extensive options to modify the content and appearance of your emails, including:
Adjusting text alignment
Applying border styles
Customizing background colors and other formatting options.
This functionality enables you to create professional, branded emails that align with your store’s design and messaging.
Customizing the Email Template Header Color
To change the header color in an email template, follow these steps:
1. Right-click on the header area of the email template.
2. Select Cell → Cell Properties.
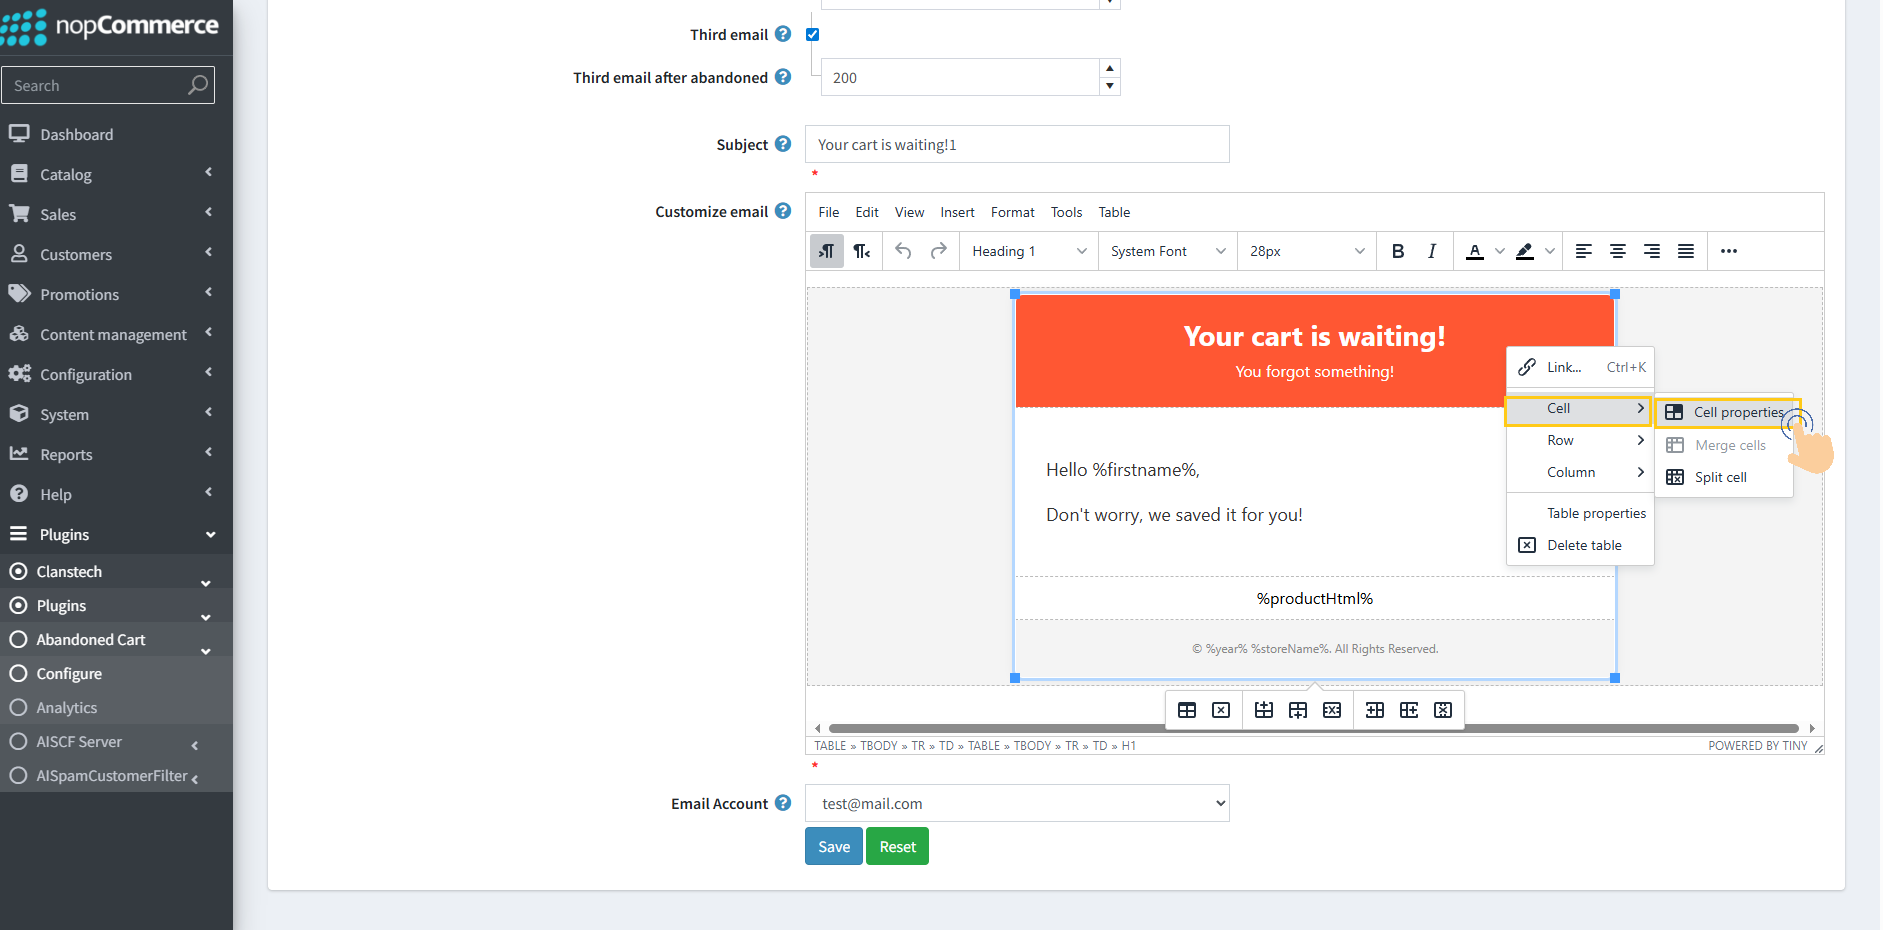
3. Navigate to Advanced Properties.
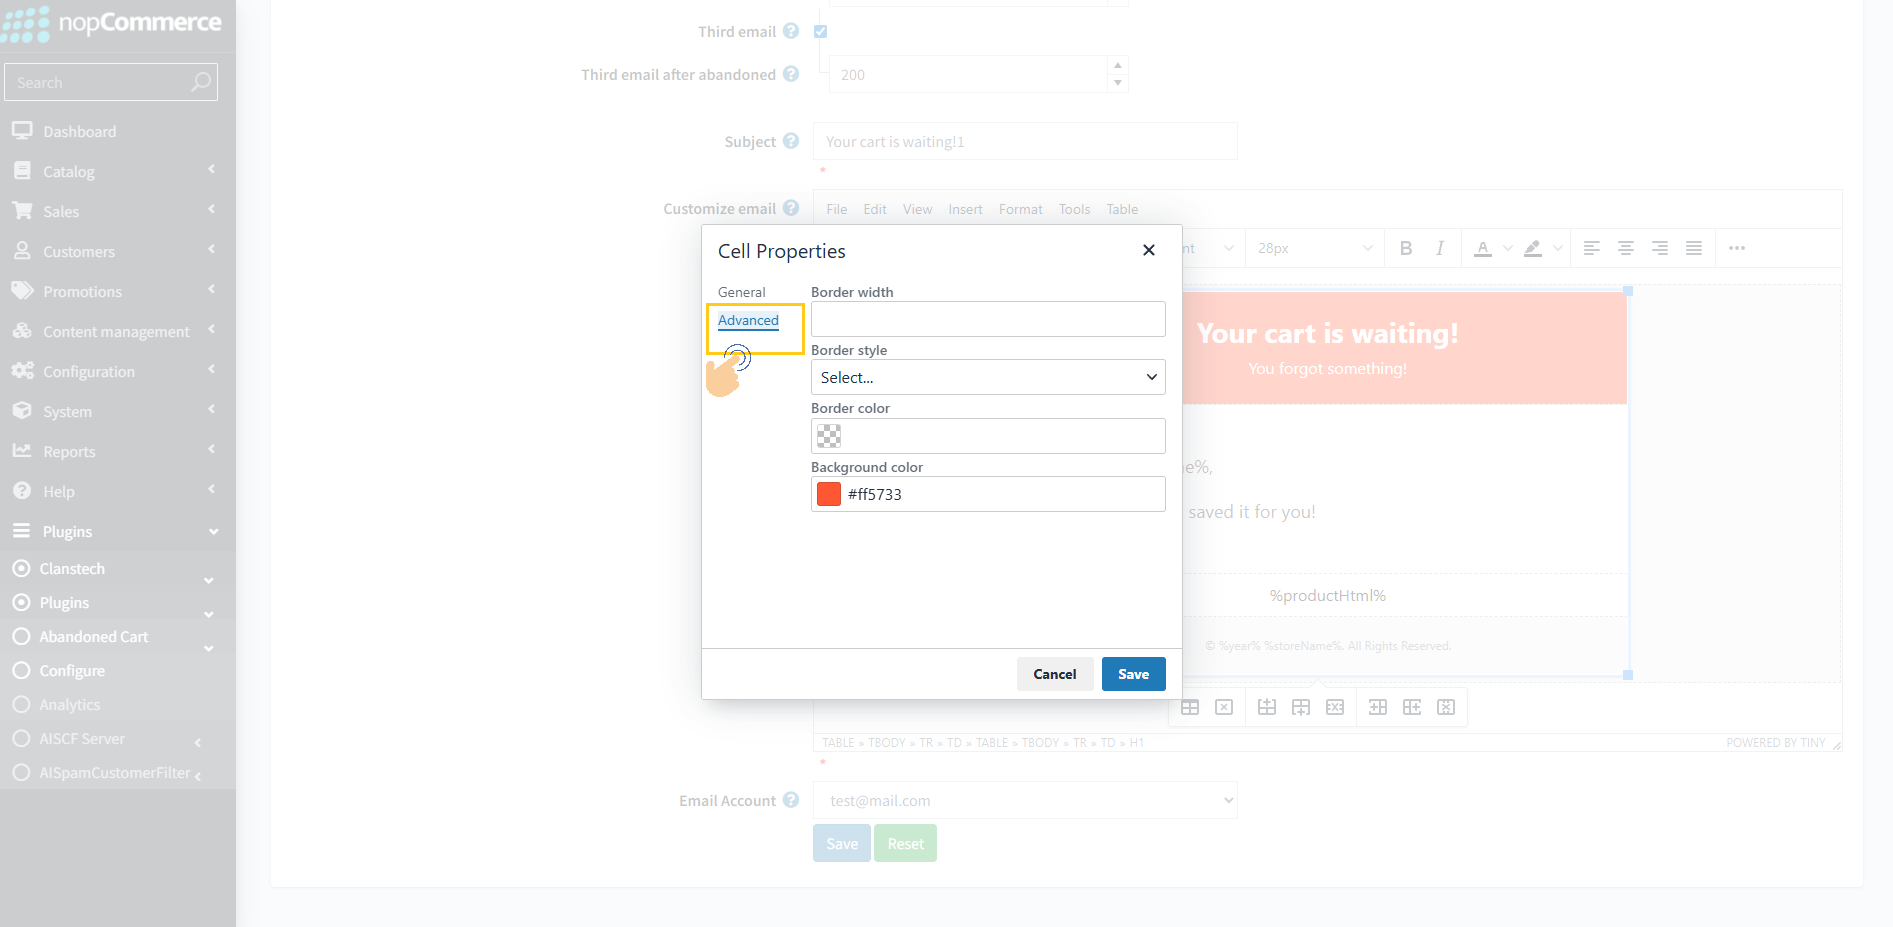
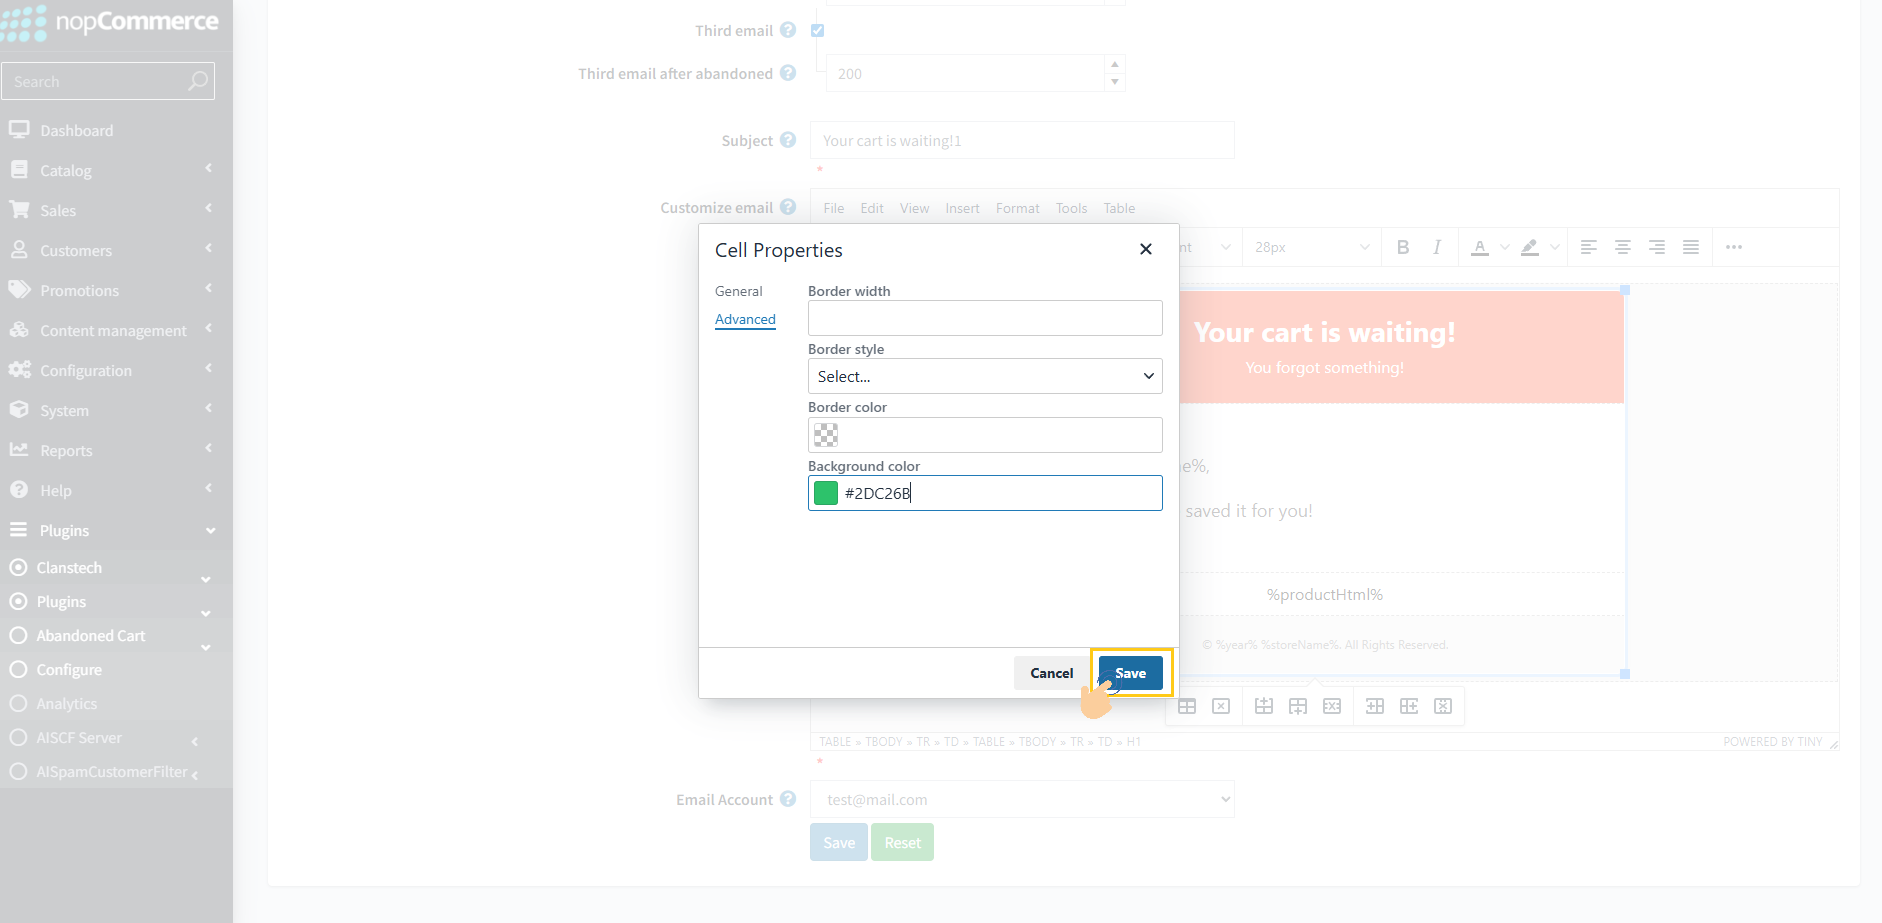
4. Choose the desired Background Color for the header.

5. Click Save to apply the changes.
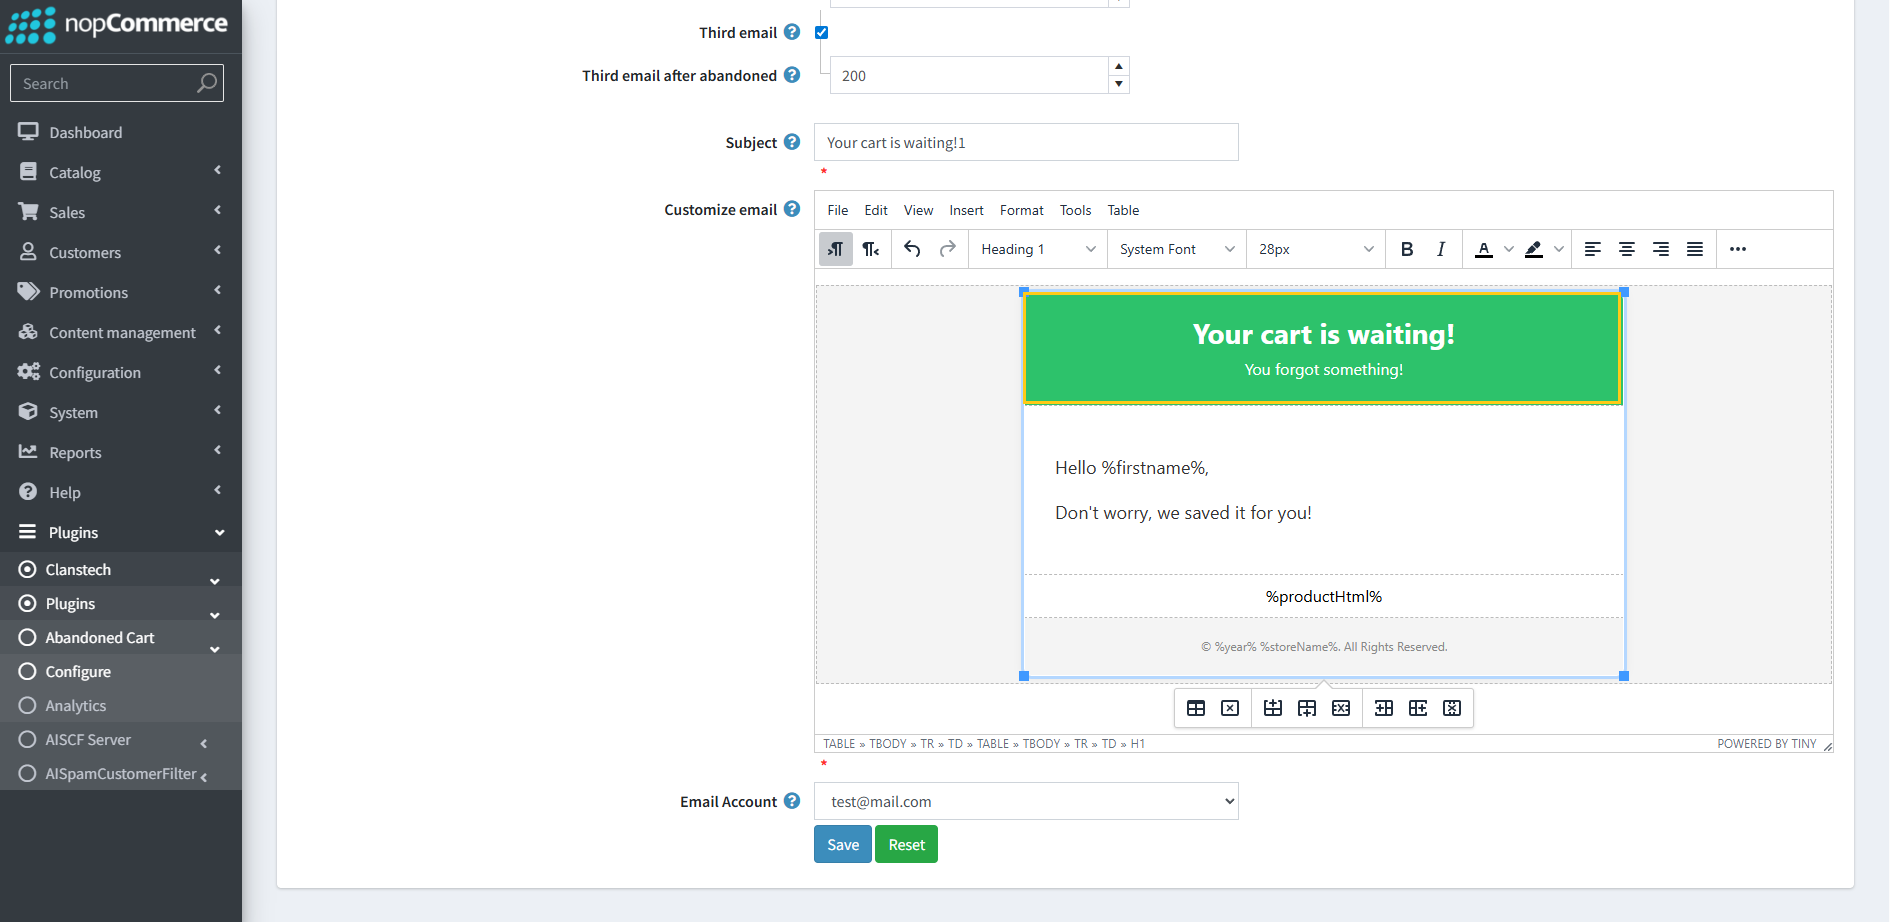
The header will now display the updated color in the email template.
Customizing Dynamic Content of Email Templates
The dynamic content in email templates includes key shopping details like product listing, price, discount, subtotal, total, and checkout button. These sections can be styled or customized to better match your store’s branding.
This guide explains how to customize and verify these dynamic sections.
Customizing the Cart Subtotal Section
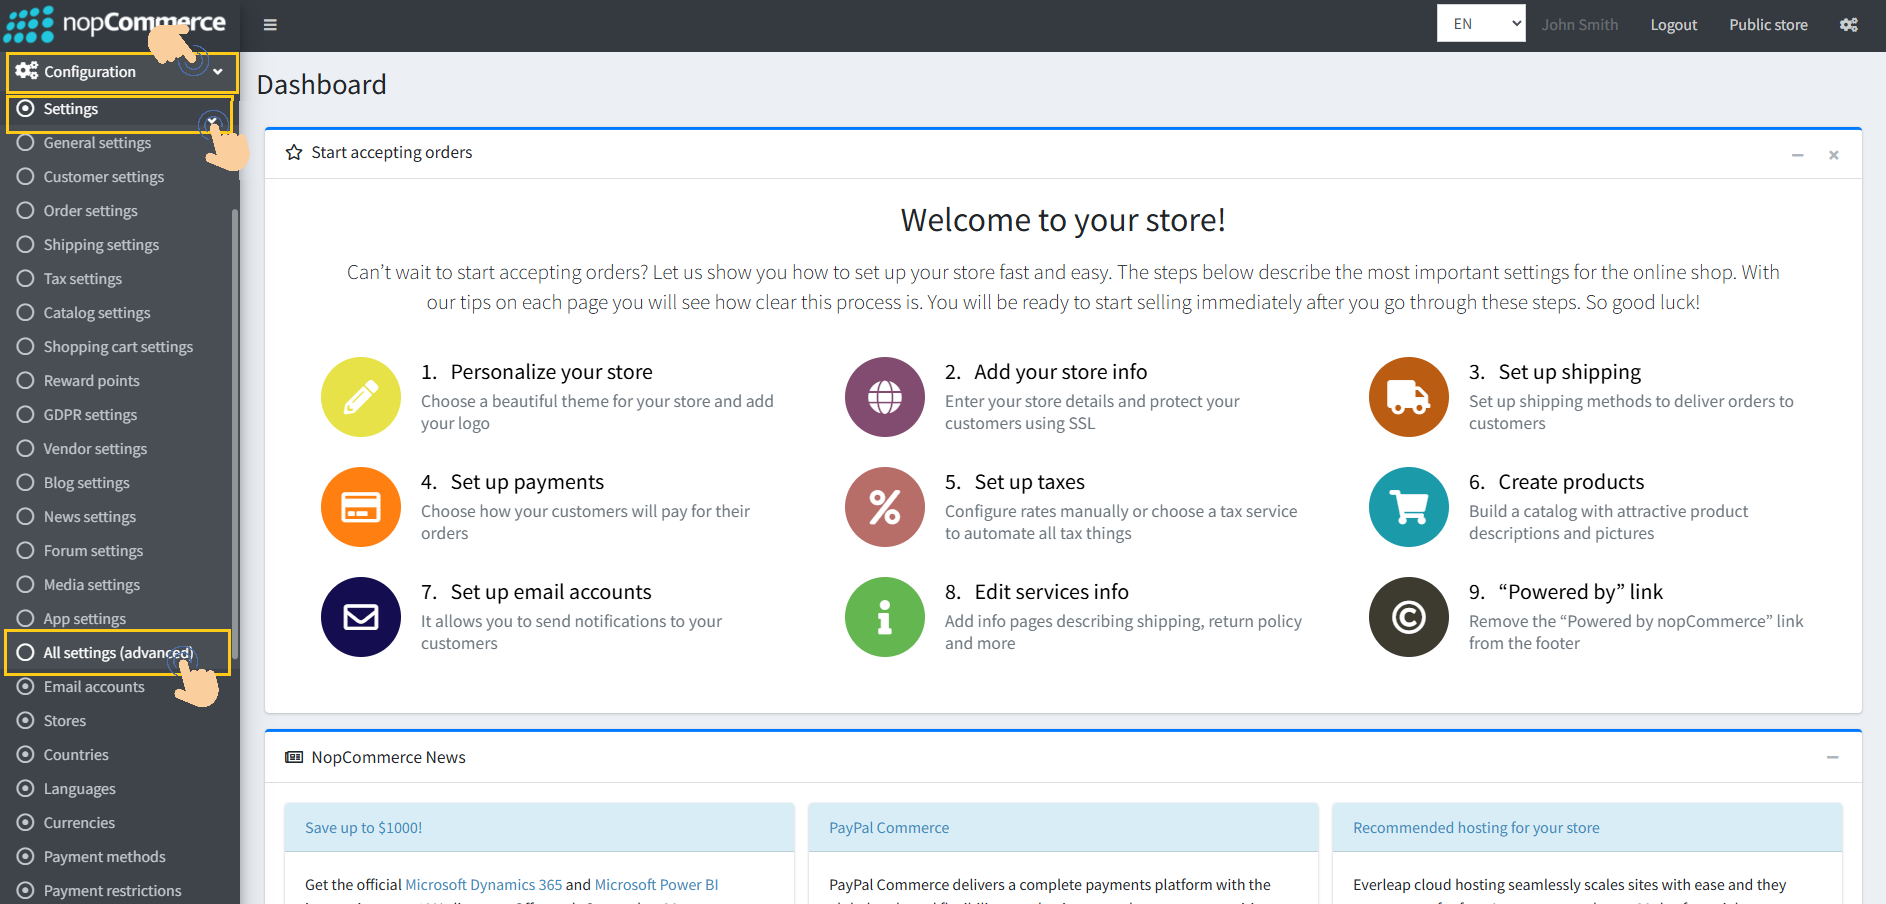
1. Go to Configuration → Settings → All Settings.
2. In the search box, type setting name → abandonedcartsettings.cartsubtotalhtml

3. Click on the Search button.
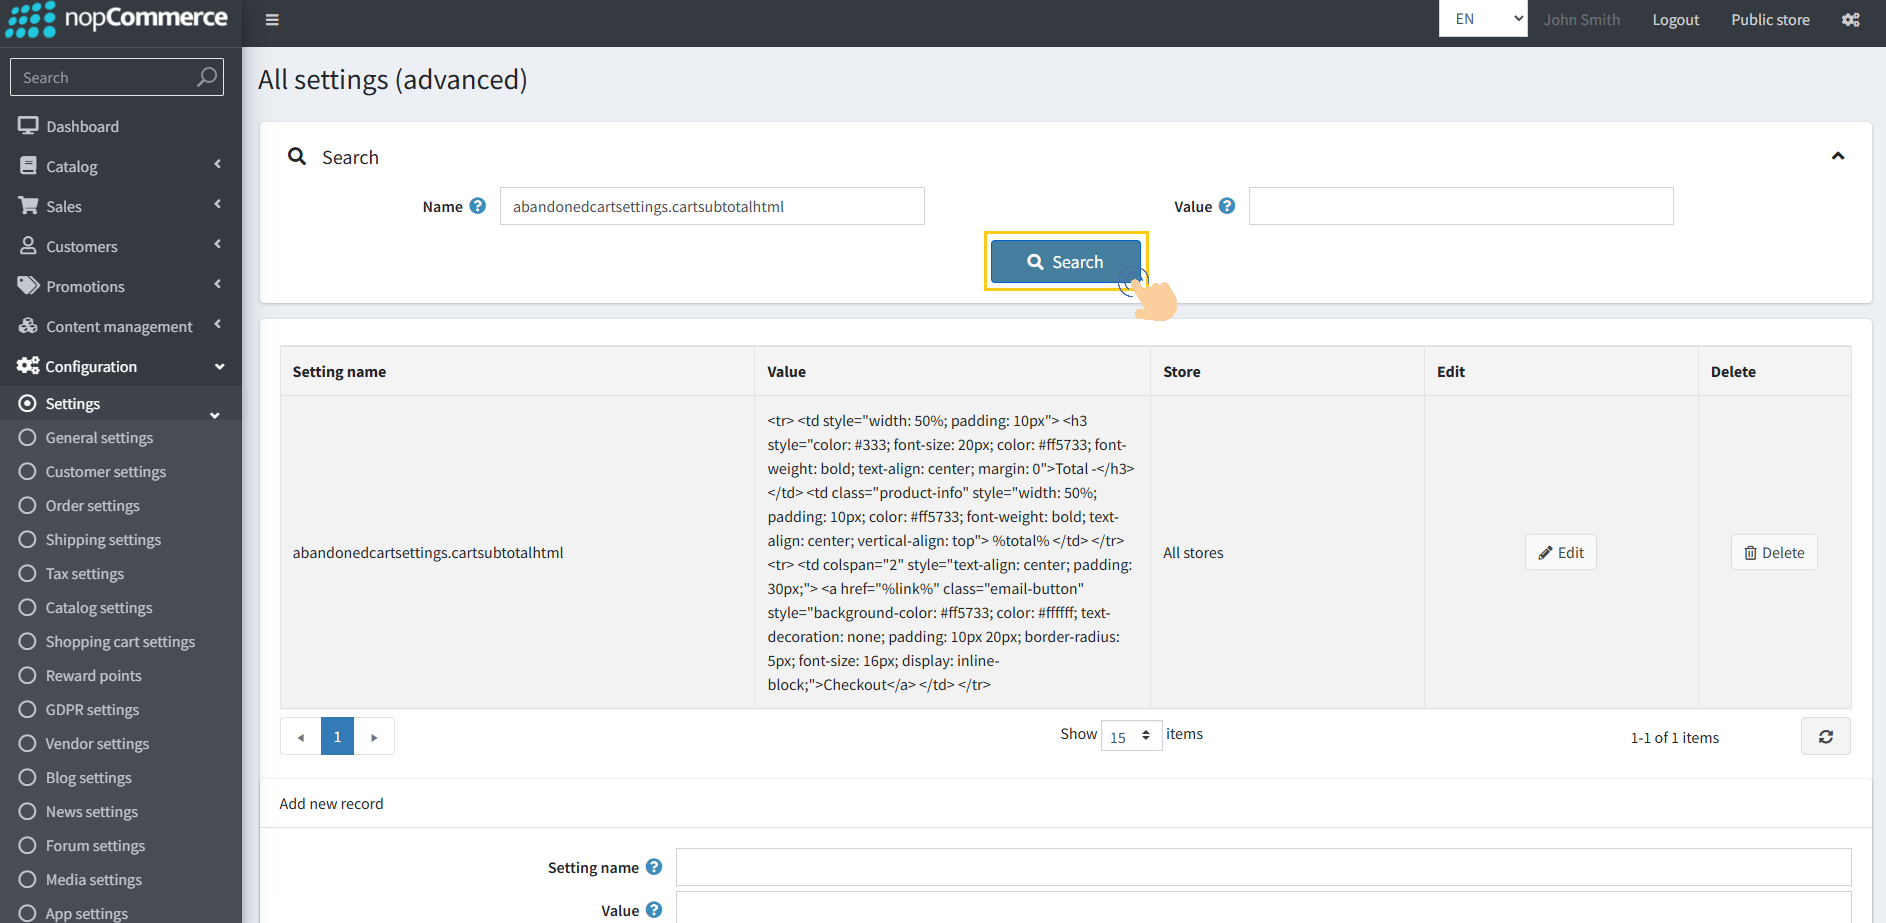
4. Click the Edit button next to the abandonedcartsettings.cartsubtotalhtml setting
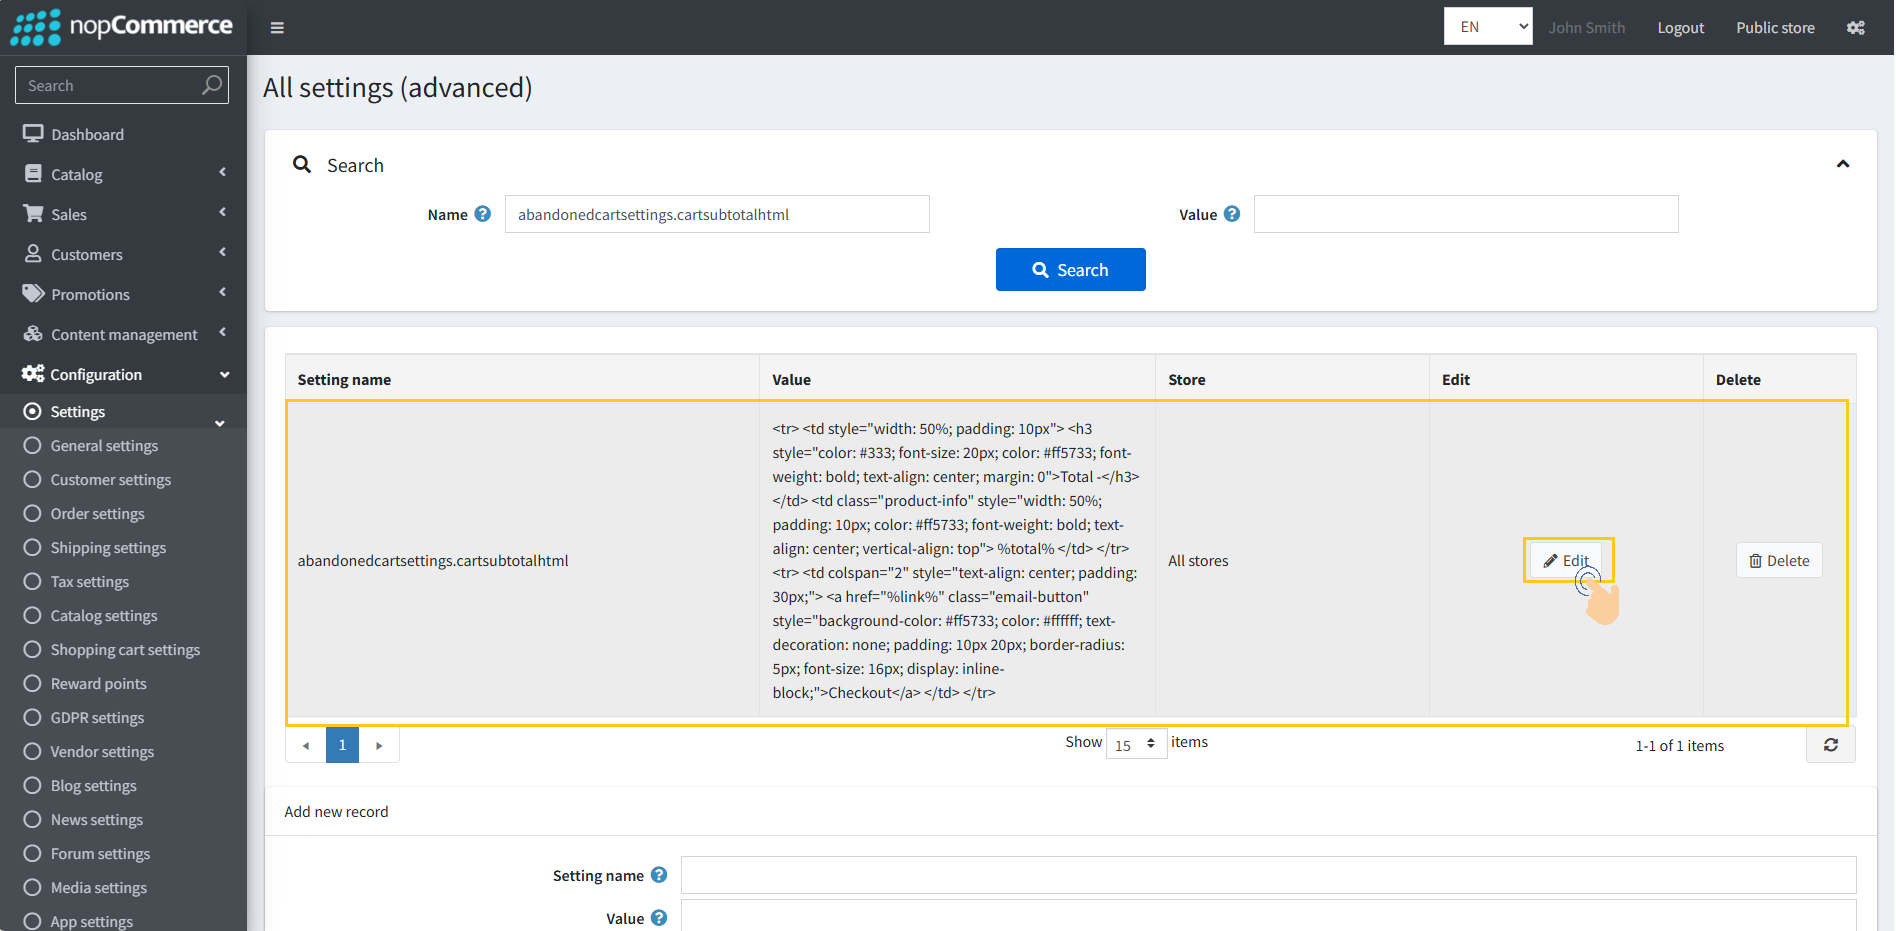
5. Update the Hex color code as needed.

6. Click Update to save the changes.
The updated color will now reflect in email templates.

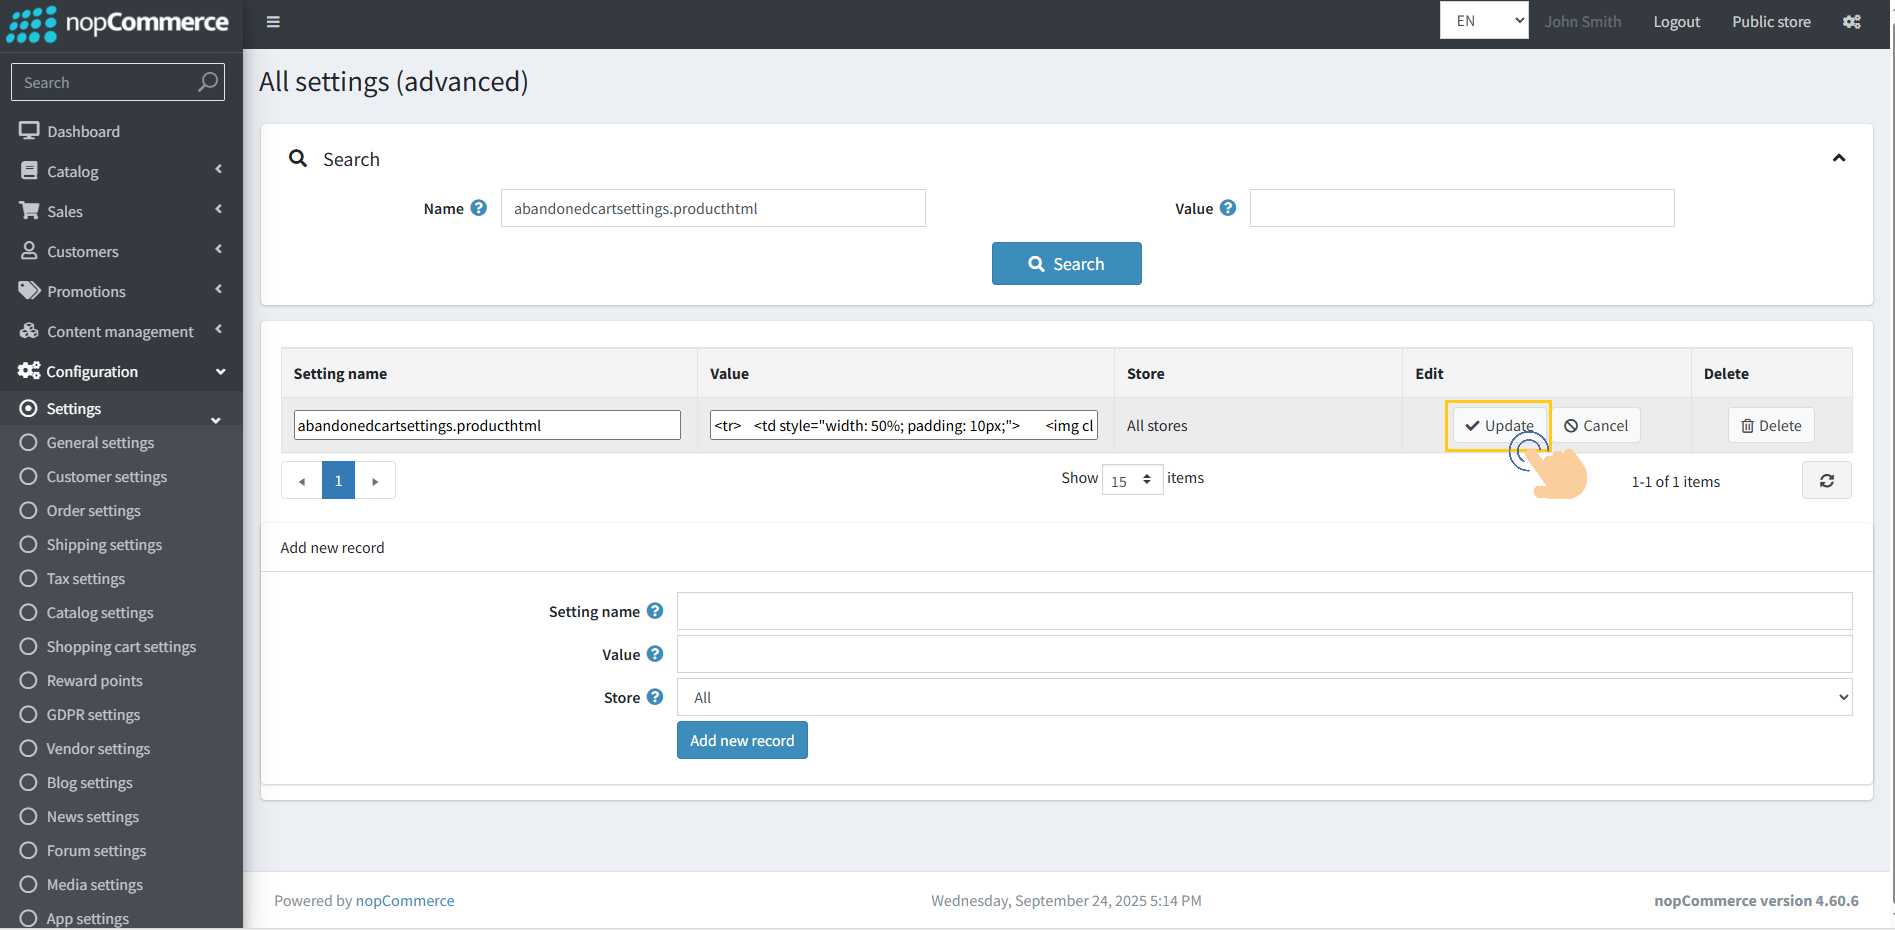
Customizing the Product HTML Section
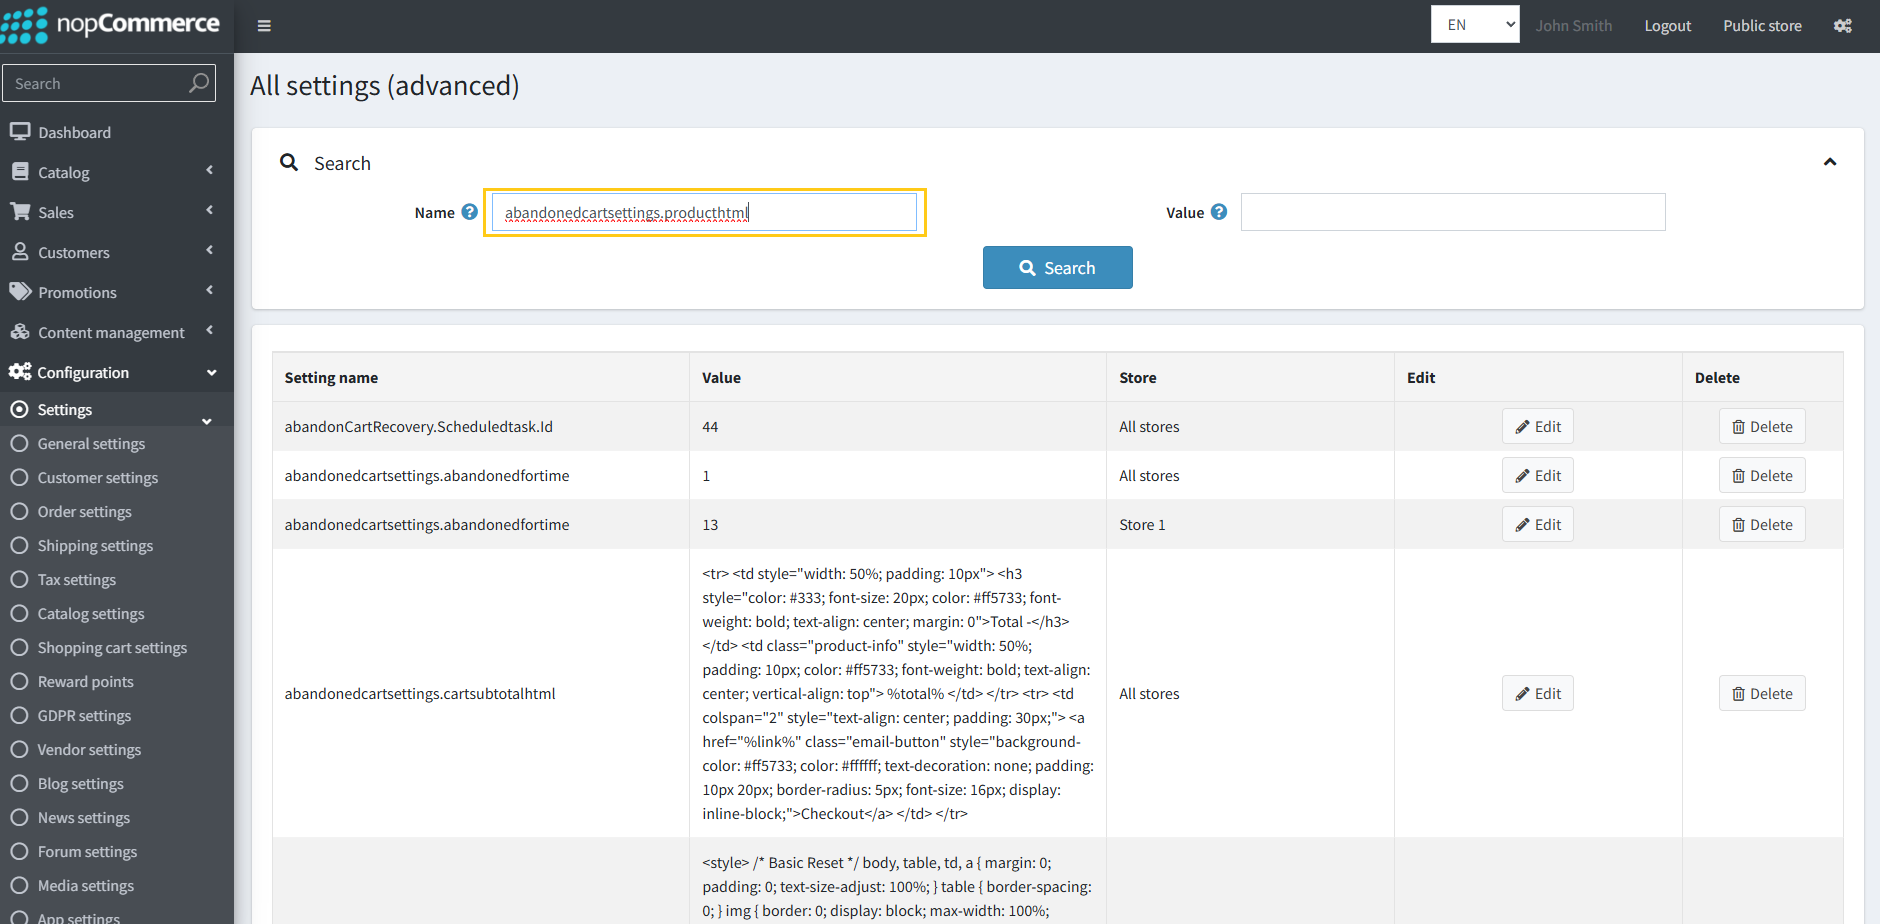
1. Go to Configuration → Settings → All Settings.
2. In the search box, type setting name → abandonedcartsettings.producthtml
3. Click on the Search button.
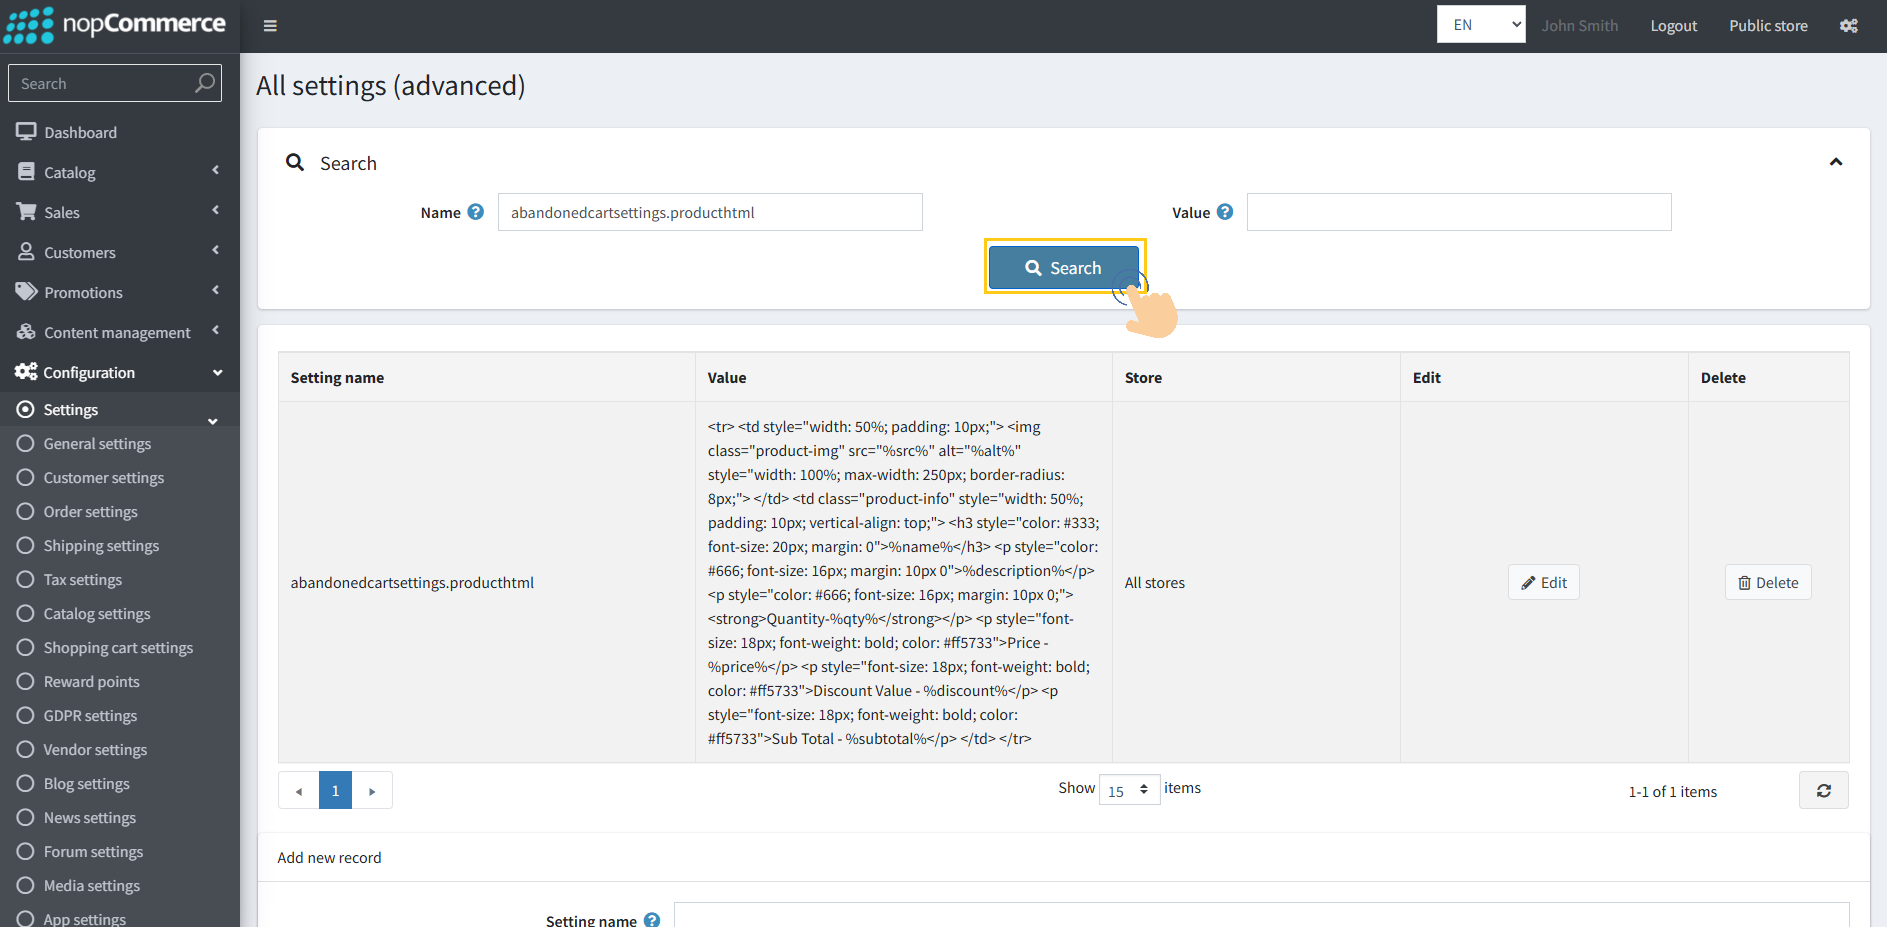
4. Click Edit next to the abandonedcartsettings.producthtml setting.
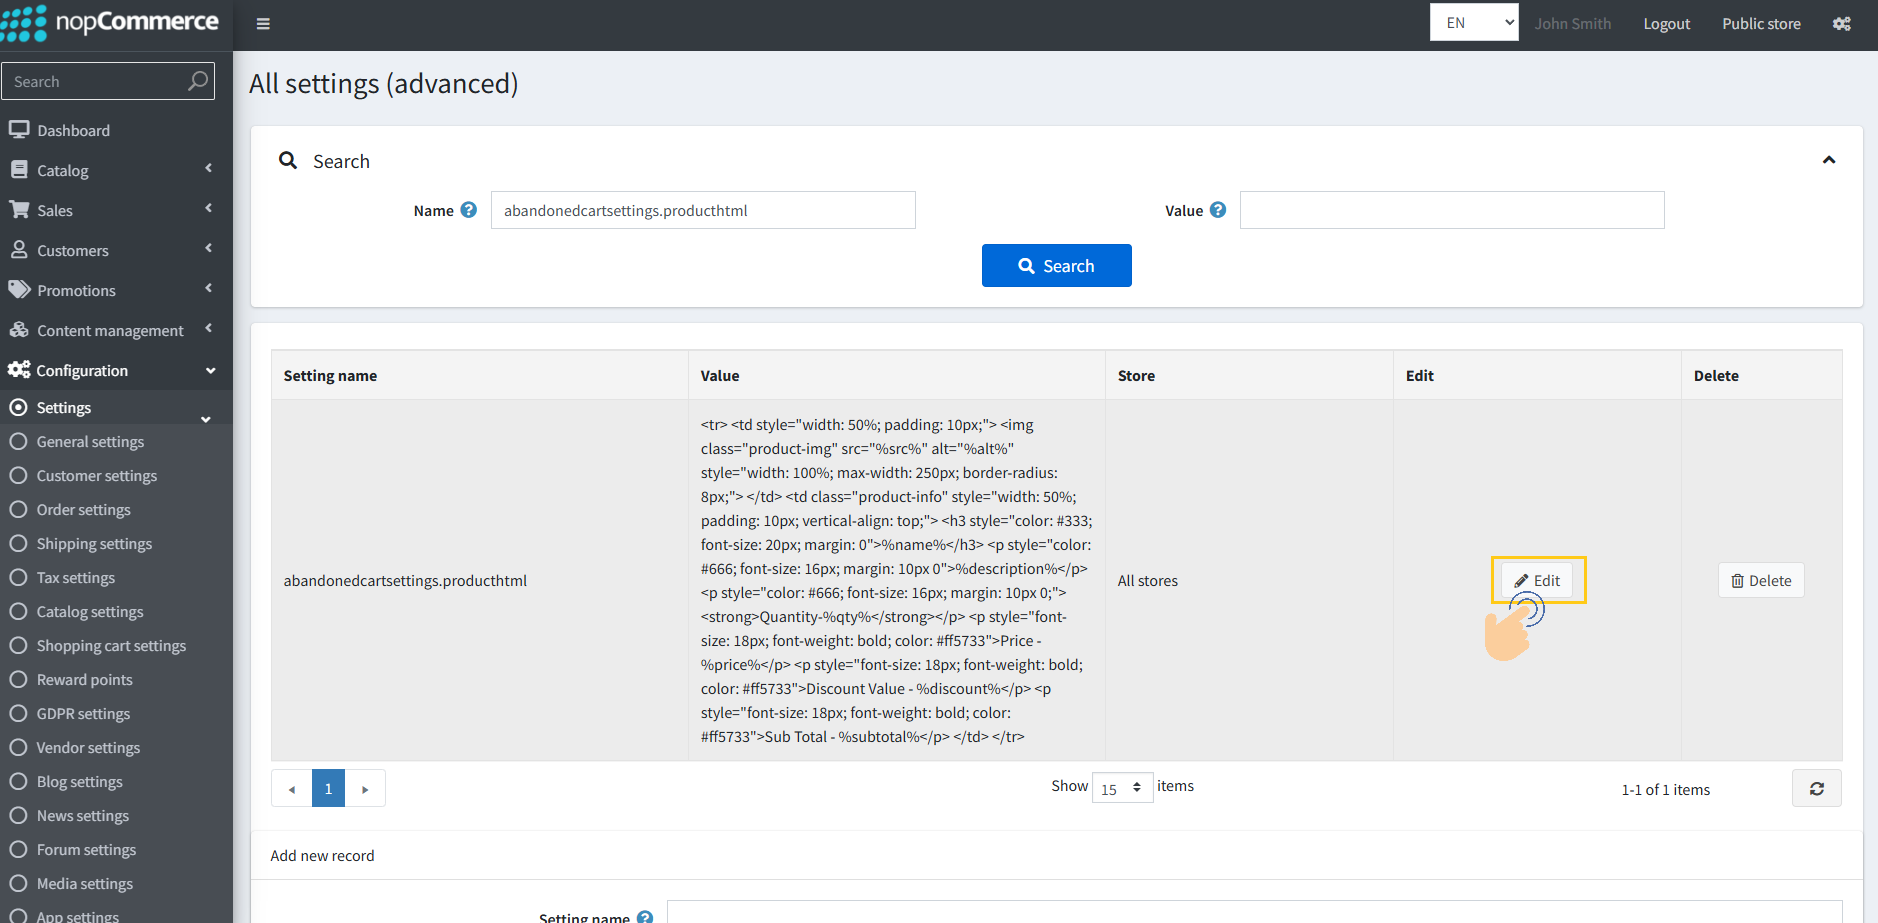
5. Update the Hex color code as needed.

6. Click Update to save the changes.
The new styling will now reflect in the email templates.
Verifying Changes in the Message Queue Template
1. Go to System → Message Queue.
2. Click the Edit button for any email template.
Check that the Subtotal and Product HTML sections reflect your updates.
Viewing and Managing Plugin Logs
The system provides an option to view different types of logs such as Error, Information, Warning, Debug, and Fatal. These logs help in monitoring issues and tracking system activity.
Our plugin generates logs in two modes, controlled by the configuration setting (<abandonedcartsettings.debug >) :
Normal Mode (Value = False) – Only Error logs will be generated.
Debug Mode (Value = True) – All logs will be generated, including Information, Warning, Error, Debug, and Fatal.
Steps to View Logs:
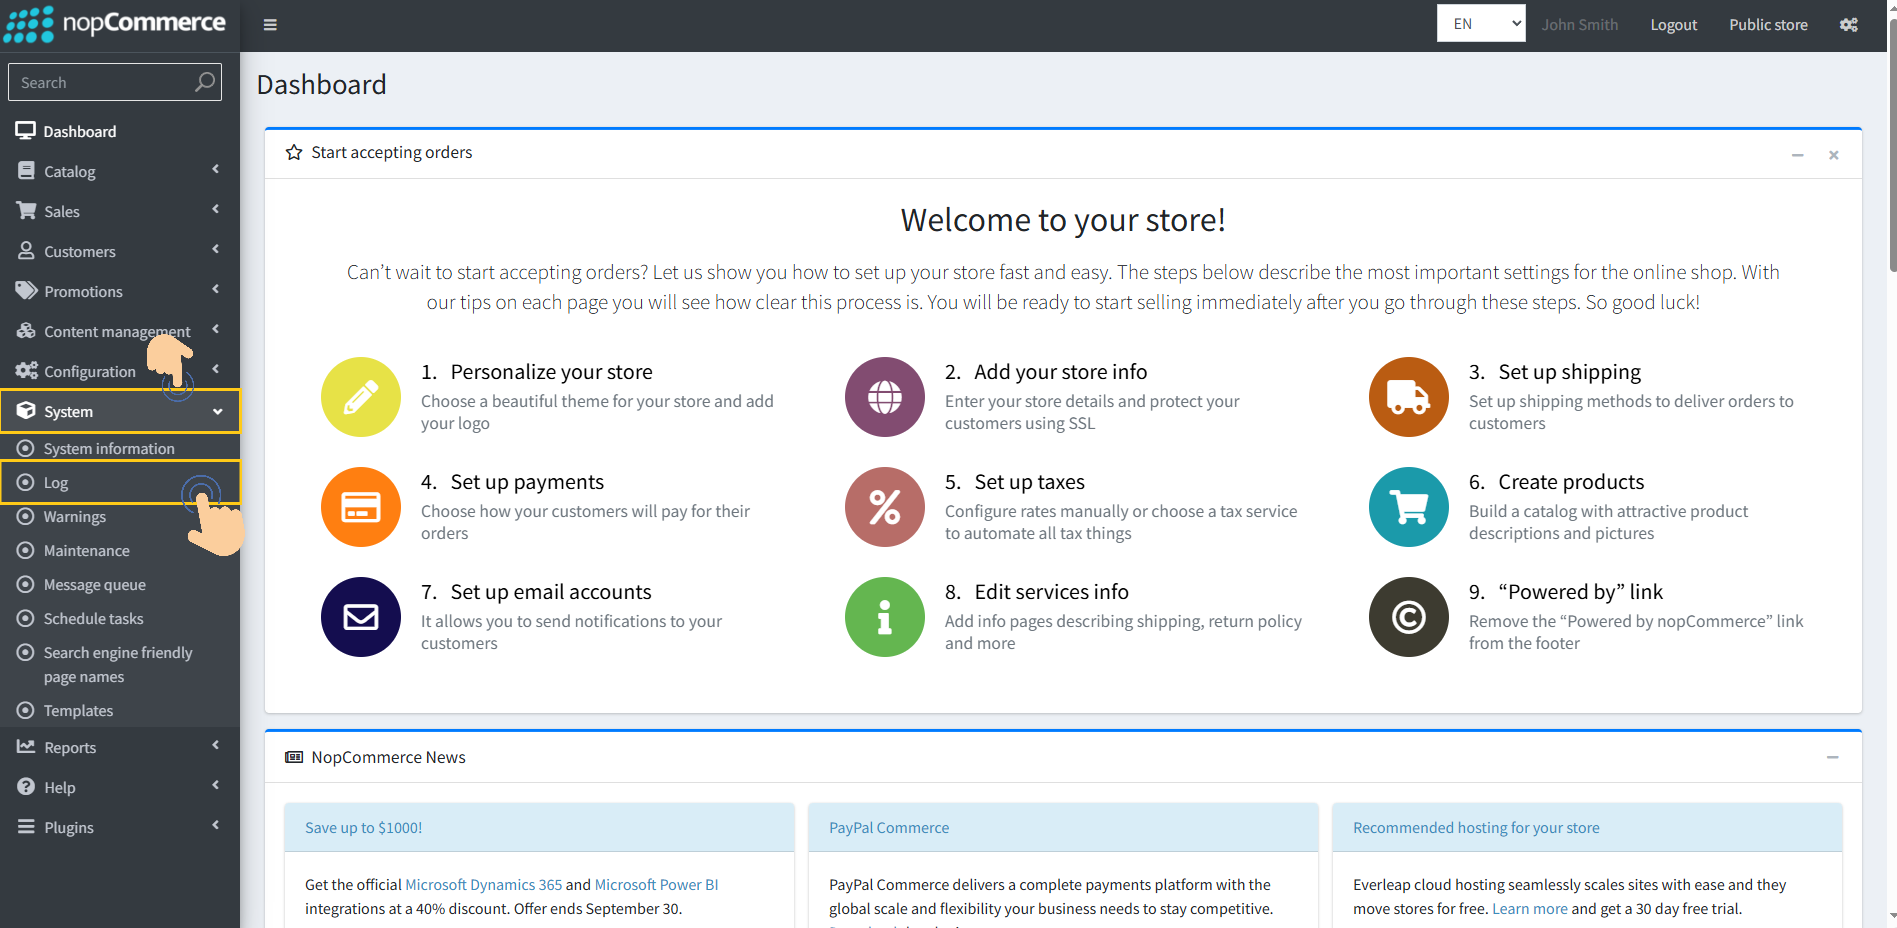
1. Go to the System → Log
Here you can view log entries depending on the mode:
Normal Mode: Only errors.
Debug Mode: Full logs (information, warning, error, debug, fatal).
Steps to Switch Logging Mode or Disable Logs:
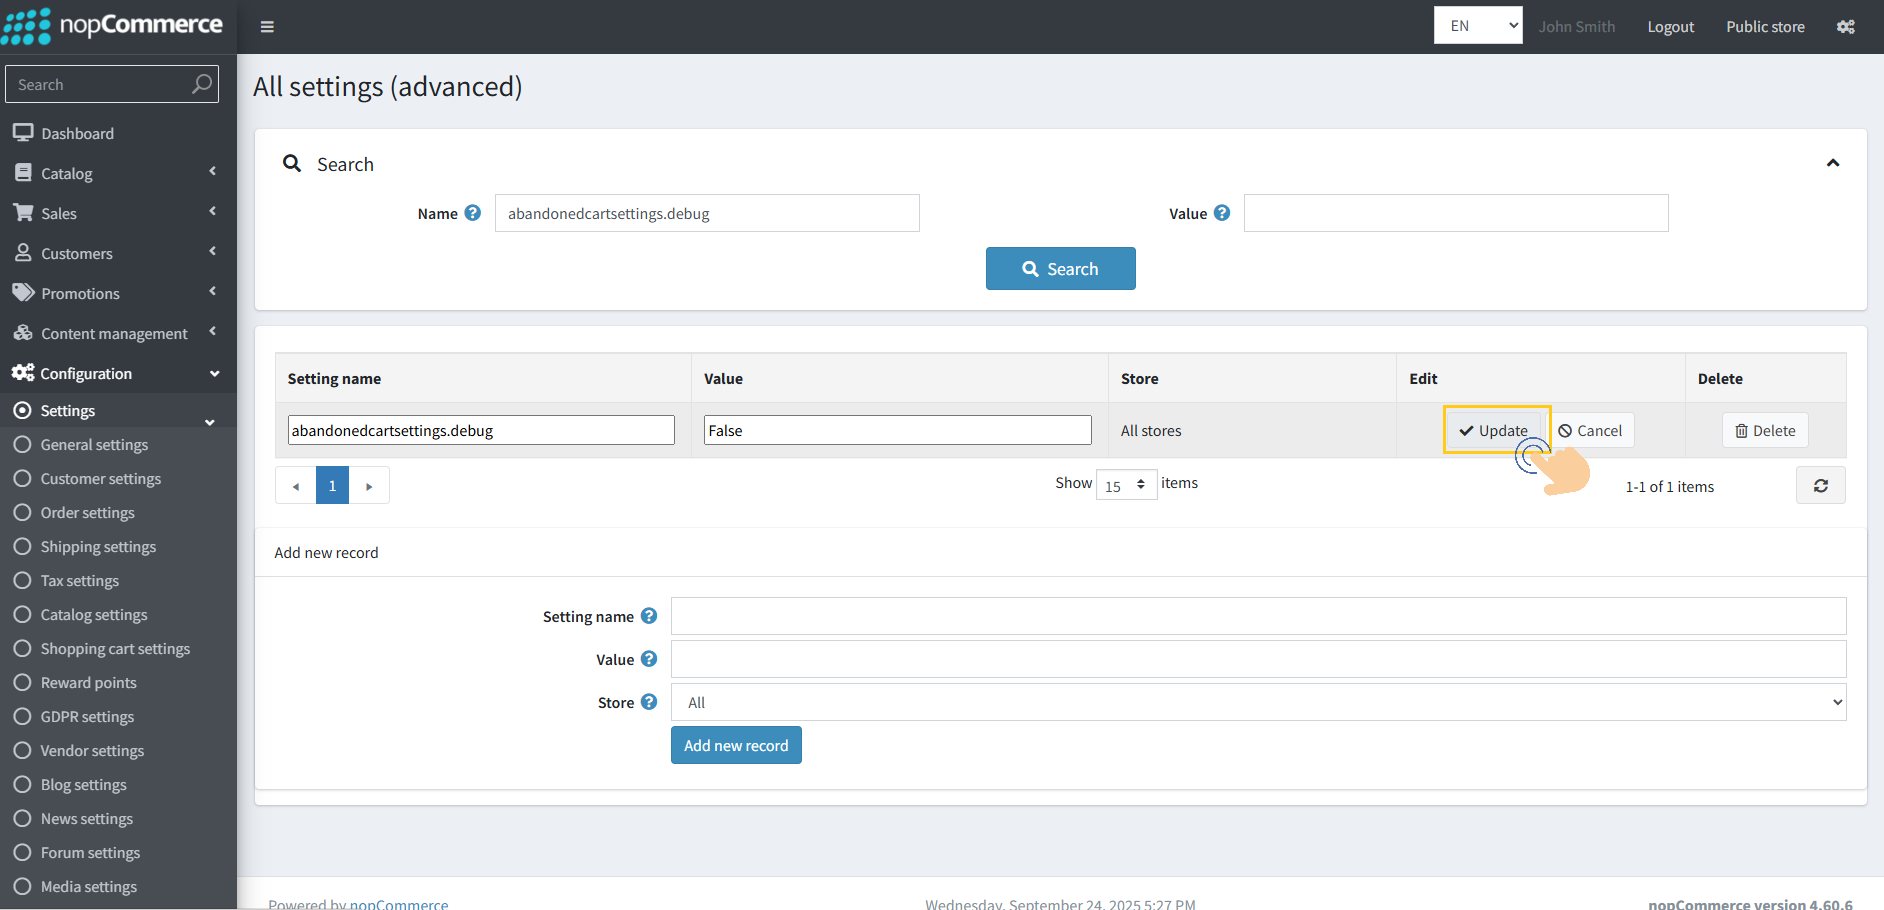
1. Go to Configuration → Settings → All Settings.
2. In the search box, type setting name → abandonedcartsettings.debug.

3. Click on the Search button.
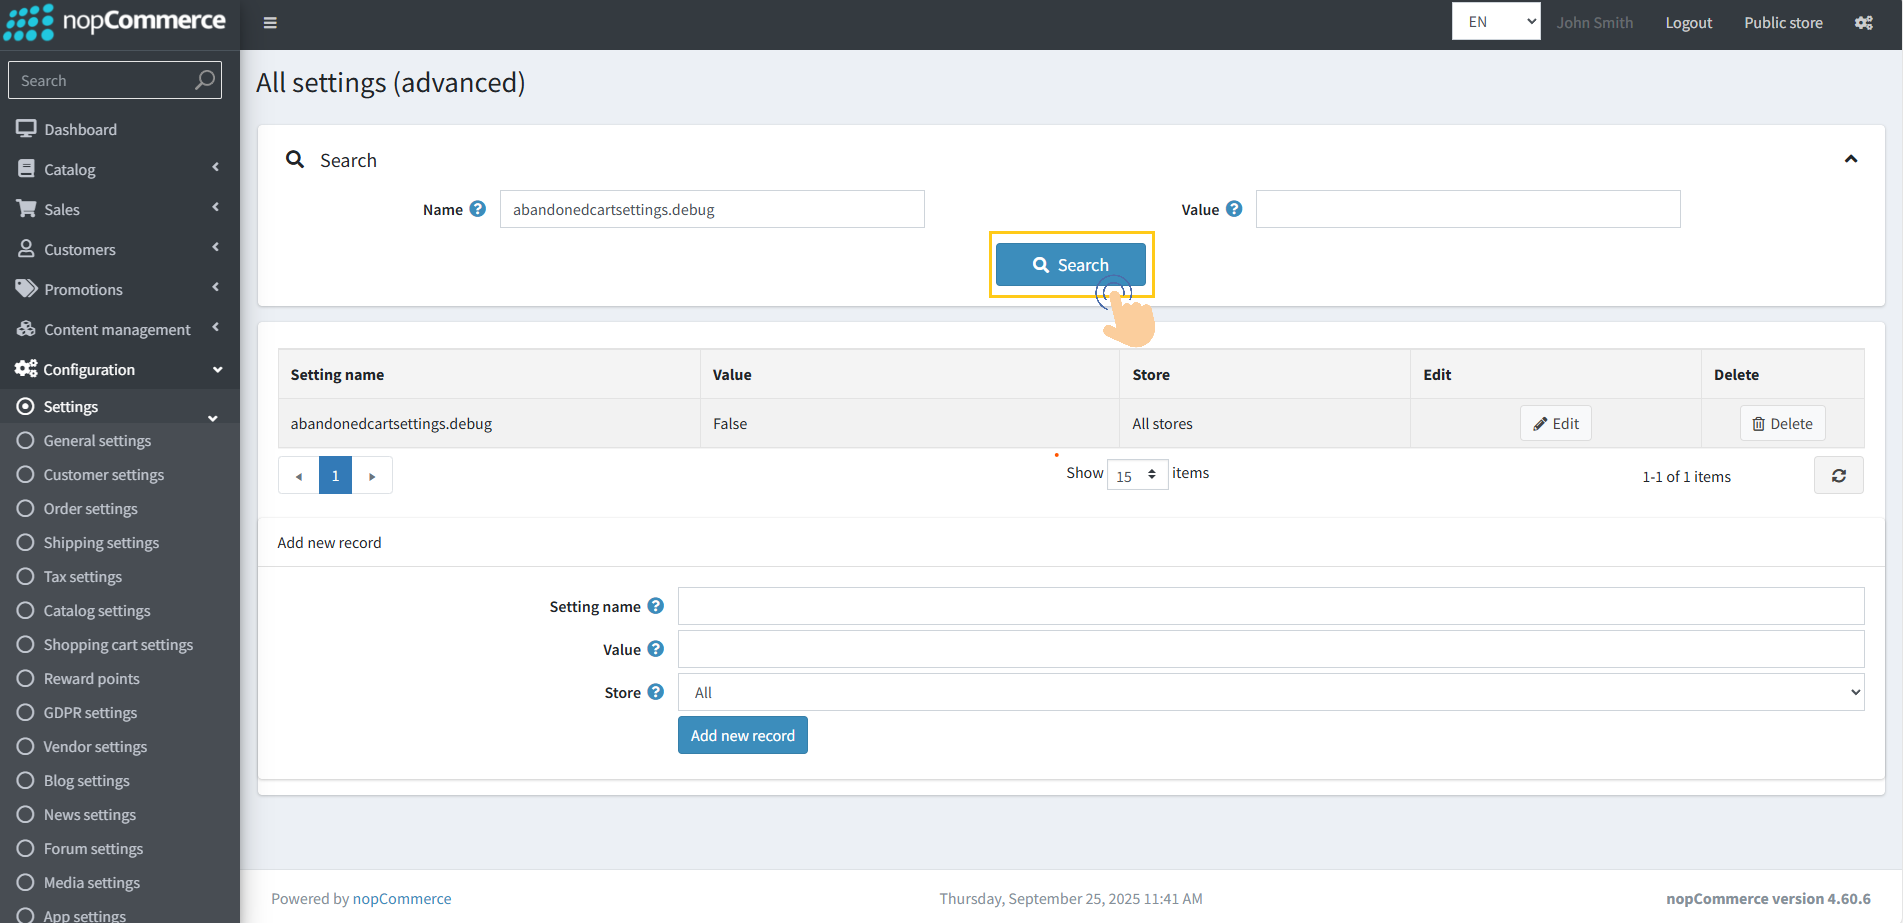
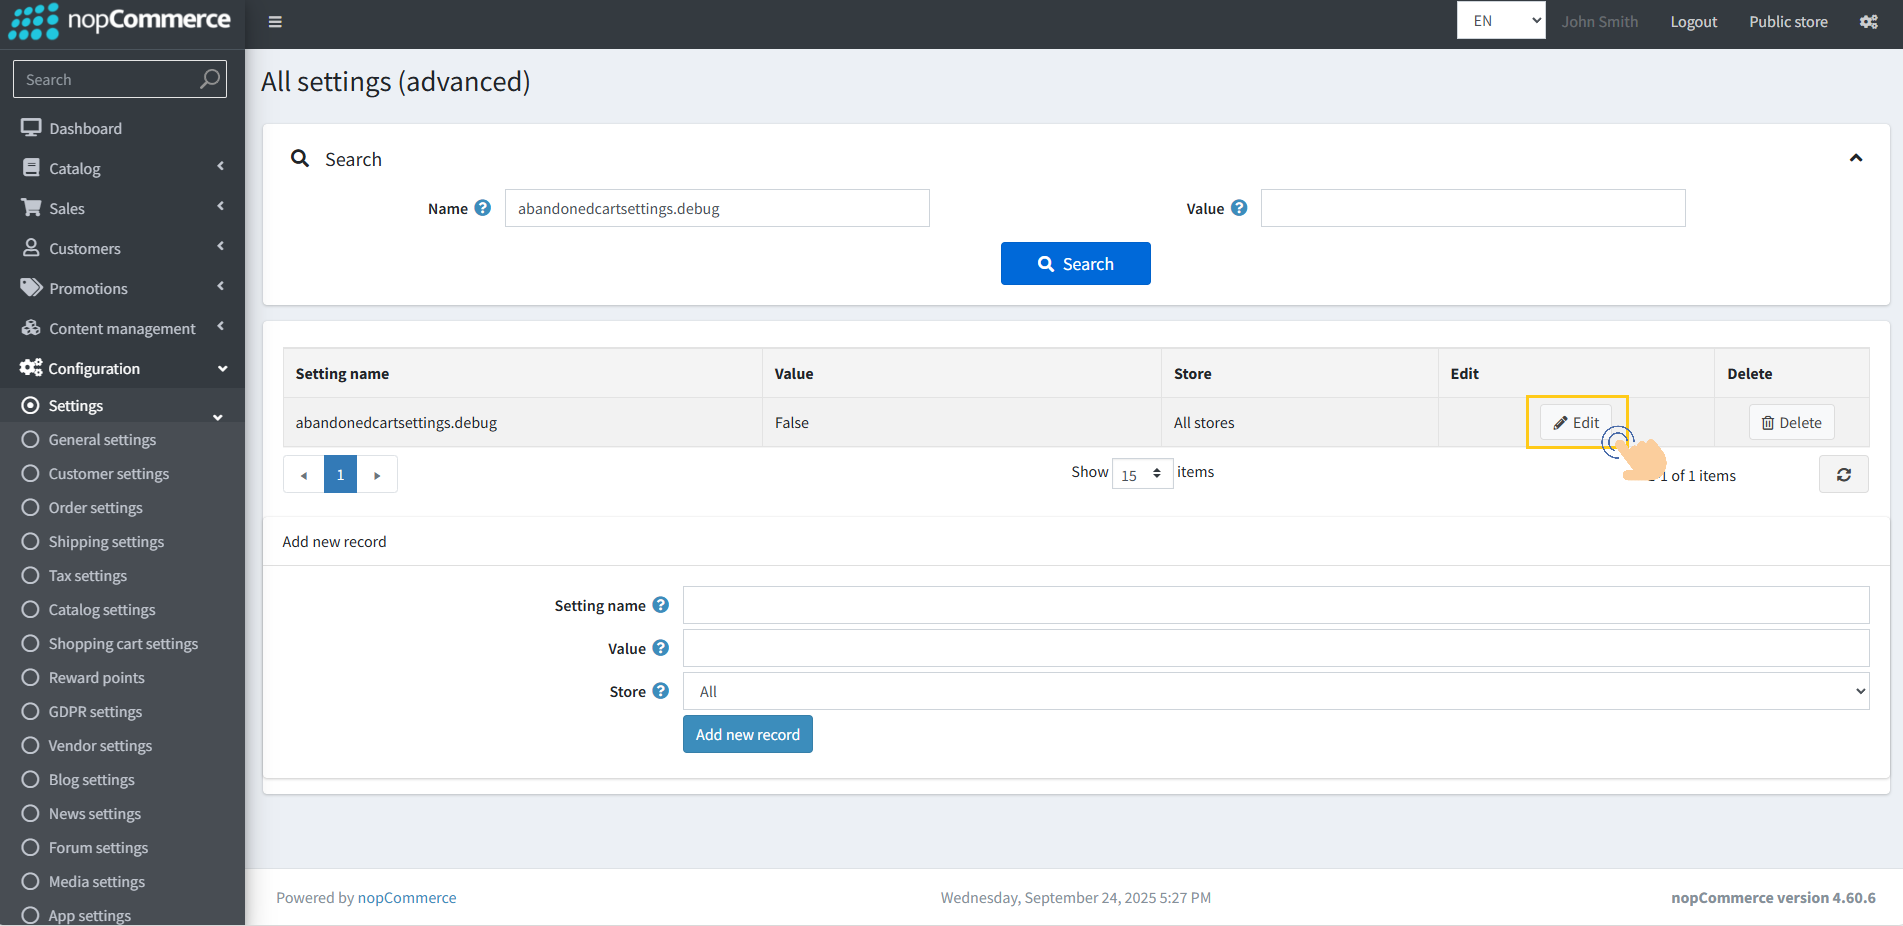
4. Click on the Edit button next to the abandonedcartsettings.debug setting.
5. To enable Debug Mode, set the value to True.
To switch back to Normal Mode, set the value to False.
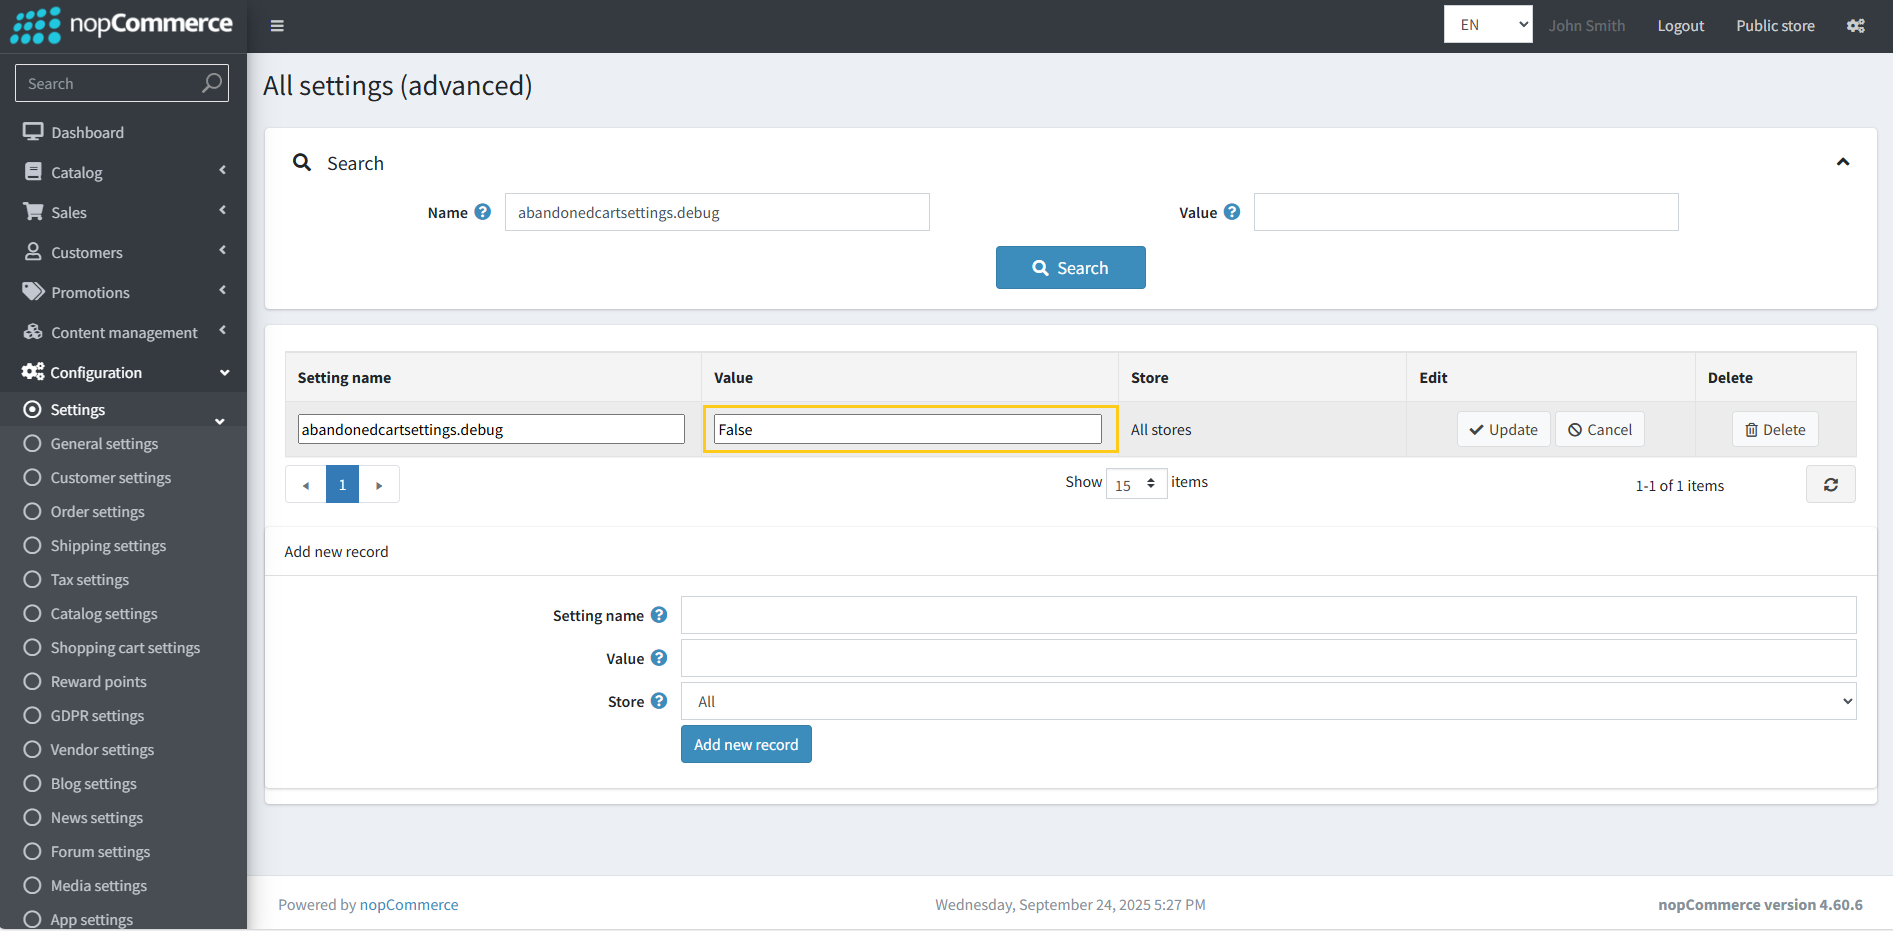
6. Click on Update.